New Guy 66 Project

A place just for our project & build threads.

Moderators: Kid, Casey 65

Post Reply
JRANGER
Posts: 29
Joined: August 26, 2014, 2:31 pm

New Guy 66 Project

Post by JRANGER »

Bought her sat and drove home 8 hours to Nashville from Springfield MO.

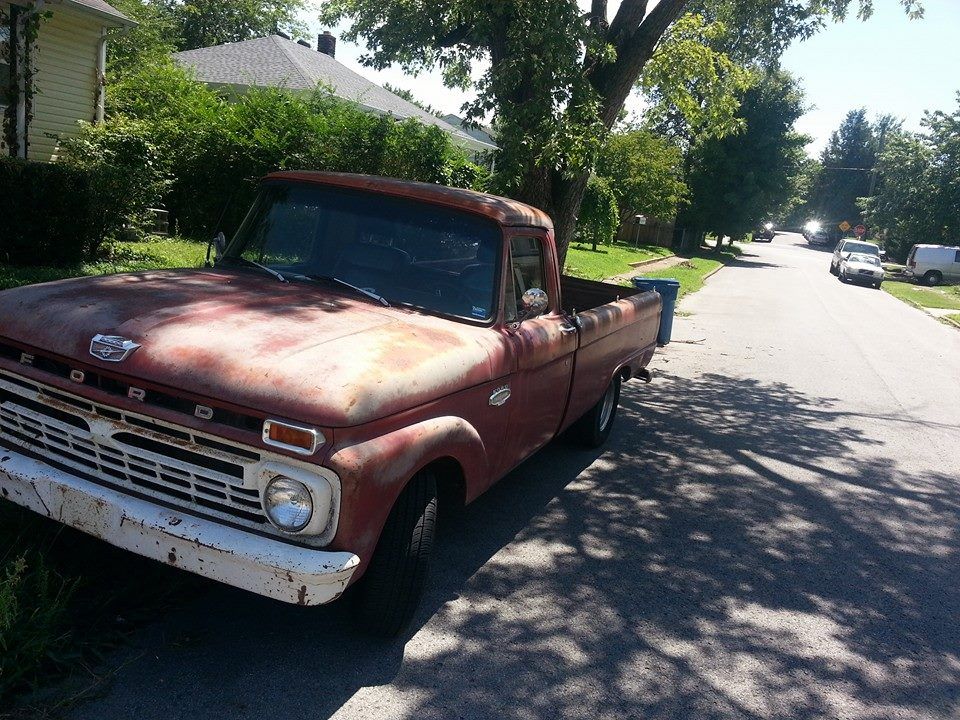
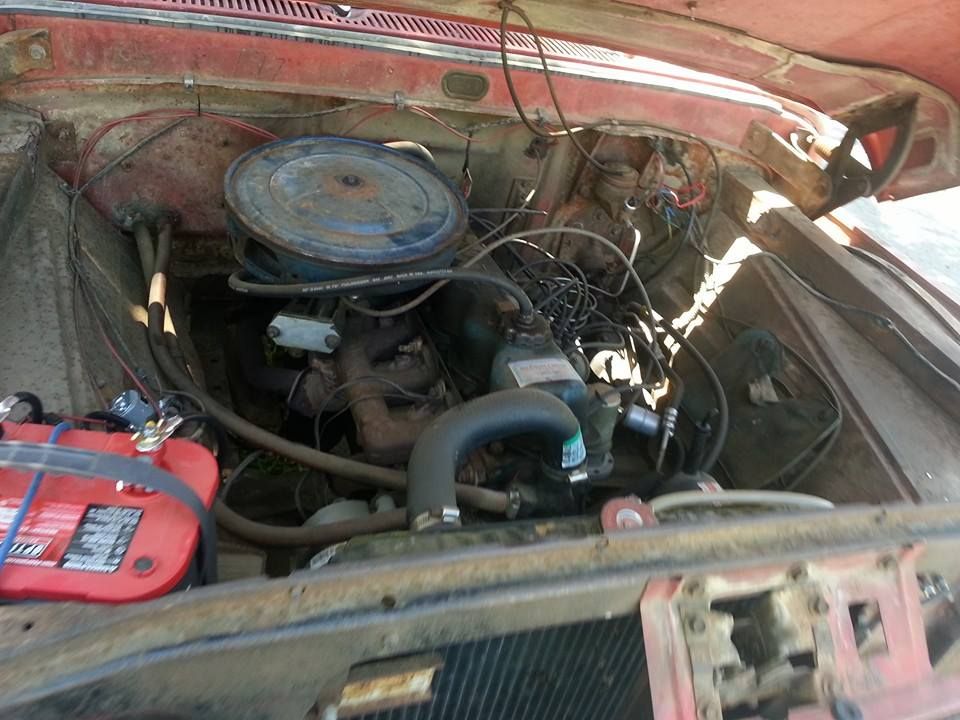
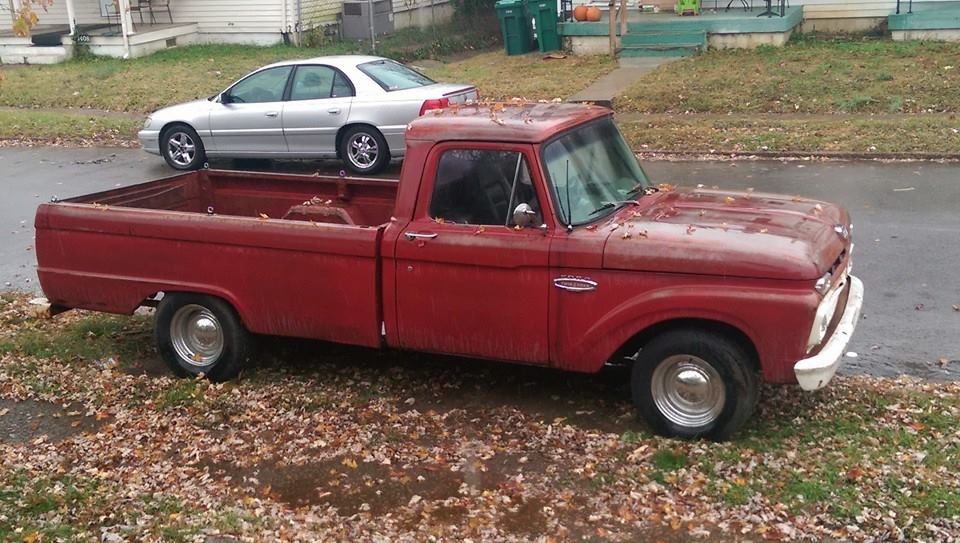
1966 i6 (Originally 240 but not sure as its a rebuilt i6)

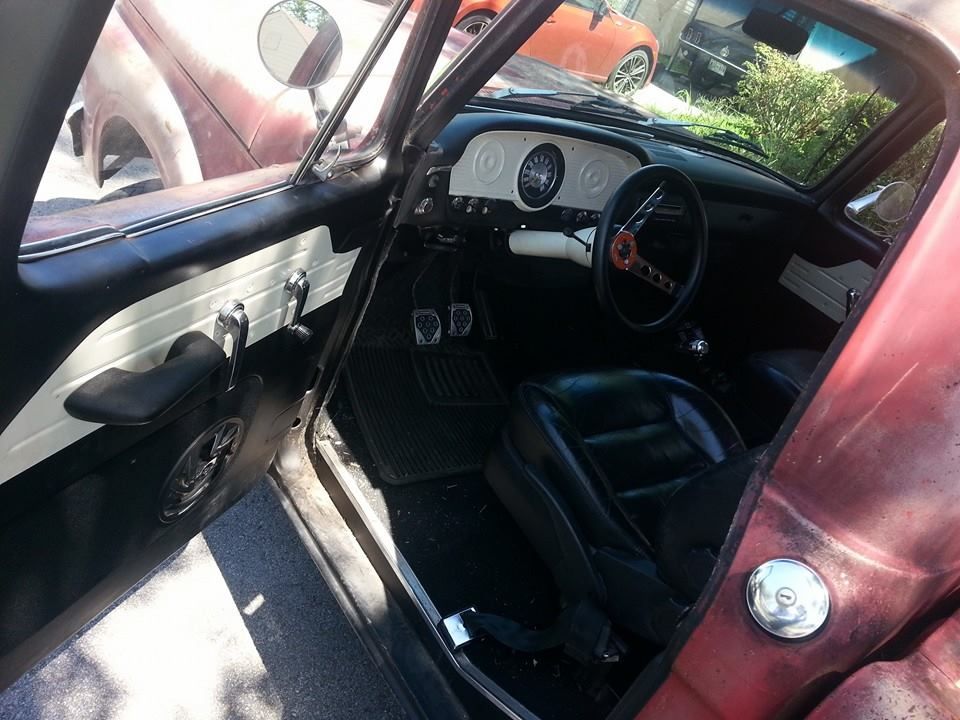
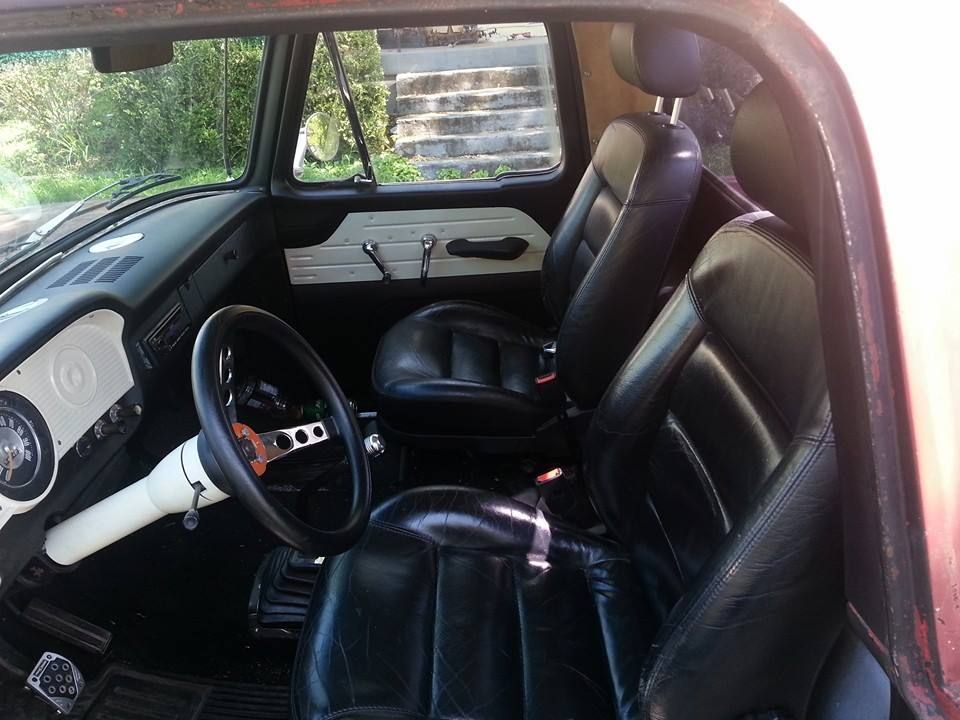
She drives great but does need some work. Most of the front suspension has been replaced, disc brakes added, and power steering. New carb, fuel lines, and quiet a bit more.

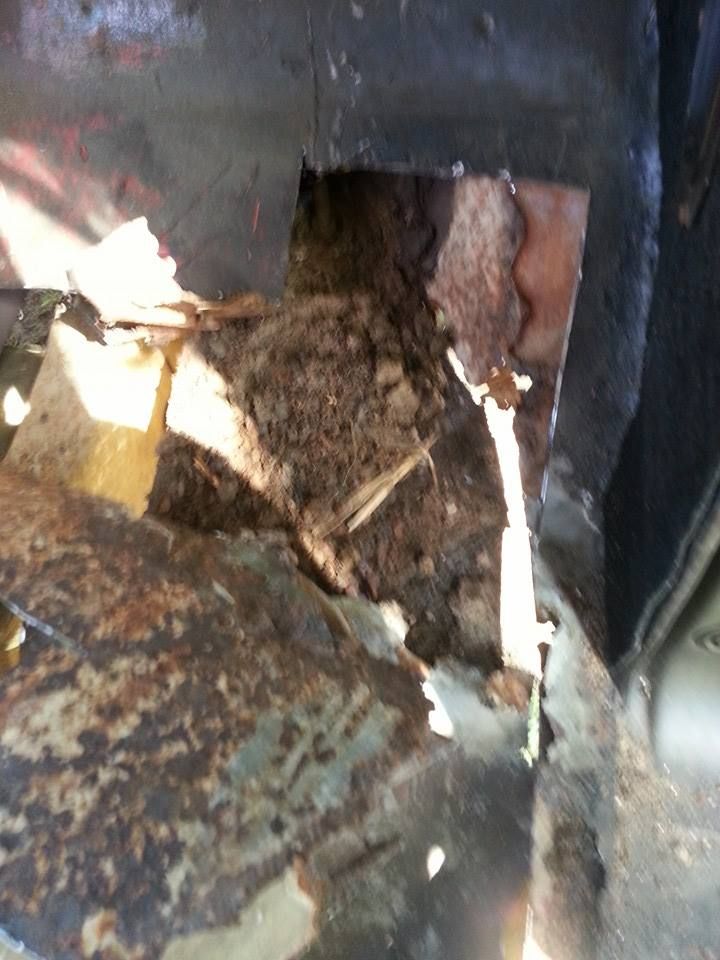
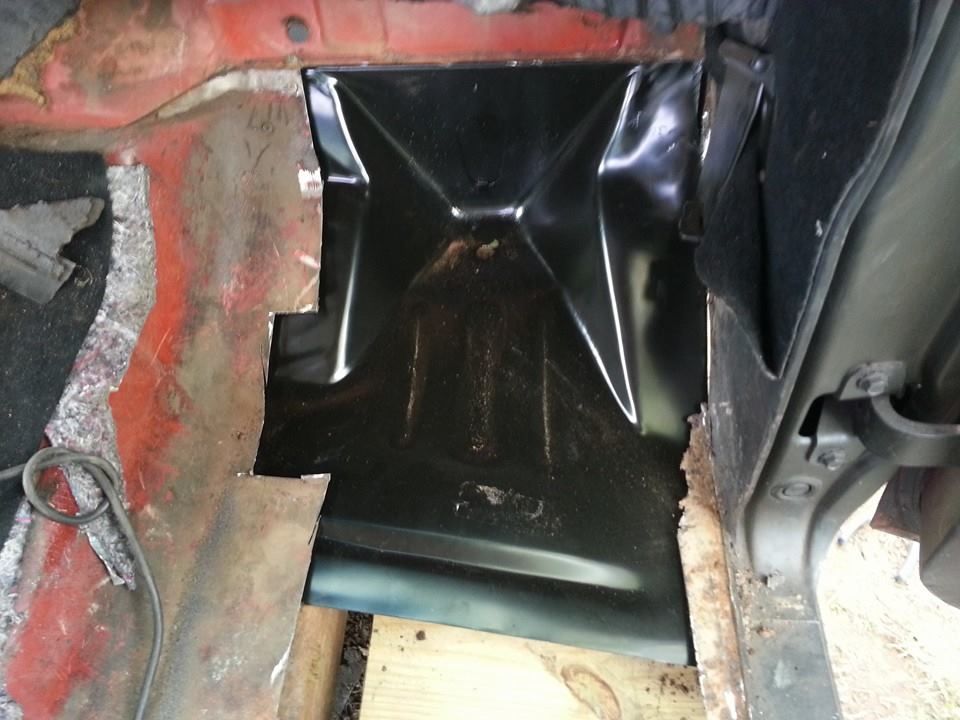
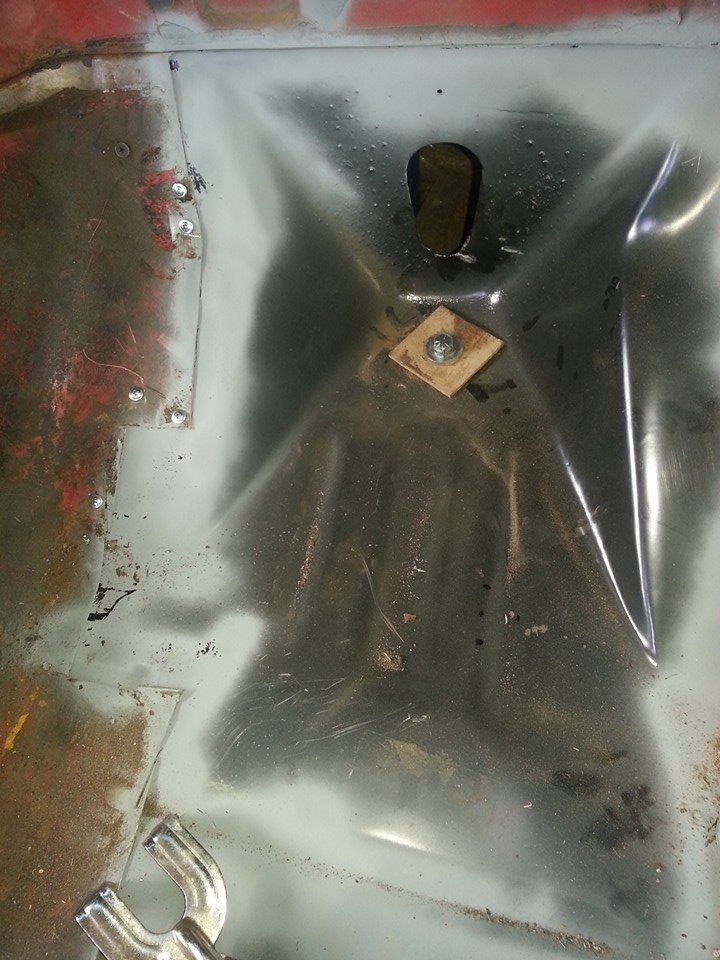
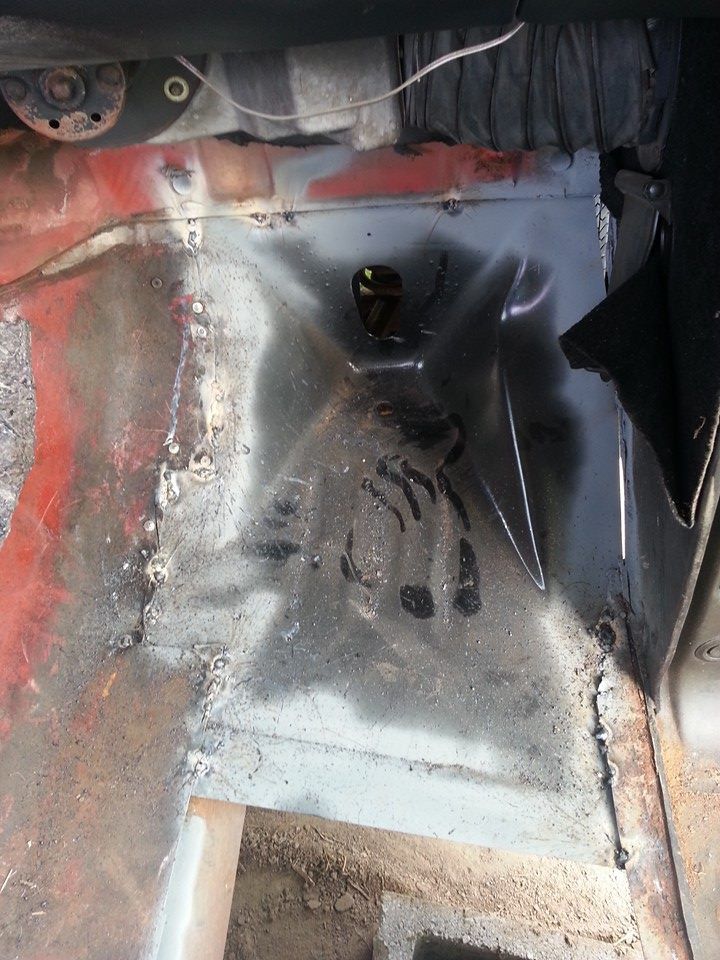
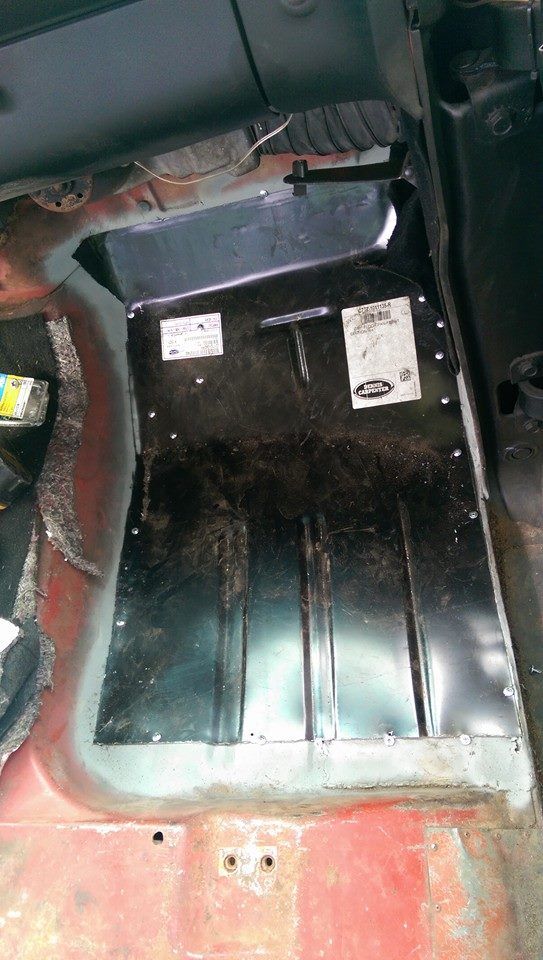
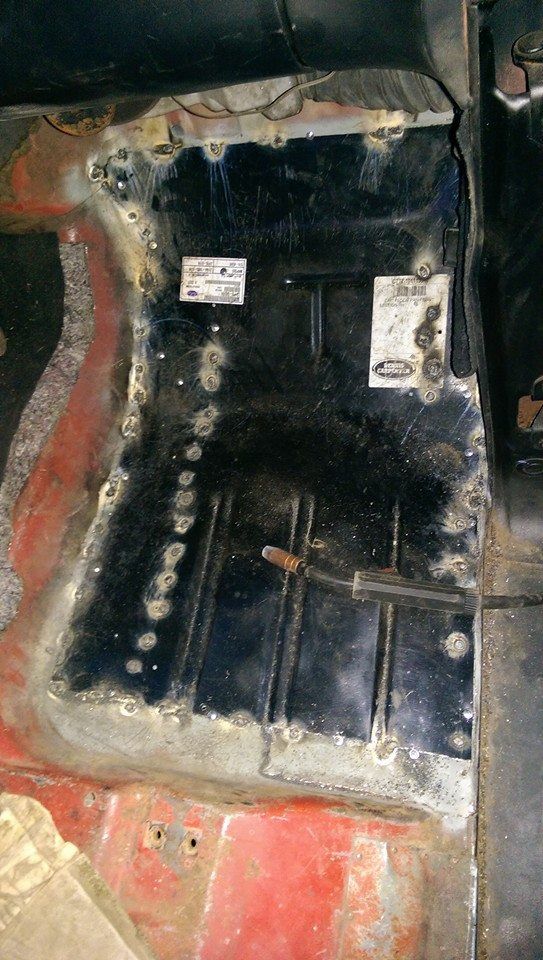
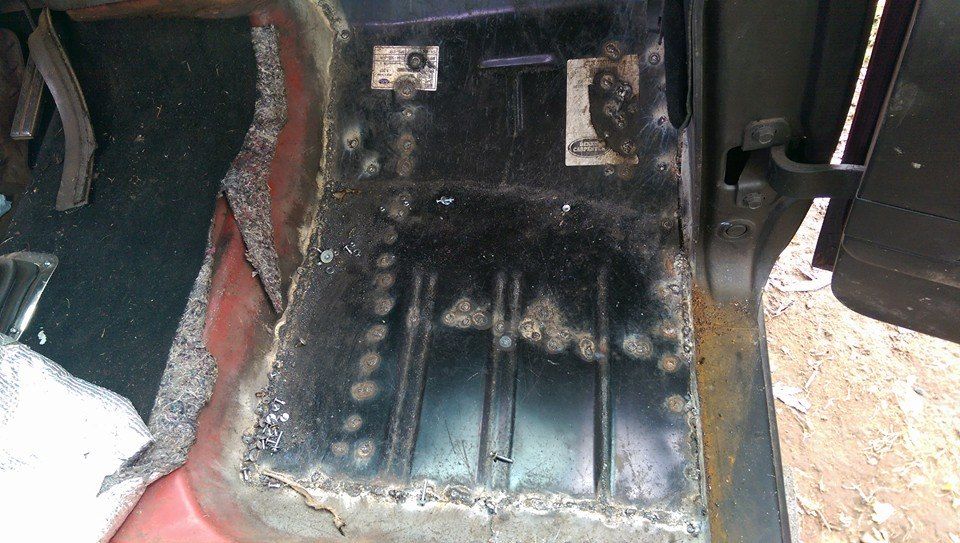
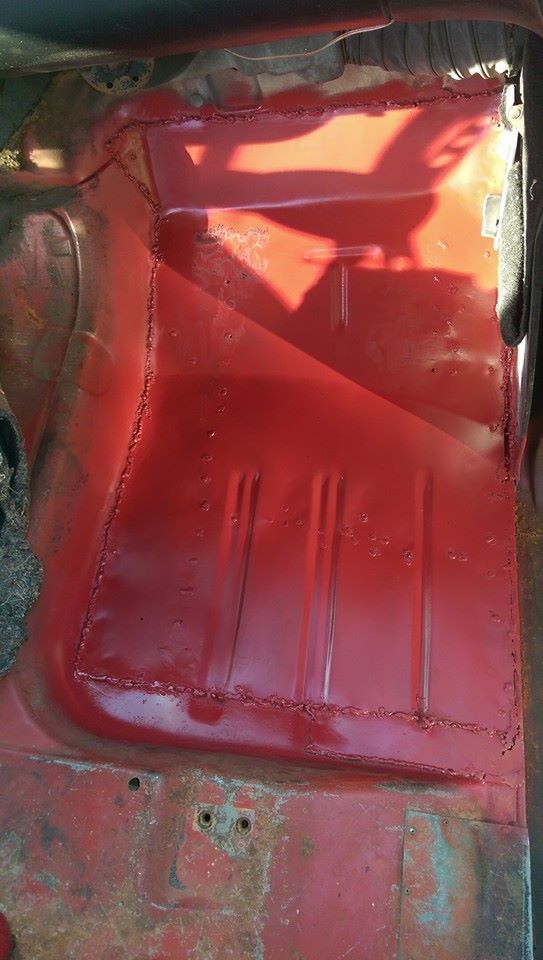
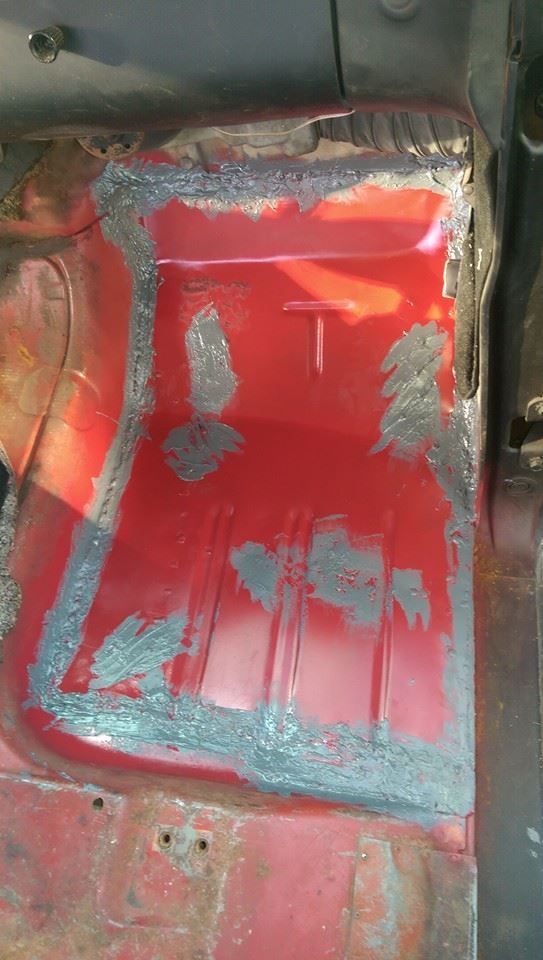
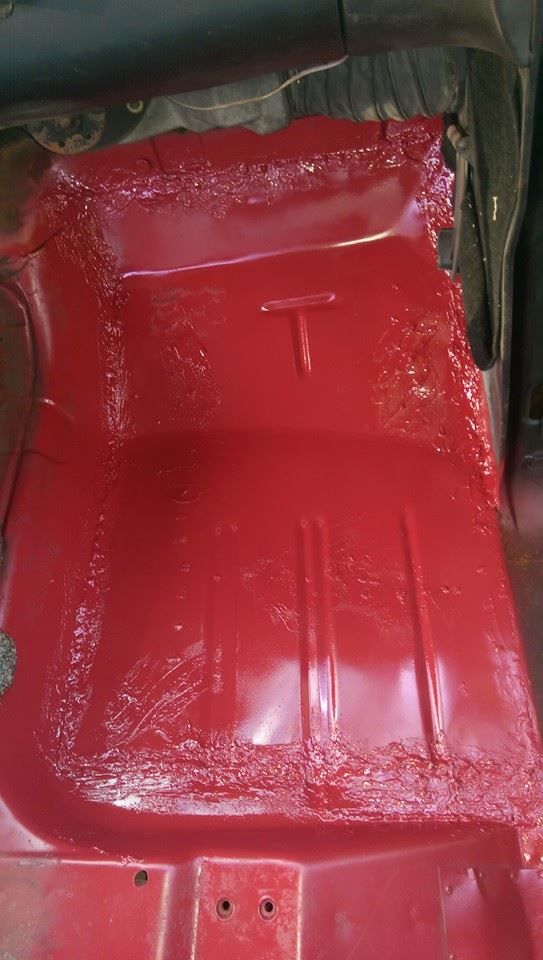
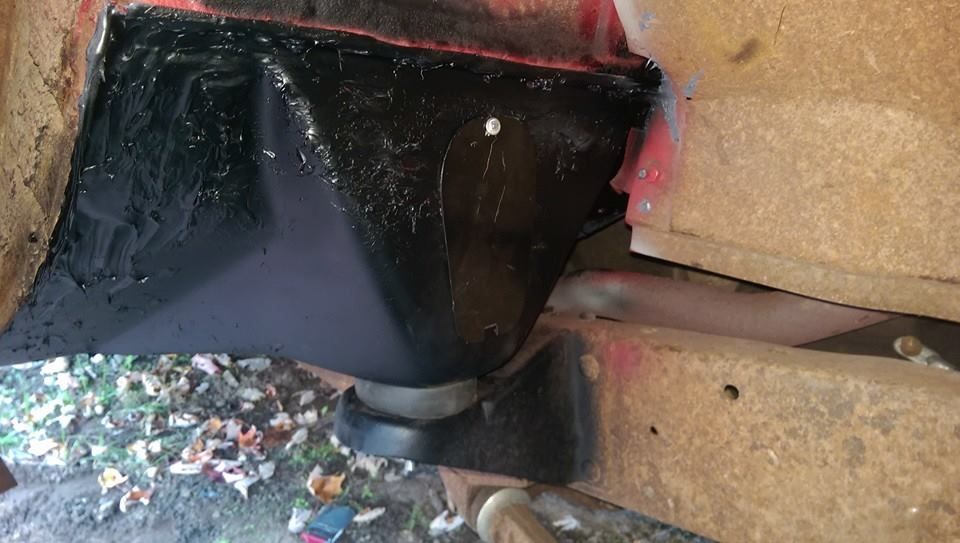
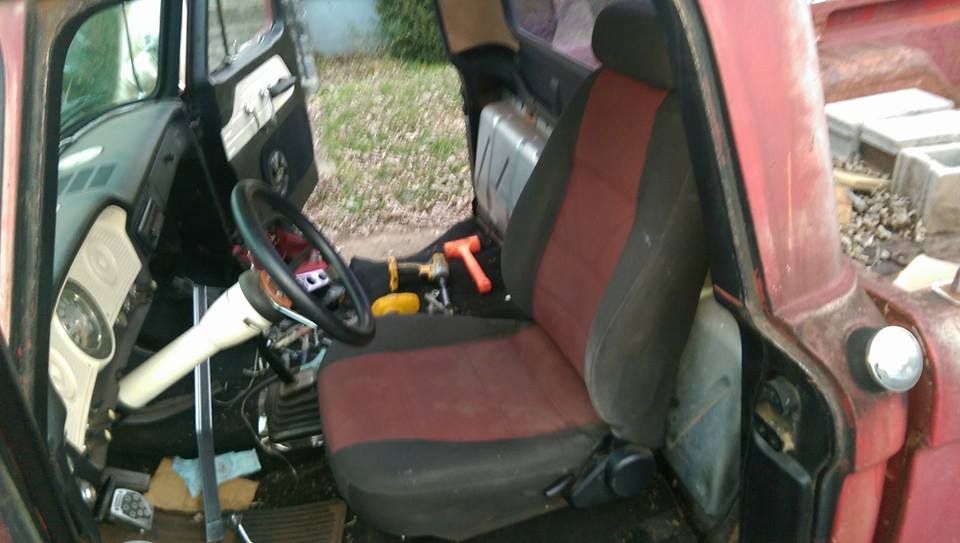
Going to have to replace the Front Cab Mounts, Floors (Previous replacement was put over the rust), tailgate, and bumper.


I have already ordered the sheet metal and will hopefully get started on her in the next couple weeks.

Image
Image
Image
Image
Image
User avatar
bobenhotep
Posts: 911
Joined: January 9, 2007, 4:15 am
Location: Las Cruces, NM
Contact:
United States of America

Re: New Guy 66 Project

Post by bobenhotep »

Welcome aboard. It looks like you have a good starting point. If you look at the links below my signature, there is some inline 6 stuff you might be able to use.

Dan
For every person with a spark of genius, there are a hundred with ignition trouble

My '63 short wrongbed

"The Iron Rhino"
300 I6, 3 spd manual, DS II/ HEI ignition.

Stuff I added to Hints and tricks

-300-6 choke tube repair
-duraspark II/ HEI
-Horn ring contact tube repair
-turn signal indicator fix


Mikhail Kalashnikov and Nikola Tesla are the guys i think of when i build things.

Image
JRANGER
Posts: 29
Joined: August 26, 2014, 2:31 pm

Re: New Guy 66 Project

Post by JRANGER »

Thanks for the info!

Went to pull a part today in hopes of scoring a tailgate off a 70 but no luck. It was long gone and all i could see is a 76. Are they comparable at all? Thinking i could grab it and maybe use it to patch my tailgate

Also had my buddy with me who is a mechanic and he told me im running rich and its a bit advanced. So might have to adjust the timing. Dont really know about these motorcraft carbs but gonna have to figure out now
JRANGER
Posts: 29
Joined: August 26, 2014, 2:31 pm

Re: New Guy 66 Project

Post by JRANGER »

Got started today. Cut the floor and front cab support and fitted the new cab support. Need to order weld thru primer, do some more grinding and waiting on my cab pads to get it lined up right before i screw it in place for welding

Image
Image
Image
JRANGER
Posts: 29
Joined: August 26, 2014, 2:31 pm

Re: New Guy 66 Project

Post by JRANGER »

did a little more work this weekend but not much. Got the bushing in place to help with alignment and put shot sheet metal screw in before i got called into work. Waiting on weld thru primer and a such but hopefully ill get this in soon
User avatar
unibody madness
Posts: 2140
Joined: December 4, 2008, 4:33 pm
Location: Paradise,CALIFORNIA 95969
United States of America

Re: New Guy 66 Project

Post by unibody madness »

Welcome to the madness. It looks like you will have no problem fitting right in. . . Hip deep in what most folks would run away from. :clap:
Turk build thread at:
viewtopic.php?f=32&t=18944

It does not matter what you think, it only matters what you do about it!
JRANGER
Posts: 29
Joined: August 26, 2014, 2:31 pm

Re: New Guy 66 Project

Post by JRANGER »

unibody madness wrote:Welcome to the madness. It looks like you will have no problem fitting right in. . . Hip deep in what most folks would run away from. :clap:


Yeah, this is my 3rd go with this type mess. Started with a 78 GMC...complete floor and supports, cab corners, rockers etc etc....That was my learning vehicle which i gave to my mother on mothers day this year. Then my 67 Mustang Ive had for a little over a year and i had to do floors and even the front portion of the frame rail. So a little sheet metal is no biggie to me. It certainly is a little different but I really want a Ford truck to go with my Mustang. Plus I really fell in love with this body style. It just looks well, SLICK! lol
User avatar
foodstick
Posts: 3364
Joined: March 15, 2006, 6:45 pm

Re: New Guy 66 Project

Post by foodstick »

Its always great to see someone with their first Slick , and the tools a flying into the work.. welcome aboard.
longcabjohn
Posts: 354
Joined: January 21, 2012, 1:08 pm
Location: waverly, Tn
United States of America

Re: New Guy 66 Project

Post by longcabjohn »

Looking good, you will get there. Did you get the PM about tailgate?


Johnny
If restoring a ford was easy, chevy guys could do it.
JRANGER
Posts: 29
Joined: August 26, 2014, 2:31 pm

Re: New Guy 66 Project

Post by JRANGER »

longcabjohn wrote:Looking good, you will get there. Did you get the PM about tailgate?


Johnny


I sure did but ive been super busy and such. I appreciate it
JRANGER
Posts: 29
Joined: August 26, 2014, 2:31 pm

Re: New Guy 66 Project

Post by JRANGER »

officially ready for welding

Image
JRANGER
Posts: 29
Joined: August 26, 2014, 2:31 pm

Re: New Guy 66 Project

Post by JRANGER »

Didnt have a lot of time but managed to get it welded in place on the inside. Just a few places to hold it where it needs to be. Now i can get under the truck and welded it in all over

Image
JRANGER
Posts: 29
Joined: August 26, 2014, 2:31 pm

Re: New Guy 66 Project

Post by JRANGER »

Well got to work on the truck yesterday and went to TOWN! I got a bunch of spot welds under the truck and once it was done i took the grinding wheel to the inside welds to smooth them out. I then wire wheeled the whole floor panel area and hit it and the inside of the cab support with weld thru primer. Cut and fitted the floor panel in to place, drilled a bunch of holes to weld to the cab support from the panel, and screwed it in. Started to weld it in place and then the weld wire ran out!

Image
JRANGER
Posts: 29
Joined: August 26, 2014, 2:31 pm

Re: New Guy 66 Project

Post by JRANGER »

more weld wire = more welding. almost have the passenger side all done. Just a little more welding, grinding, paint, and seam sealer to go
Image
JRANGER
Posts: 29
Joined: August 26, 2014, 2:31 pm

Re: New Guy 66 Project

Post by JRANGER »

Finished welding, Filled the outer gap, ran out of weld wire, wire wheeled the floor, hit it with satin red rustoleum i had around the house, then brushable seam sealer, and then another coat of rustoelum. Now i have to do the same under the truck to finish the passenger side


Image
Image
Image
Image
bigmcgiv
Posts: 21
Joined: October 12, 2014, 7:08 pm

Re: New Guy 66 Project

Post by bigmcgiv »

looks good. nice solid repair.
JRANGER
Posts: 29
Joined: August 26, 2014, 2:31 pm

Re: New Guy 66 Project

Post by JRANGER »

Finally completed the passenger side and installed the new front bushing. Then took her for a quick spin up the road
Image
Image
JRANGER
Posts: 29
Joined: August 26, 2014, 2:31 pm

Re: New Guy 66 Project

Post by JRANGER »

Did some test fitting on seats with the ranger brackets. So i test fitted some 11 Mustang seats and 01 Mustang seats. These have been modified and fitted with 67 Brackets which was very easy and then mounted to the Ranger Brackets.

I ended up putting the 01 seats as they are a little lower and gave a very comfy fit. Plus the 11 seats are for my 67 mustang

Image

Image

Image

Image
JRANGER
Posts: 29
Joined: August 26, 2014, 2:31 pm

Re: New Guy 66 Project

Post by JRANGER »

opps double posted
Last edited by JRANGER on January 18, 2015, 10:09 pm, edited 1 time in total.
JRANGER
Posts: 29
Joined: August 26, 2014, 2:31 pm

Re: New Guy 66 Project

Post by JRANGER »

Started on the 3 point seat belt install. I welded the nuts to a Bushing Washer i had left over from my 78 GMC I gave my mother. They were nice and thick and about an 1.5. So to me it was perfect for a backing plate to make sure everything is re-enforced. I thought about welding it in but it would be too much of a hassle so Tuesday i ordered a riveter kit thinking it would be here. It wont show up til Friday.. ERG..


So yeah, I drilled a hole, got the backing plated bolted in, drilled 2 holes for rivets and that's where it is.
Image

Also
Order a Mr Gasket 7667A shifter to replace the jimmy rigged Mr Gasket shifter the last guy installed.
Post Reply