Page 1 of 13
Greg D's Traditional Build of a 1964 F 250
Posted: April 17, 2010, 8:12 am
by Greg D
Well, actually I'll just fix a few things first. I am going to start on it today so I thought a build thread was in order.
Plans are;
pull the 292 and freshen it up
reinstall with my T-5
cut it down to a short
lower it with F100 axles
will install the tires & wheels from the 62 (they need to not just be sitting there)
repaint it - no not beige
I'll will eventually do more to it but this is the list for this year. I plan to drive this truck to SS.
Here is the purchase announcement thread rather than reposting it all here.http://fordtruk.com/forums/viewtopic.php?t=15847
Posted: April 18, 2010, 2:39 pm
by 62bigwindow
If it is not too much trouble i would like to see some pics of the engine mounts.I am putting a y-block in my uni and plan to use car mount as opposed to the truck mounts.With the aod i am using i am worried that there will be too long of a span between mounts.Afraid it will put too much stress on bell housing area.
Posted: April 18, 2010, 8:03 pm
by Greg D
Posted: April 19, 2010, 8:32 pm
by Greg D
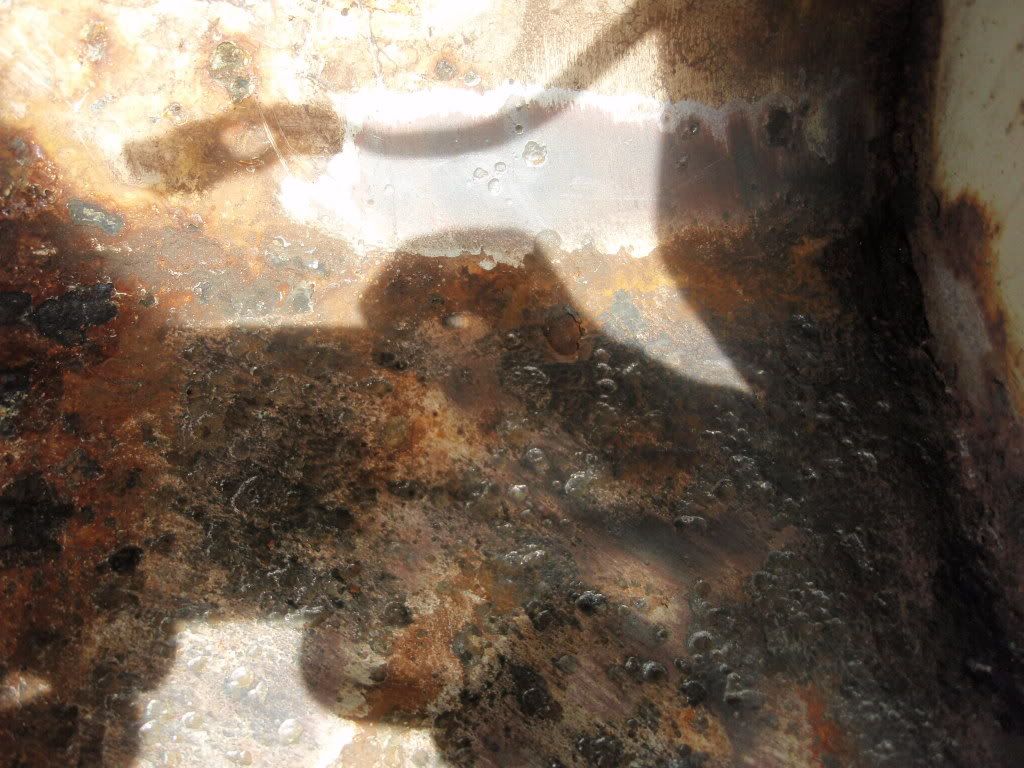
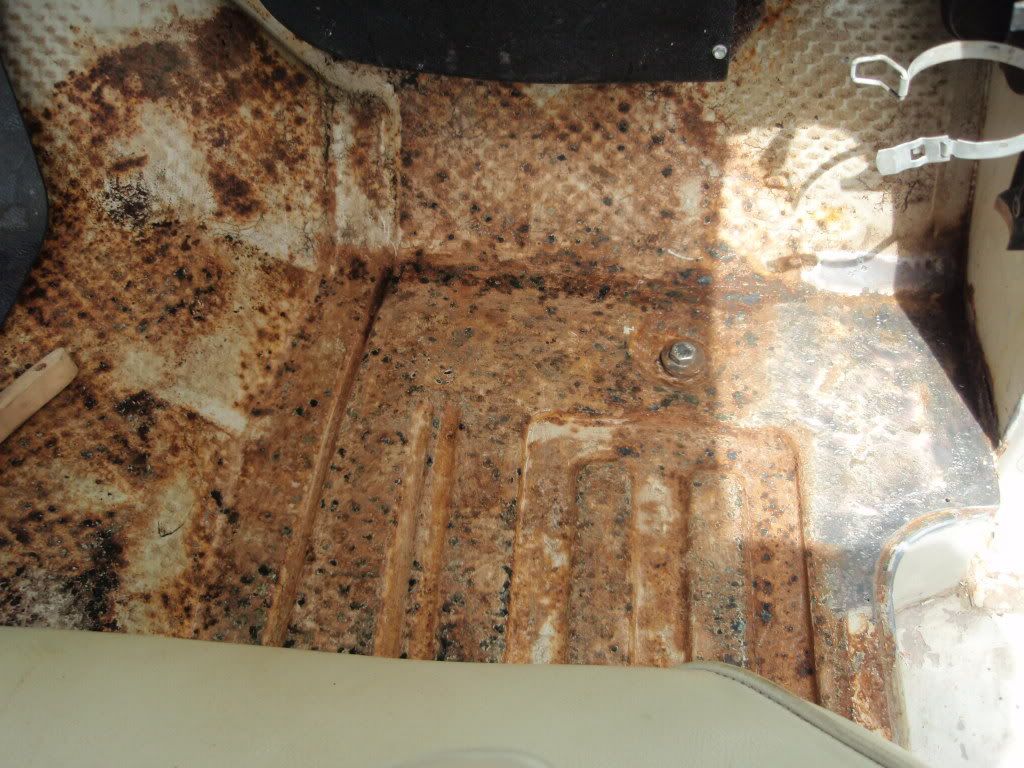
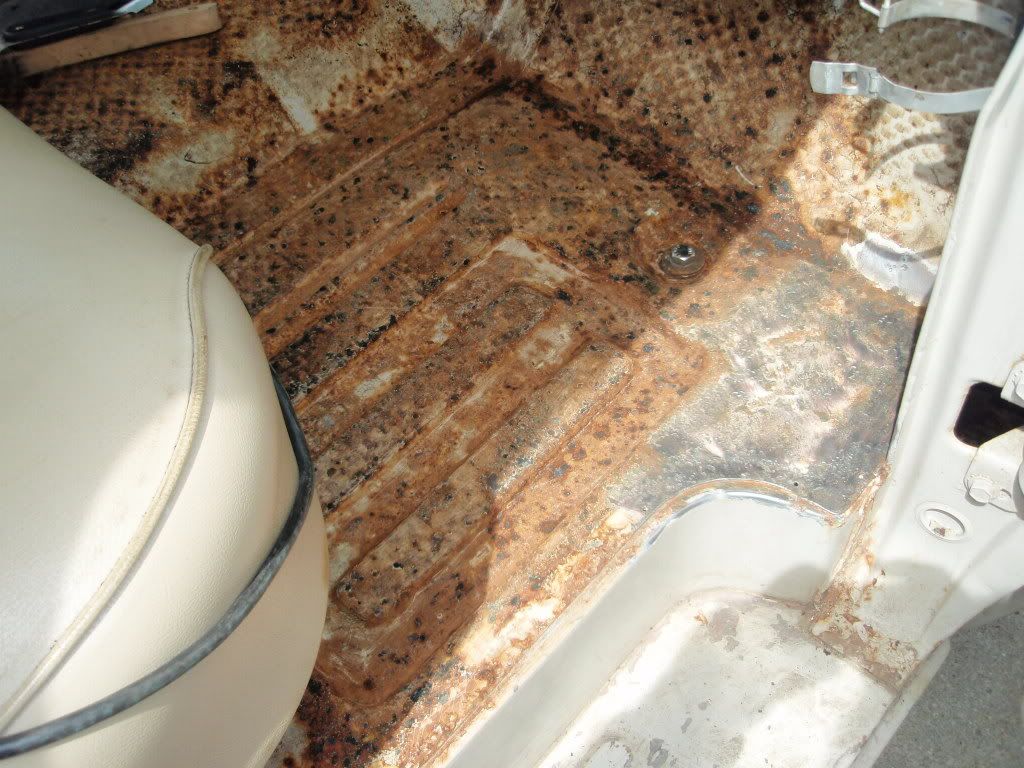
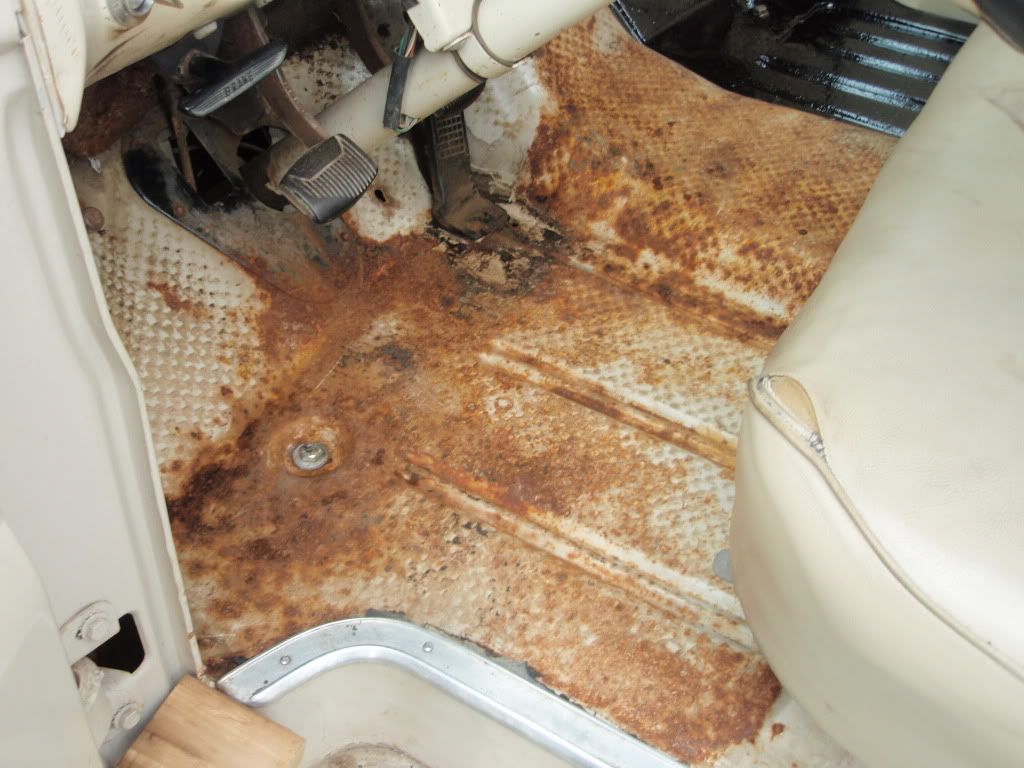
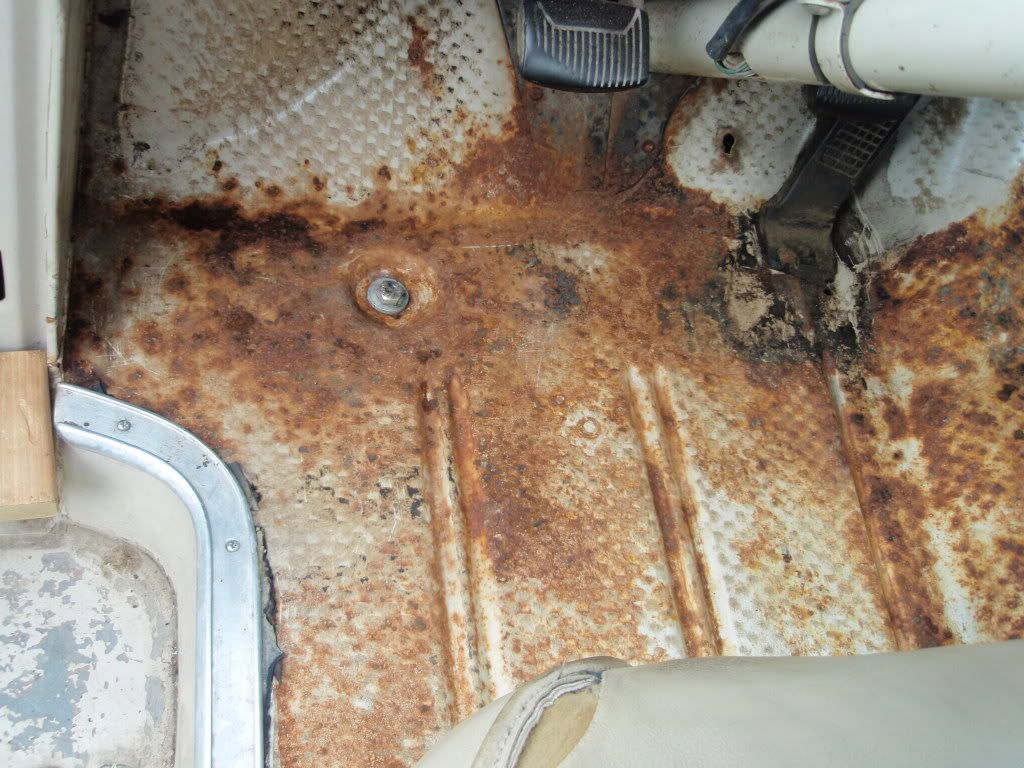
Cleaned up the drivers side floor today after work.
Considering the condition of this truck it would be shame not to weld a small patch here. This right under the brake pedal where the mat was worn through.
Patch will be about the size of a business card is all. I am out of .030 flux core so I'll have to pick up a roll to do it. Seeings as I can't get it perfectly clean without digging into the metal more than I want to and and I can't get to the back side flux core is the way to go here.
I'll be a really lucky guy if this is the worst patch I ever do again, lol.
Posted: April 19, 2010, 10:21 pm
by Paranoid!
Not bad at all....
I allways find myself holding my breath when looking under them mats for the first time....
Posted: April 20, 2010, 6:30 pm
by Greg D
I examined it REAL close underneath - pretty much knew what I would find.
Tonight is a secondary project to this truck - swapping the fuel pump in the van so I can put the 64 in the drive. If I don't have to keep it movable so I can put it back across the street I can get alot more done.
Supposed to get a couple days of rain - I'll start getting a few things together for it for the next round.
Still working on picking colors - have a few ideas but haven't settled on one.
I was originally going to be a semi flat black with some metallic custom paint (secret, lol), see alot of cars & trucks done like that anymore - it's still on the table though. I'll need to pick something before I fix the roof - I'll want to get the color around the windshield frame before the glass goes back in so I don't have to pull it again for paint.
Posted: April 24, 2010, 12:57 pm
by rwhistles
OK so where's the pic of the whole truck before you molested it? Did I miss them in another thread?
Posted: April 24, 2010, 6:31 pm
by Alan Mclennan
Greg D wrote:Cleaned up the drivers side floor today after work.
Considering the condition of this truck it would be shame not to weld a small patch here. This right under the brake pedal where the mat was worn through.
Patch will be about the size of a business card is all. I am out of .030 flux core so I'll have to pick up a roll to do it. Seeings as I can't get it perfectly clean without digging into the metal more than I want to and and I can't get to the back side flux core is the way to go here.
I'll be a really lucky guy if this is the worst patch I ever do again, lol.
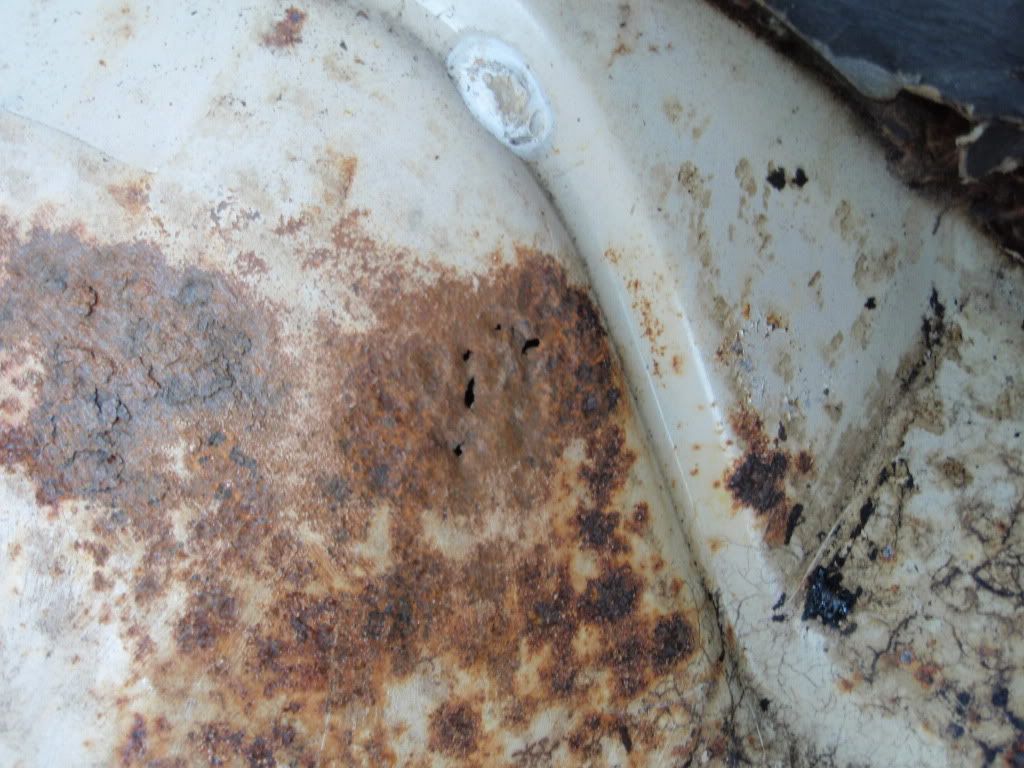
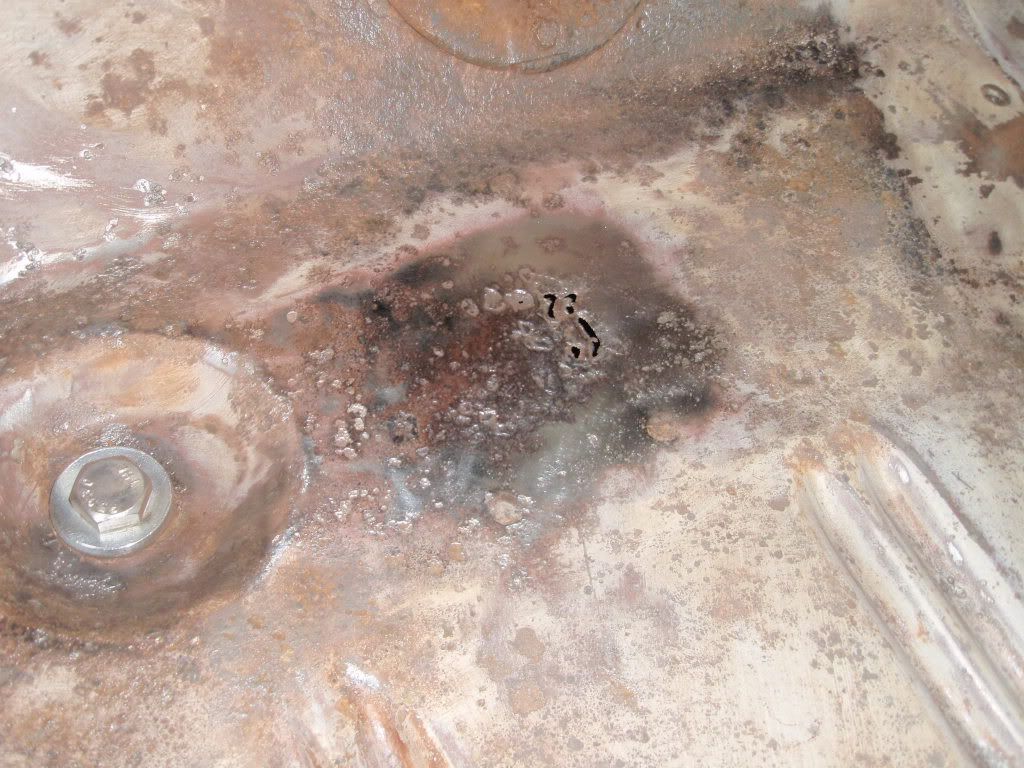
Greg, just as a suggestion, why don't you just clean the area up good and put a layer of Bronze weld over the area, then coat with Por 15. It`s not a structural location!, Just saying!
Posted: April 25, 2010, 4:12 am
by blackagatha
wow I wish the floor in Aggie was that good.... She had CARPET...
so, alan, what is this Bronze Weld?
Posted: April 25, 2010, 9:49 am
by Greg D
Robert,
the link in the first post will take you to pics of it.
Alan - Bronze weld?
Posted: April 25, 2010, 10:00 am
by slick4x4
i think what Alan is saying is just to take a torch and some brazing rod &
fill in the holes with brass...
then put the POR over the top and you wont even notice.
Posted: April 25, 2010, 11:08 am
by rwhistles
Wow greg I musta been asleep when you posted that one don't know how I missed that.Looks like you got a winner there. congrats
Posted: April 25, 2010, 6:34 pm
by Alan Mclennan

Pat you got it in one!, they are only small holes!, so cutting out the section some times is a bit of over kill!. I think a lot of pin holes can be over come this way, just watch the heat!
Posted: April 26, 2010, 8:02 pm
by Greg D
I don't have an Ox/Acetylene set up. Maybe could grab one of those small ones just for this though - I'll check into one.
I did get some cleaning & prepping done over the weekend. Got some paint I need ordered.
I also managed to pic the base color for the paint job. I have had the scheme in my head for awhile.
Been wet & rainy since Saturday so not much since then.
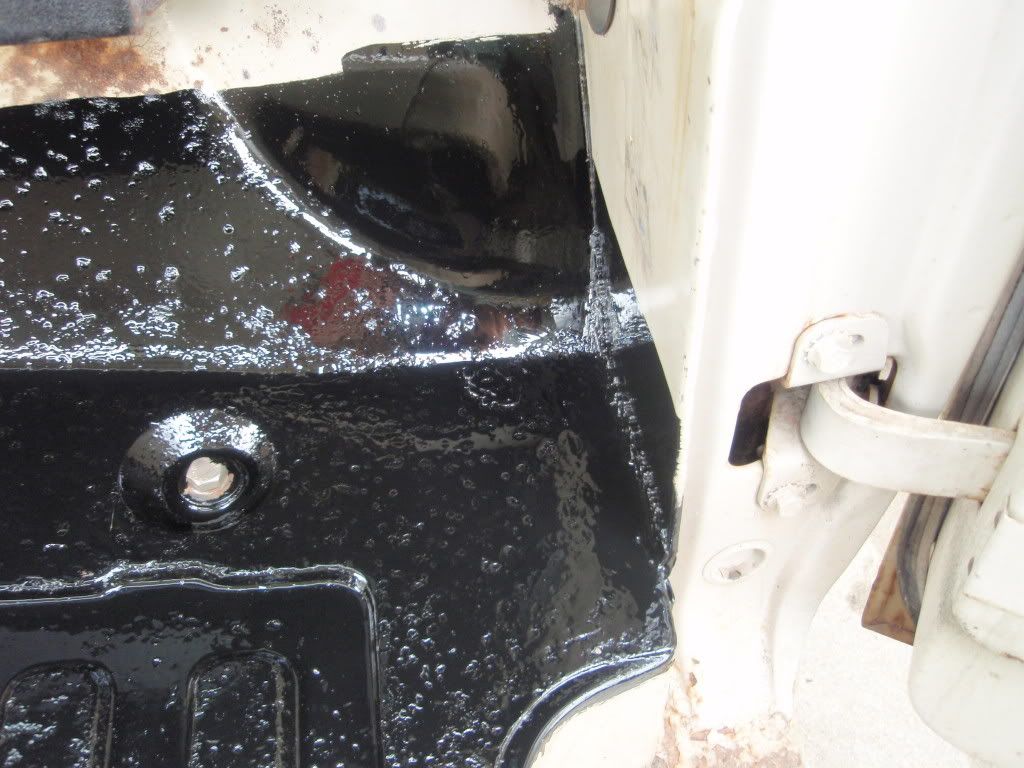
Next decent day the bottom of the cab starts getting POR.
I found a new similar Product at the paint store that is a much better price - $37 vs $50 a quart. If these guys carry it - it's good.
Posted: April 26, 2010, 10:17 pm
by MadMaxetc
Greg. You should be able to get by with JB Weld or POR Puddy or something like that. Those are small holes.
I would use JB Weld and put a small peice of 22g steel over the wet JB Weld and and "Glue" it in place. Then you wouldn't need to worry about heat.
Then POR the floor.
Posted: April 27, 2010, 3:21 am
by Paranoid!
Yeah!!!
JB Weld that som'bit@h Greg!!!....

Posted: April 27, 2010, 10:05 am
by Greg D
That's a pretty good idea. I could also use it as a putty to fill some of the bigger pits. After the bottom is POR'd I should have it sealed real well then.
Posted: April 27, 2010, 8:49 pm
by bird55
I'm envious of those that have welders and can use 'em but what I use on small stuff like that is 3M Structural adhesive And sometimes a sheetmetal patch if needed. Gotta clean up all the metal prep as usual but it works super fast and doesn't dry glass hard, but has a slight flex feel to it. Then, you can also grind and sand it, paint it. Someday I'll try to get pics of the process.

Posted: April 27, 2010, 9:00 pm
by Rusty 63
My 2c would be to POR15 the rust before you putty it up.
Posted: April 28, 2010, 11:26 am
by ebentraywick
looks great dude more pics less talk lol jk