BlackTruck Build 65

A place just for our project & build threads.

Moderators: Kid, Casey 65

Post Reply
JeffinMooresville
Posts: 242
Joined: January 23, 2018, 8:12 pm
Location: Mooresville, NC
United States of America

BlackTruck Build 65

Post by JeffinMooresville »

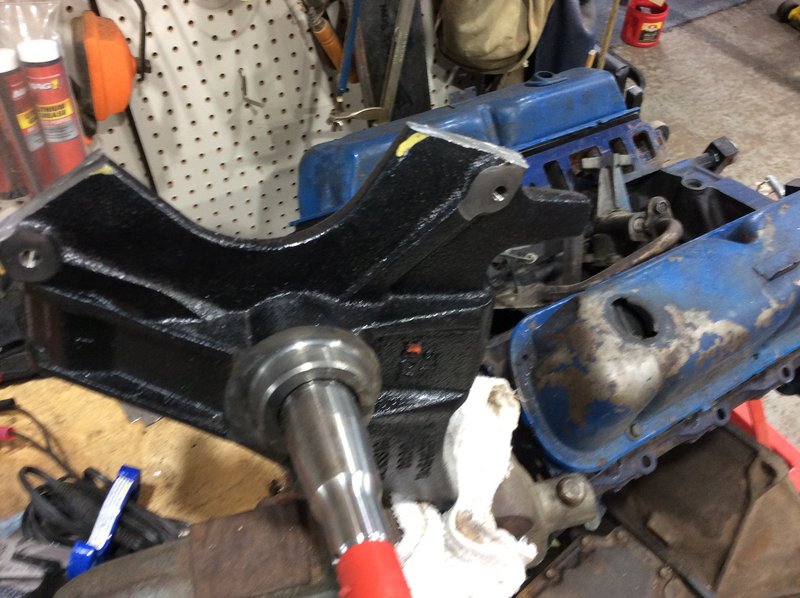
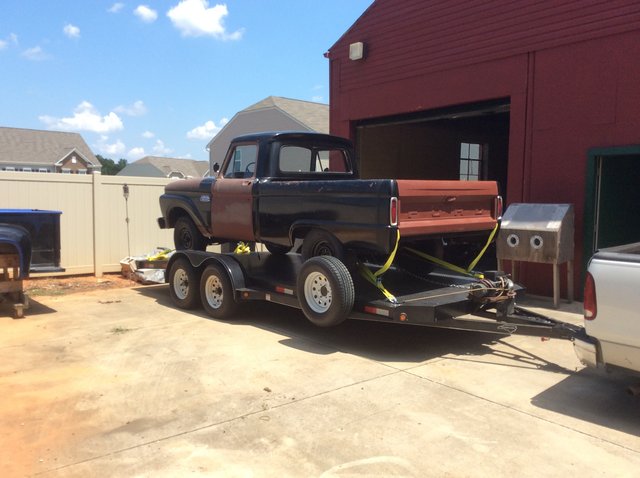
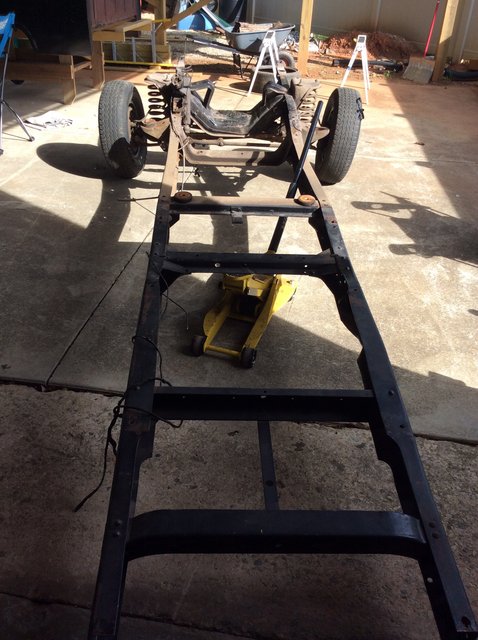
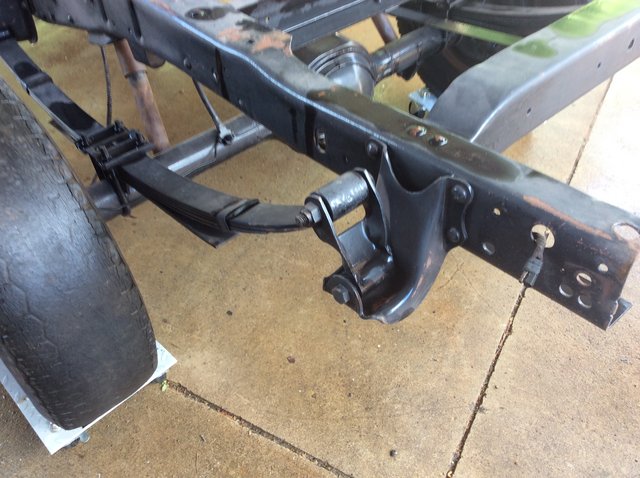
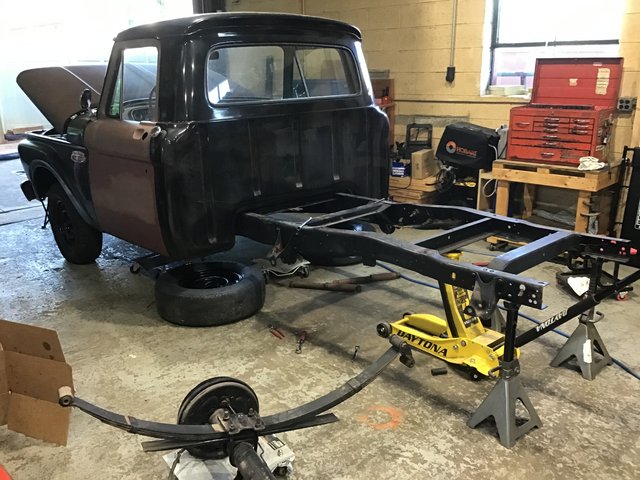
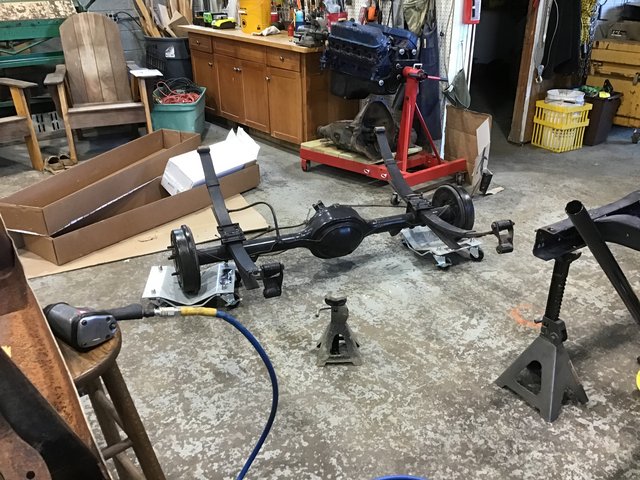
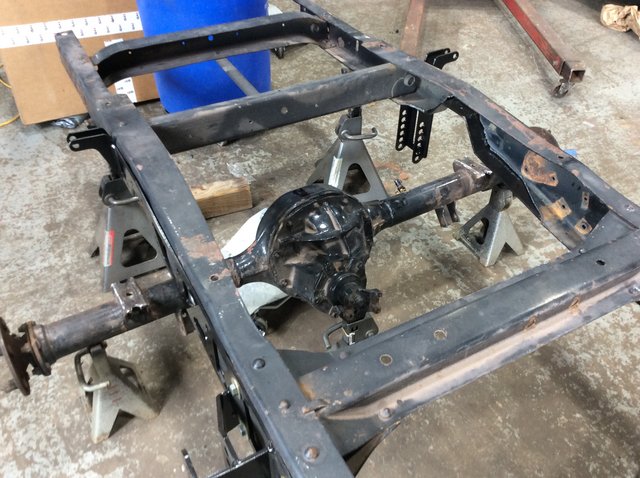
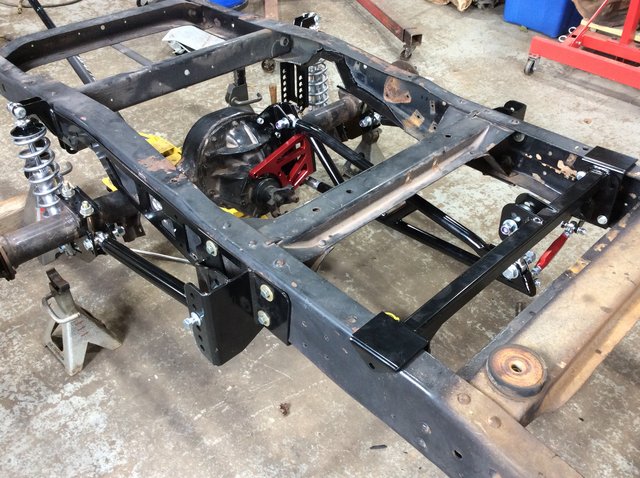
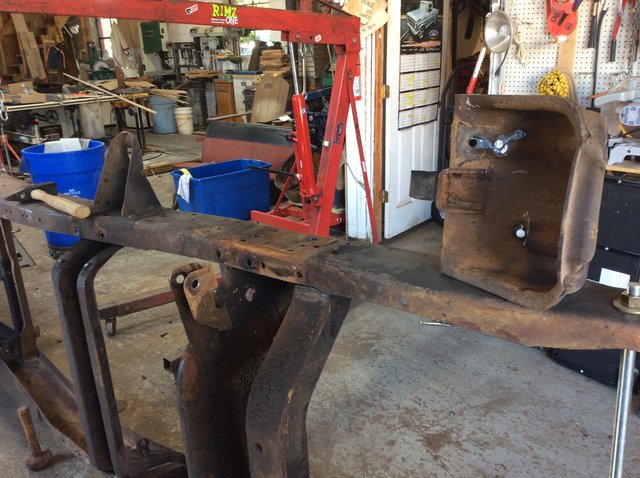
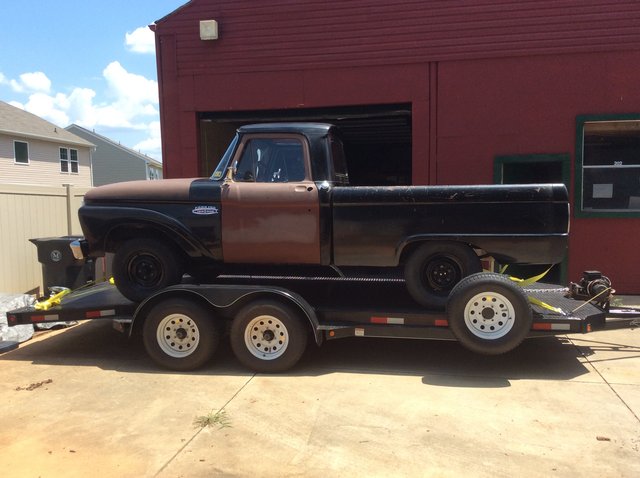
New build for 65 styleside shortbed. I just finished up build for 63 flareside under topic New 63 Owner. That was my first build and I learned alot from people on the forums and some people i met online. The 63 build ws a frame off, but pretty much stock rebuild of chassis, suspension, drum brakes etc. Previous owner had put a 390 with C6 transmission. I had the motor and trans rebuilt, but left pretty stock, 2 barrel carb etc. i also decided to leave the body / paint alone... as it had been redone maybe 15 years ago and other than chips, cracking etc it looks ok from a distance. I also left the stance alone and basically has stock stance.

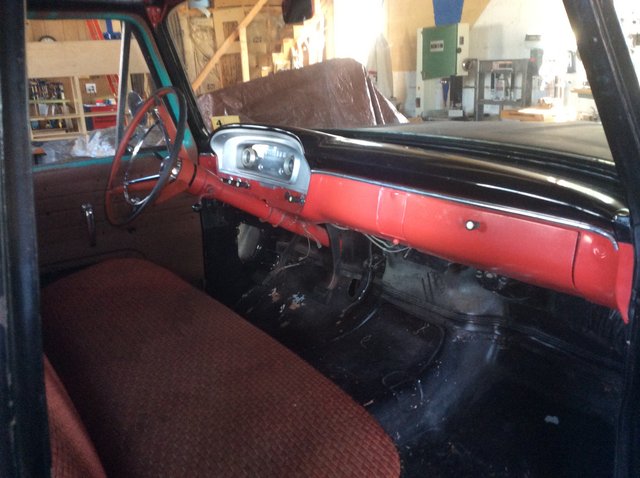
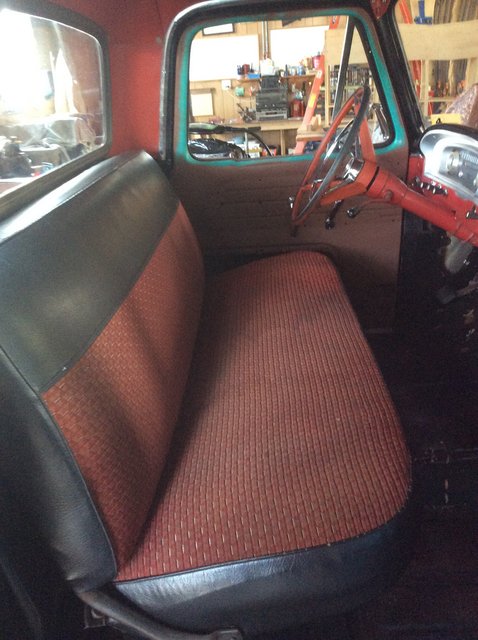
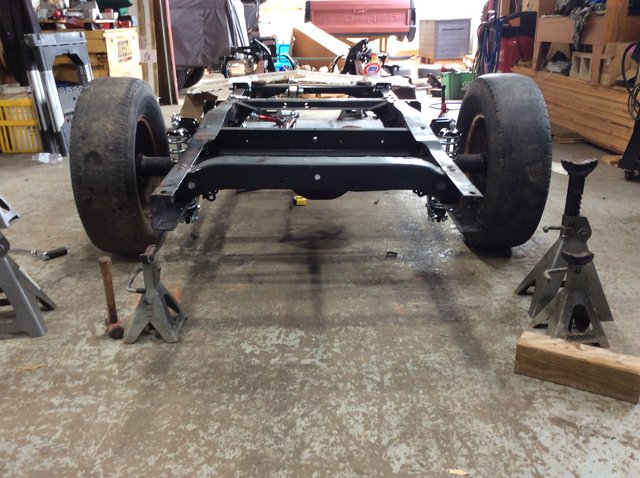
Anyway, found a new project truck, grandson calls the 63 Blue Truck and this one Black Truck, so black truck it is. Truck is in great shape and has interesting story, some old timer collector pulled it into his shop to do some work on it in 1982 and it has been there ever since. So good news is no replacing rusty floors and door hinges like in the 63. Has some rust in the front of the bed, but not much other than that.

Image

Image

Image

Image
Jeff in Mooresville
63 Flareside and 65 Styleside projects underway
grump
Posts: 959
Joined: September 14, 2006, 6:47 pm
Location: ohio

Re: BlackTruck Build 65

Post by grump »

Looks good. I'll be watching this one also.
JeffinMooresville
Posts: 242
Joined: January 23, 2018, 8:12 pm
Location: Mooresville, NC
United States of America

Re: BlackTruck Build 65

Post by JeffinMooresville »

Thanks Grump. Trying to get caught up on pictures.
Jeff in Mooresville
63 Flareside and 65 Styleside projects underway
JeffinMooresville
Posts: 242
Joined: January 23, 2018, 8:12 pm
Location: Mooresville, NC
United States of America

Re: BlackTruck Build 65

Post by JeffinMooresville »

Plan for Blacktruck is frame off restomod. New suspension front and back lowered. Bodywork and paint, new engine 351w with mild build, Tremec 5 sp manual, something with a little mustard in it.

First things first, something I know how to do. Tear it apart.

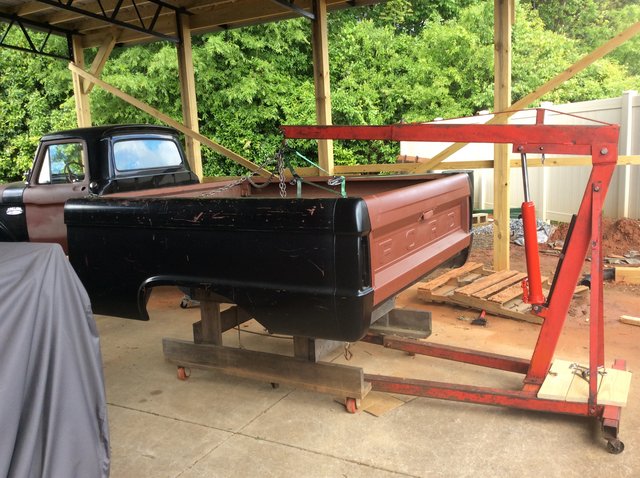
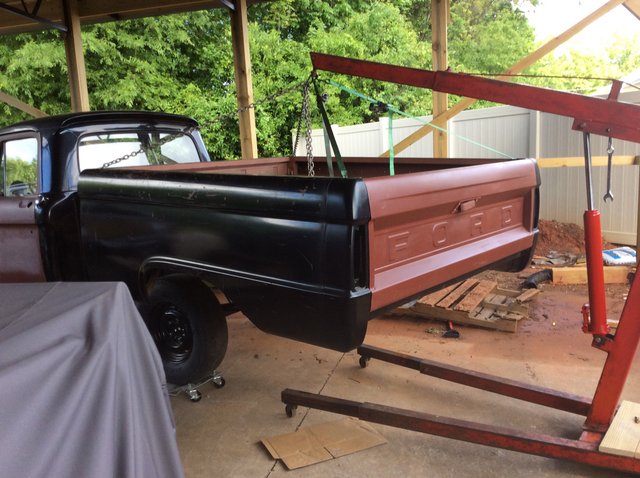
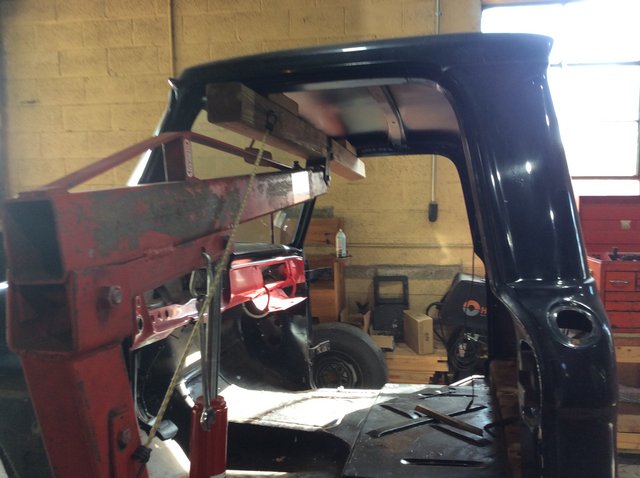
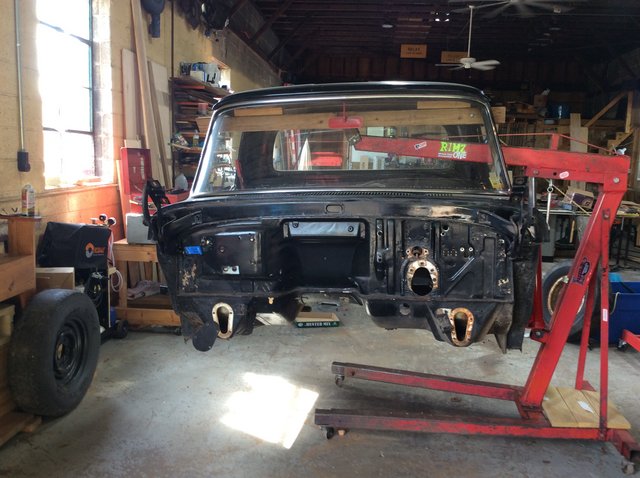
Thank goodness for the hoist- found this old school one with long reach. Perfect for pulling the bed and cab.

Image

Image

Image

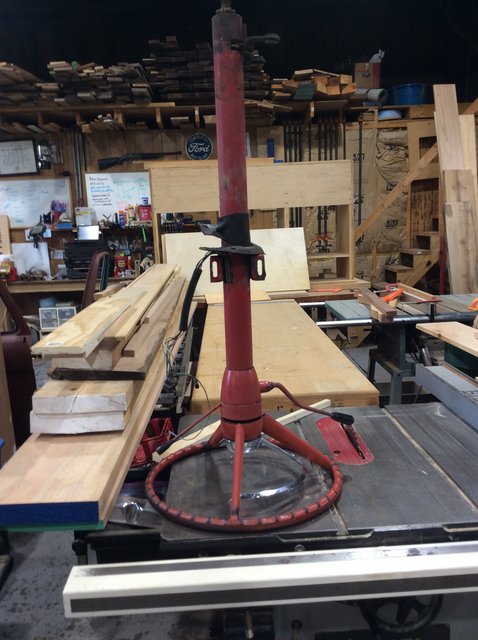
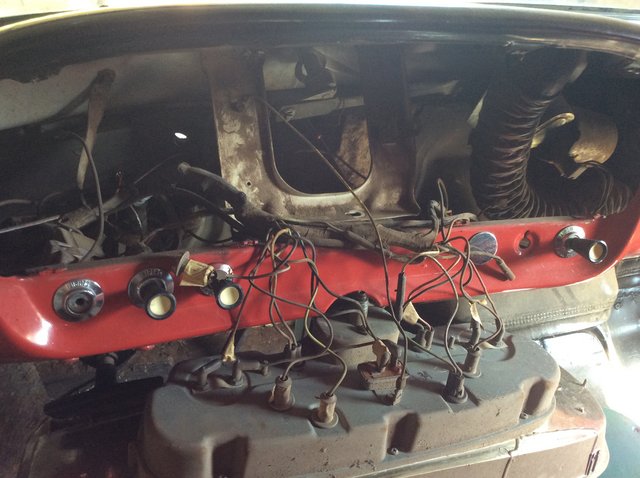
Won’t be needing this, suspension has rack and pinion, so will need aftermarket steering column.

Image

Or this, all new wiring. Looking for suggestions, small number of circuits, no power windows or power seats. I can’t tell the difference between the $200 kit and the $700 kit.

Image

Image

Image

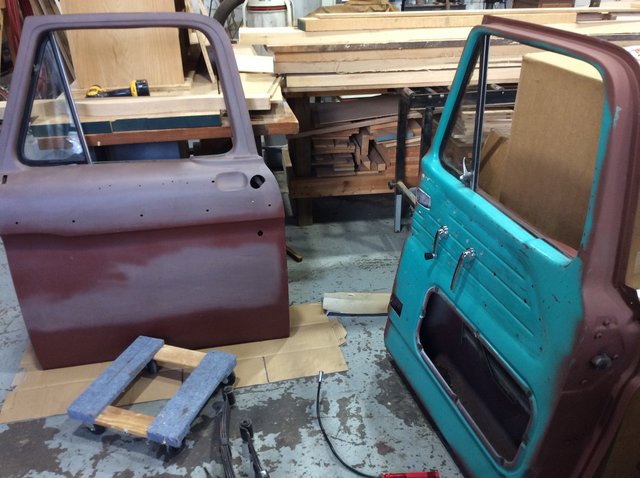
The doors are not original to truck, but are in good shape. Will need complete rebuild of window channels, window rubber/ felt.
Image

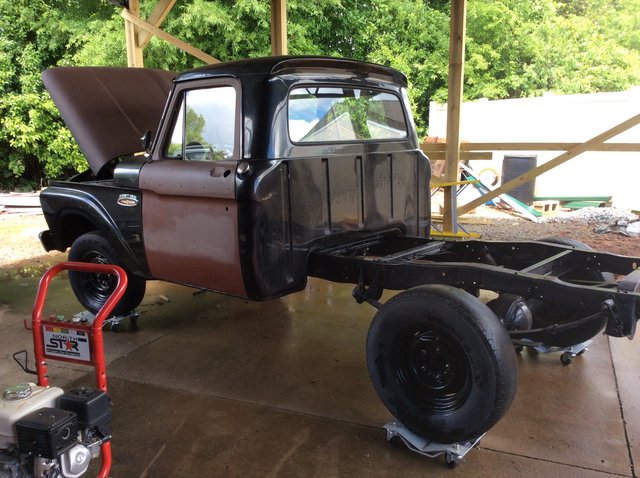
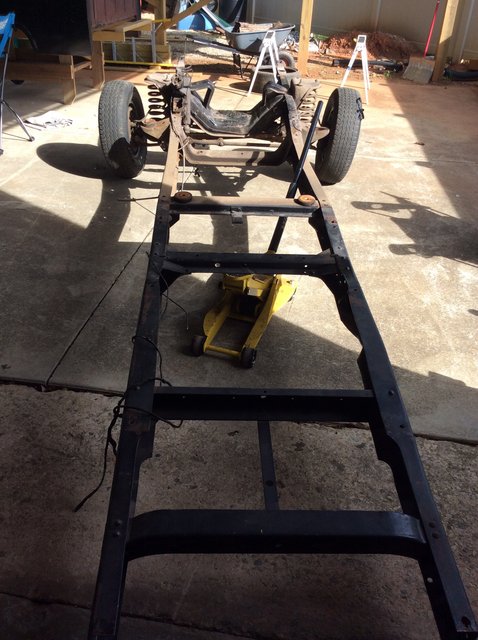
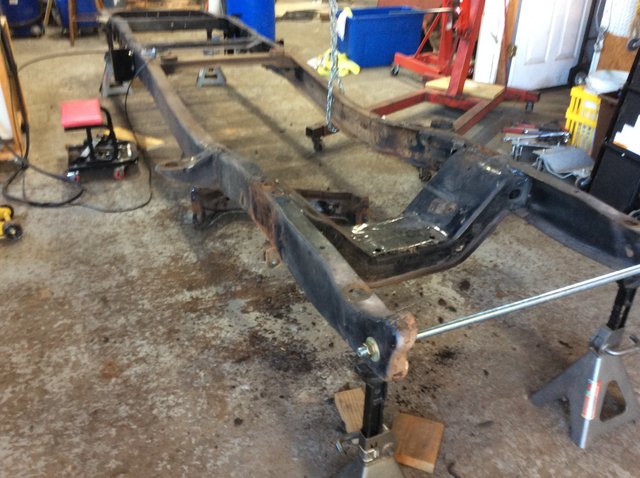
OK down to bare frame, next prep for new front and rear suspension.
User avatar
FarmMotorSports
Posts: 431
Joined: November 13, 2010, 6:55 pm
Location: KS, Lawrence
United States of America

Re: BlackTruck Build 65

Post by FarmMotorSports »

So are you keeping that Chrysler seat cover?
I promise it will wear like iron. But it is an acquired taste.
61 F250 Unibody
5.9 Ford Diesel / Allison
Disk brake straight axle
SteveCanup
Posts: 1096
Joined: November 7, 2014, 11:08 pm
Location: Wytheville, Virginia
United States of America

Re: BlackTruck Build 65

Post by SteveCanup »

...And I'm here...subscribed and watching! Excitement abounds! What a great score....can't wait to see what you do with this one.
Last edited by SteveCanup on August 29, 2020, 7:50 am, edited 1 time in total.
1964 F-100
Image
JeffinMooresville
Posts: 242
Joined: January 23, 2018, 8:12 pm
Location: Mooresville, NC
United States of America

Re: BlackTruck Build 65

Post by JeffinMooresville »

See, learn something new every day. I wondered about the seat, vin called for woven red, but i didn't think that was a stock color pattern. So you are saying that Chrysler seat covers would fit ?

I actually like the seat, but not for this truck. Low back buckets , as soon as i find some. My buddy with a 65 ranger says the old school seats aint that comfortable. Thought about modern seat out of something newer, but they all have headrest, and i don't want anything that sticks up in back window.

Anyway, meant to post pic of bare frame starting point.

At this stage, i had already removed rear suspension, leafs and frame mounts. The suspension kit i bought requires taking off almost everything attached to the frame.

Image
Jeff in Mooresville
63 Flareside and 65 Styleside projects underway
oldsmiley
Posts: 281
Joined: December 20, 2016, 9:28 am
Location: Durham nc
Contact:
United States of America

Re: BlackTruck Build 65

Post by oldsmiley »

NICE truck Jeff, you must have a golden horse shoe up your butt. That should be a relatively easy build, as far as (very little rust repair). Glad to
see the pics, I might even get some ideas for mine. You keep working and I'll keep watching.... :D
User avatar
FarmMotorSports
Posts: 431
Joined: November 13, 2010, 6:55 pm
Location: KS, Lawrence
United States of America

Re: BlackTruck Build 65

Post by FarmMotorSports »

What I can tell you is that the material used in that seat cover is a pattern used by the Chrysler Corp. The actual seat frameing looks factory Ford...
61 F250 Unibody
5.9 Ford Diesel / Allison
Disk brake straight axle
JeffinMooresville
Posts: 242
Joined: January 23, 2018, 8:12 pm
Location: Mooresville, NC
United States of America

Re: BlackTruck Build 65

Post by JeffinMooresville »

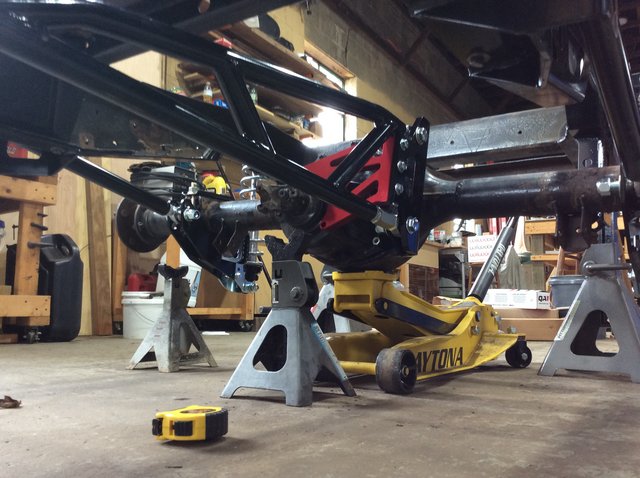
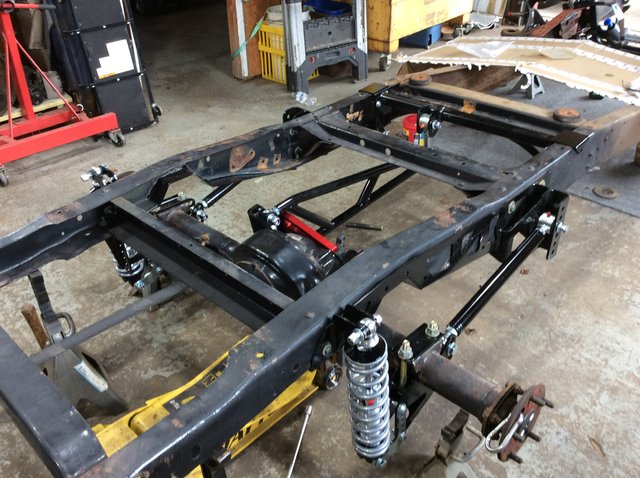
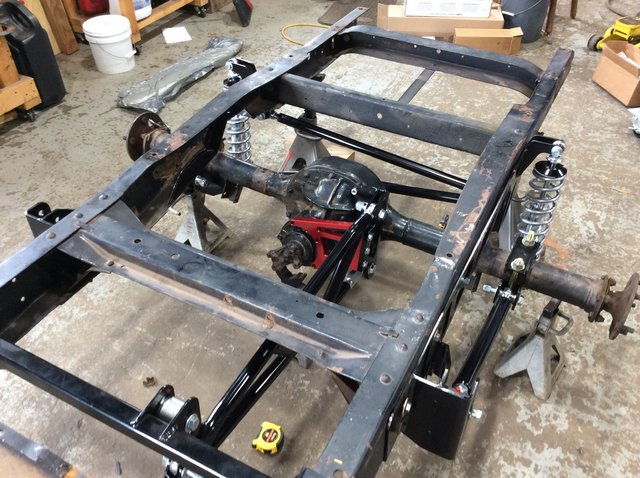
Ok, trying to get caught up on pictures and progress. I started a couple of months ago, but will get current soon. In any case, the work / pictures reflect work over past few months.

For suspension, i decided to go with QA-1 front and rear suspension kit. Kit fits 65 -79 f100s. It was pricey, but was mostly a bolt on kit that was in line with my skills.

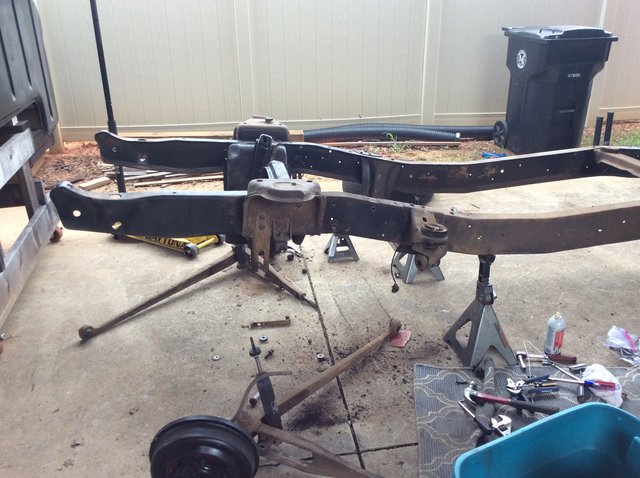
Start on the back end. Easy enough to drop the leaf springs, unbolt the shocks and rear suspension is out.

Image

Image

Image

Next is the hard part. All of the leaf spring hangers and rivets have to be removed. Tried every technic, some come easy some not. A few, i had to drill to get out. In addition to the hanger rivets, there are also some rivets on top and bottom of frame that must be removed so the hardware can sit flat against the frame.

Didn't get pics during the rivet removal fest, probably because i was cussing and sweating most of the time.

Now you have to trim some of the frame, so the brackets sit flush and also cut the C-Notch.

Image

Image

Now you bolt the primary bracket onto the frame. It uses holes from leaf spring brackets for alignment and also requires some additional holes to be drilled. I am just dry- fitting at this time so not all bolts are in.

Image

Image
Jeff in Mooresville
63 Flareside and 65 Styleside projects underway
My wife's nightmare
Posts: 341
Joined: October 3, 2009, 8:22 am
Location: Mooresville, NC
United States of America

Re: BlackTruck Build 65

Post by My wife's nightmare »

Welcome back!! That is going to be a nice ride for sure. You are really putting the heat on me to keep up but I appreciate the motivation!
oldsmiley
Posts: 281
Joined: December 20, 2016, 9:28 am
Location: Durham nc
Contact:
United States of America

Re: BlackTruck Build 65

Post by oldsmiley »

Either that's an easy installation, or you're just making it look easy. I don't think I've seen this particular setup before...interesting.

I'll surely keep watching.......
JeffinMooresville
Posts: 242
Joined: January 23, 2018, 8:12 pm
Location: Mooresville, NC
United States of America

Re: BlackTruck Build 65

Post by JeffinMooresville »

Hi Smiley,

The hard part is removing the hardware and brackets off of the frame. The rear took me a full weekend to remove the leaf spring brackets and related rivets. I think it is like 16 rivets each side that must be removed. Once that is done, the brackets bolt up well and use the existing holes for alignment.

I still have to drill so e holed that are required and not existing, will do that when i break it back down.

Ok on with pics or the rear assembly.

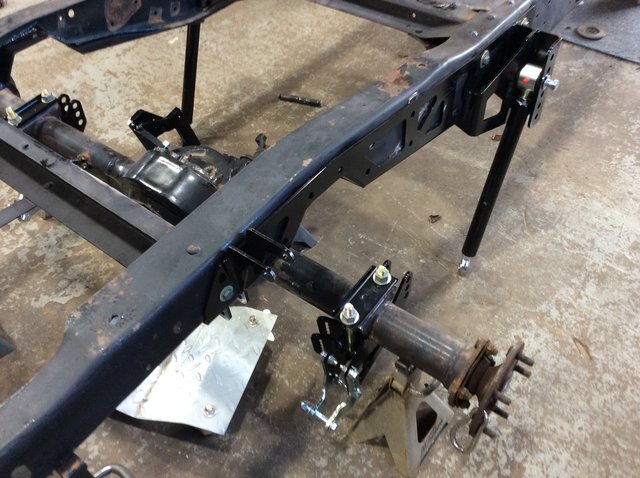
First you cut a couple of notches into the leaf spring mounts on your diff, this makes room for the new brackets .

Image

Then you just bolt up new brackets to diff. These brackets are used for shock mount in the back and the front arm (i guess called 4 link arm, is actually a 3 link)

Image

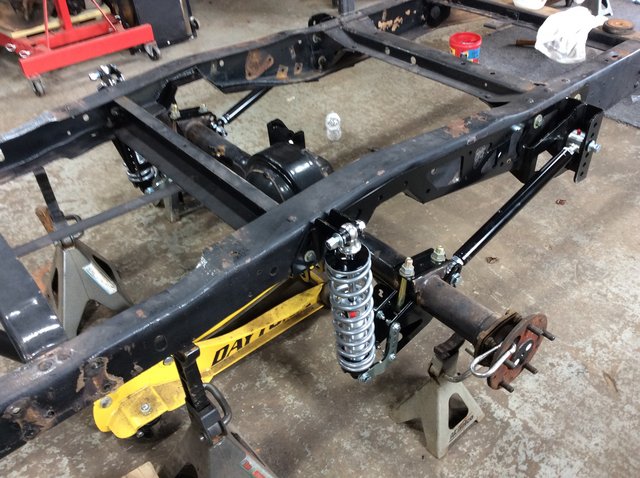
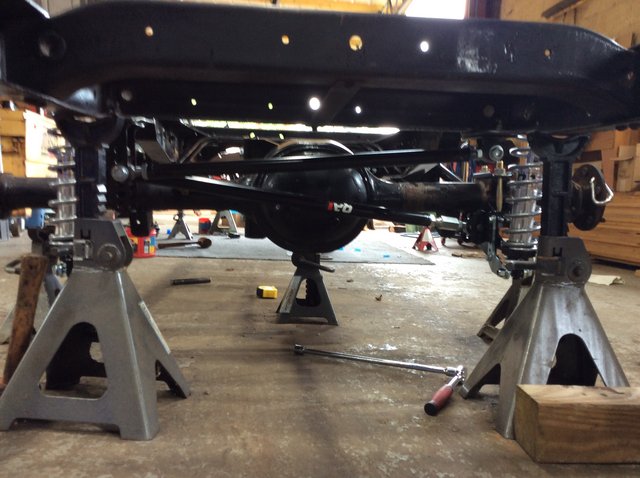
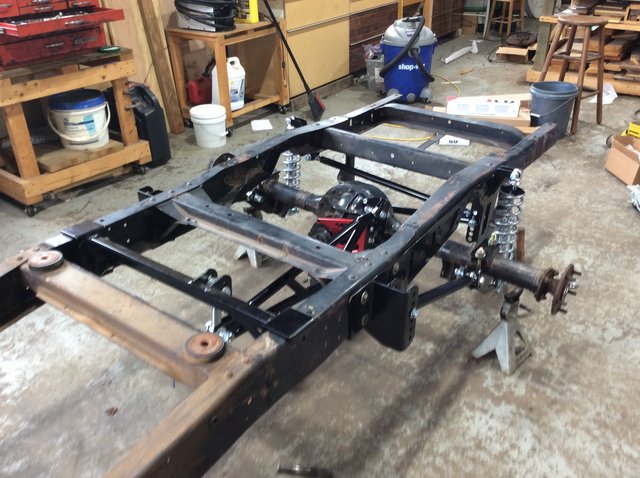
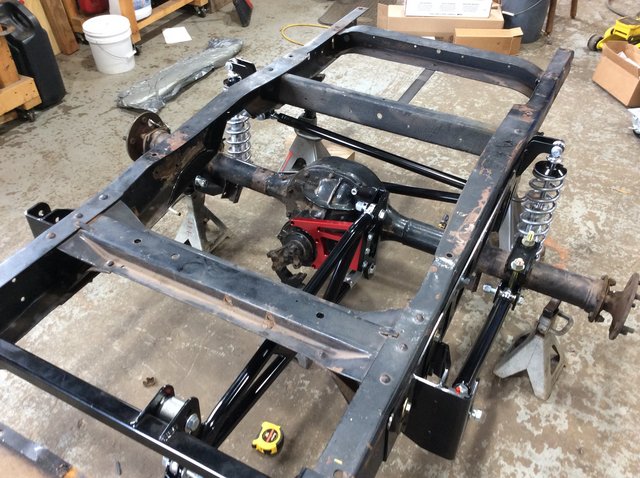
Next assemble coil over shocks, install hang them from the top of C -notch bracket and connect to the diff brackets, with jack under diff, connect the front bars and now the diff is hanging from new brackets.

Image

Image

next there is a torque arm, that connects from the differential pumpkin ball bolts. It connects to a new crossmember installed toward front. The torque arm is the a shaped bar in pic.

Image
Y
Image

Image

Image

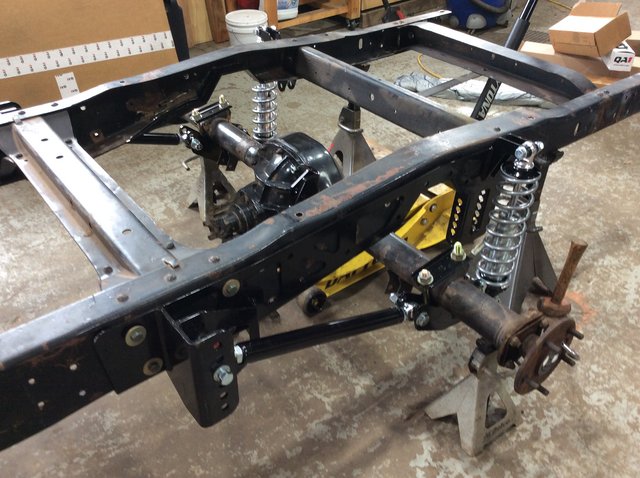
Then finally, there are 2 panhard bars that keep the whole thing from moving side to side.

Image

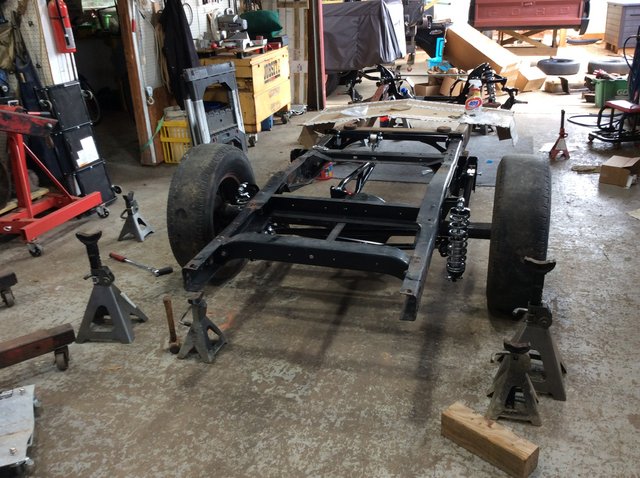
Boom read end suspension mock up complete.

Image

Image

Image
Image
Jeff in Mooresville
63 Flareside and 65 Styleside projects underway
grump
Posts: 959
Joined: September 14, 2006, 6:47 pm
Location: ohio

Re: BlackTruck Build 65

Post by grump »

Dang, that looks like a pretty hefty rear suspension. Looks good
JeffinMooresville
Posts: 242
Joined: January 23, 2018, 8:12 pm
Location: Mooresville, NC
United States of America

Re: BlackTruck Build 65

Post by JeffinMooresville »

Ok, moving to front. The pictures are a little out of sequence. I started on the back, got the C- notch brackets on and realized i would probably want to be able to flip the frame around for better access to cut the front, so i did that next.

Started with bare frame
Image

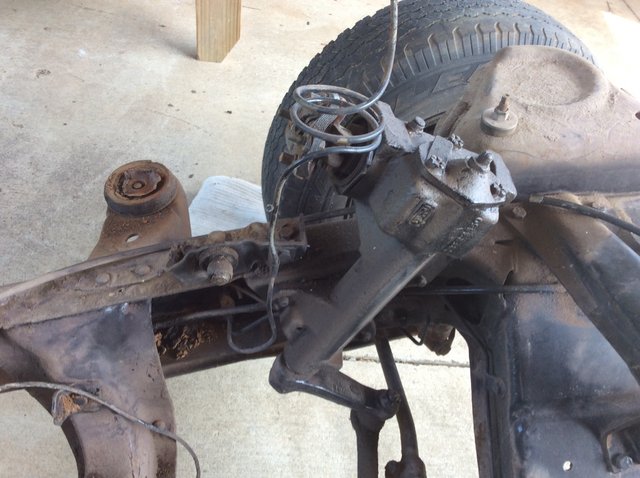
Next removed the steering box and any related brackets

Image

Dropped the twin i beams, not bad except there is always one friggin bolt that takes 2 hours.

Image

Image

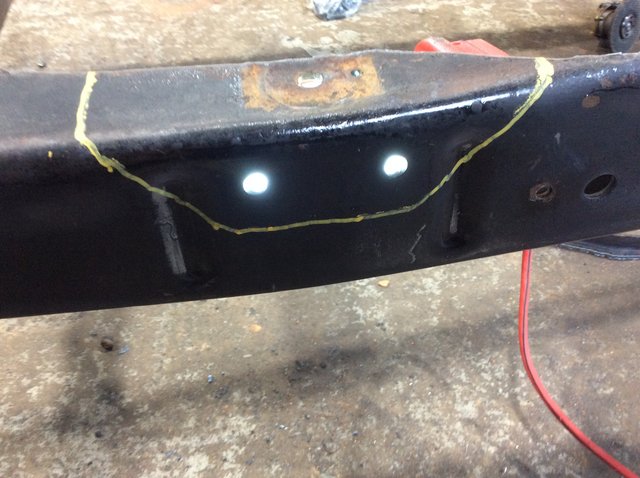
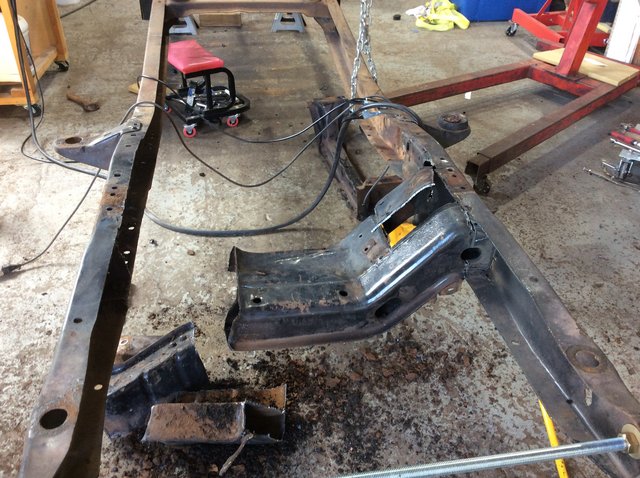
Next - rivet time on the shock towers. Was glad i was able to flip frame around to cut and bang on these.

Image

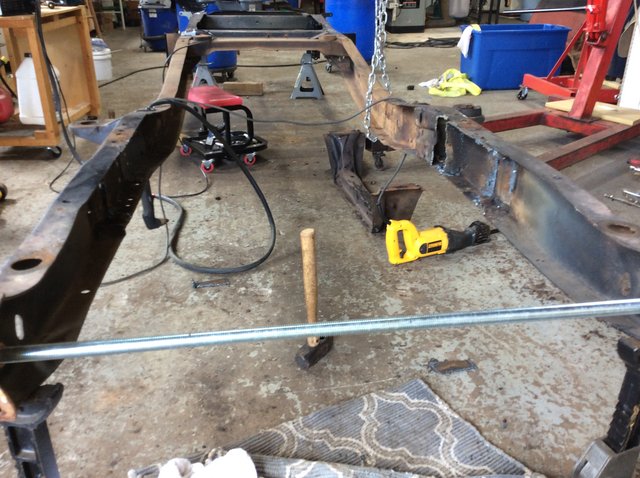
I used a 5/8 threaded rod up front to keep the frame square while i removed the cross members.

Removed the rivets from trans cross member and removed that.

Image

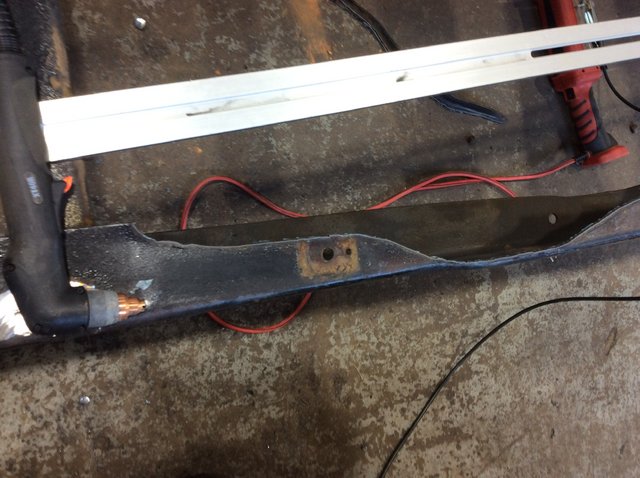
Now on to the main cross member, broke out the plasma cutter for this step.

Image

This part is a beast, so i just kept cutting pieces, until i got everything removed.

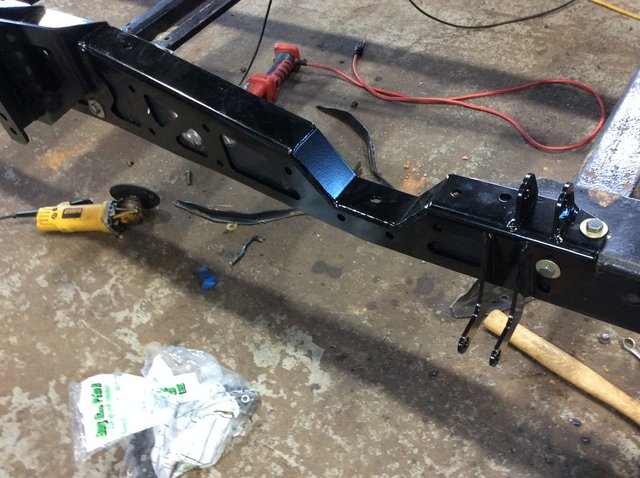
Finally, now just had to get the grinder out and clean up the remnants.

Image

Remove all rivets from the cab mounts up, and also have to ream out some standard frame holes to 1/2 to use with the kit.

Demo complete, ready for install.
Jeff in Mooresville
63 Flareside and 65 Styleside projects underway
JeffinMooresville
Posts: 242
Joined: January 23, 2018, 8:12 pm
Location: Mooresville, NC
United States of America

Re: BlackTruck Build 65

Post by JeffinMooresville »

Switching image size to 800x600 in postimage to get more detail, let me know how it looks on your monitor. I use my iPad, so hard to tell.

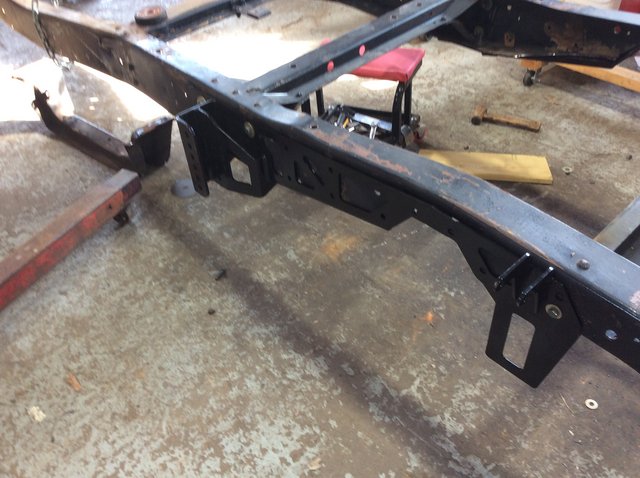
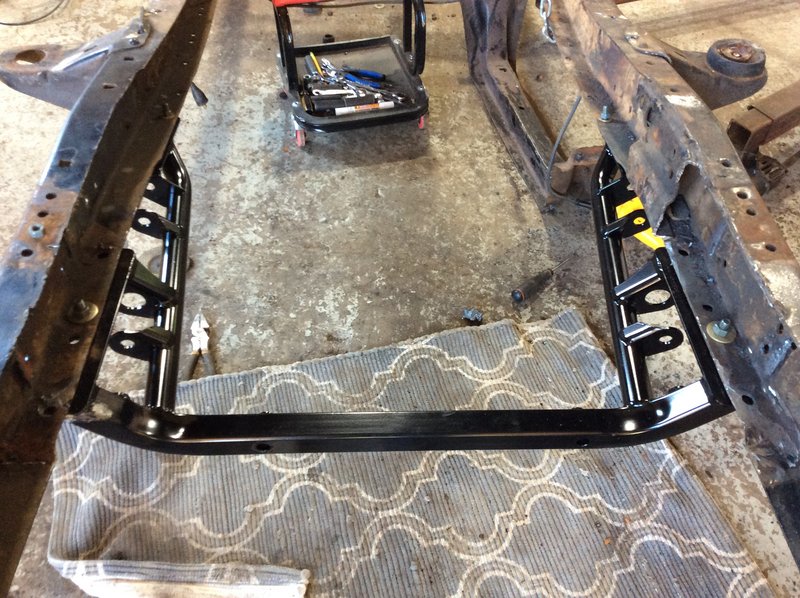
Ok test fit on lower bracket to make sure this boy is going to fit. Uses existing holes on Frame for alignment.
Image

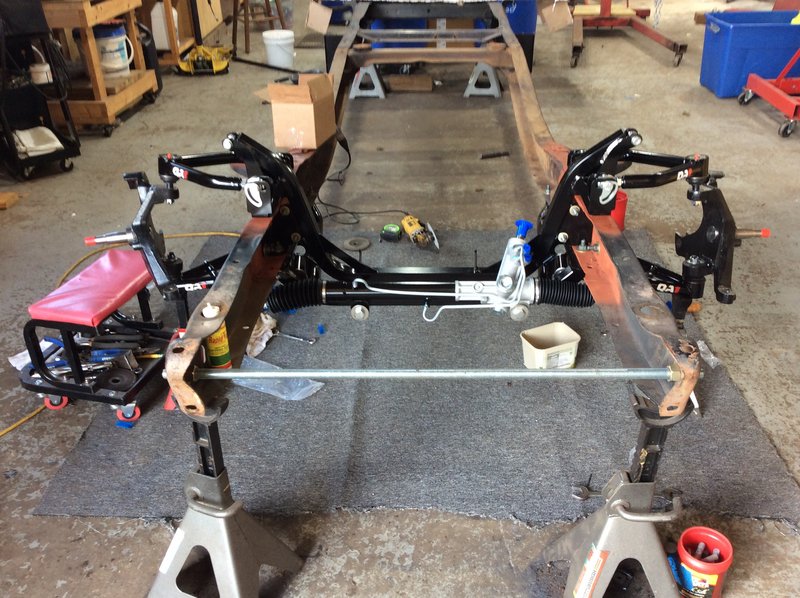
Meant to take more step by step pics, but this after a little cleanup of the frame, lower and upper main cross members in place. They kind of sandwich the frame.

This shot also has upper and lower control arms installed.

Image

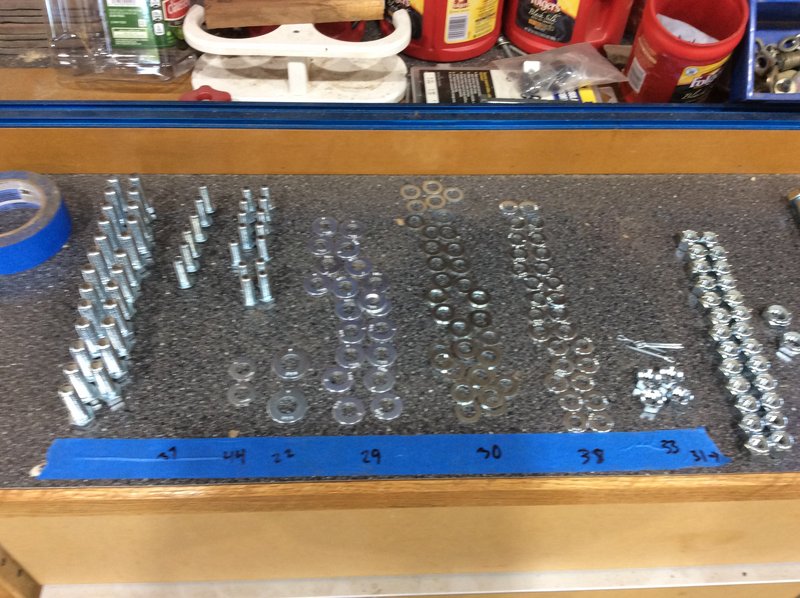
At this point, the main challenge is keeping the right bolts/ washers and nuts straight.

Image

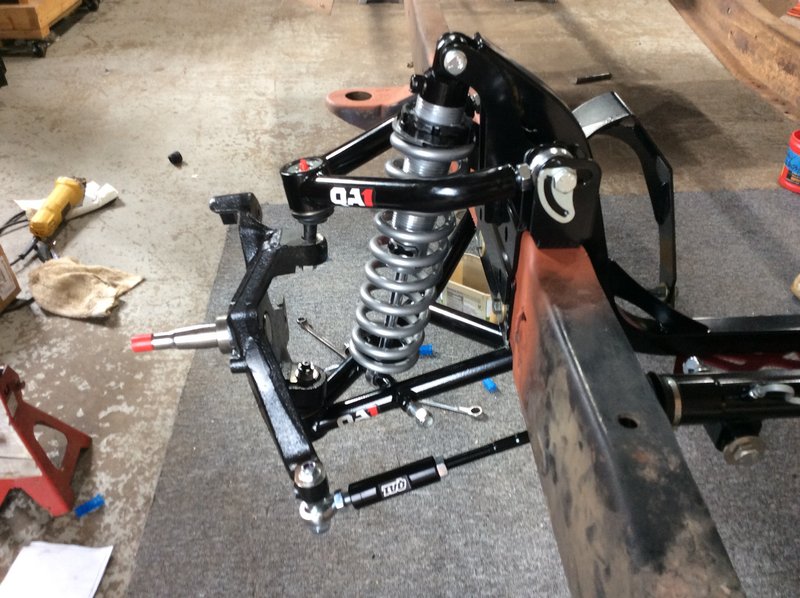
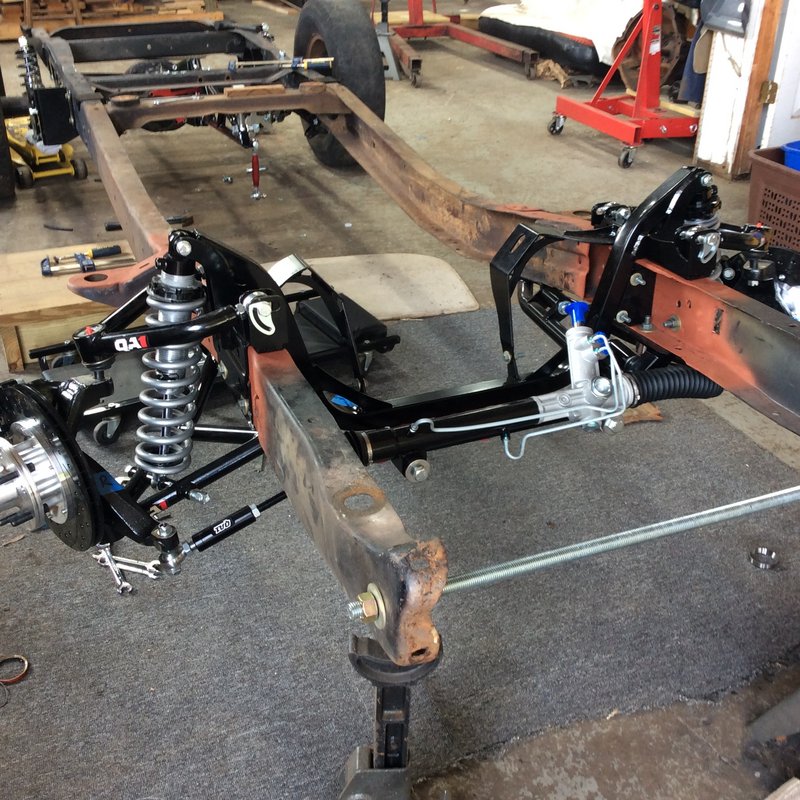
Next mount the spindles - this kit uses 79-81 Camaro 2” drop spindles - more on this later.
A couple of bolts in the cross member mounts the power Rack and pinion unit

Image

Next, pre assemble the coil over adjustable shocks. You have to press swivel mounts in each end and position the spring adjusters.

Image
Jeff in Mooresville
63 Flareside and 65 Styleside projects underway
SteveCanup
Posts: 1096
Joined: November 7, 2014, 11:08 pm
Location: Wytheville, Virginia
United States of America

Re: BlackTruck Build 65

Post by SteveCanup »

Jeff,
Pics are crystal clear...and great. That's a lot of work removing those rivets! Been there done that...it's a pain. Ford didn't want them to come out,lol.
That looks like a great kit, I'm sure the truck is going to sit perfect and ride and handle very well.
1964 F-100
Image
JeffinMooresville
Posts: 242
Joined: January 23, 2018, 8:12 pm
Location: Mooresville, NC
United States of America

Re: BlackTruck Build 65

Post by JeffinMooresville »

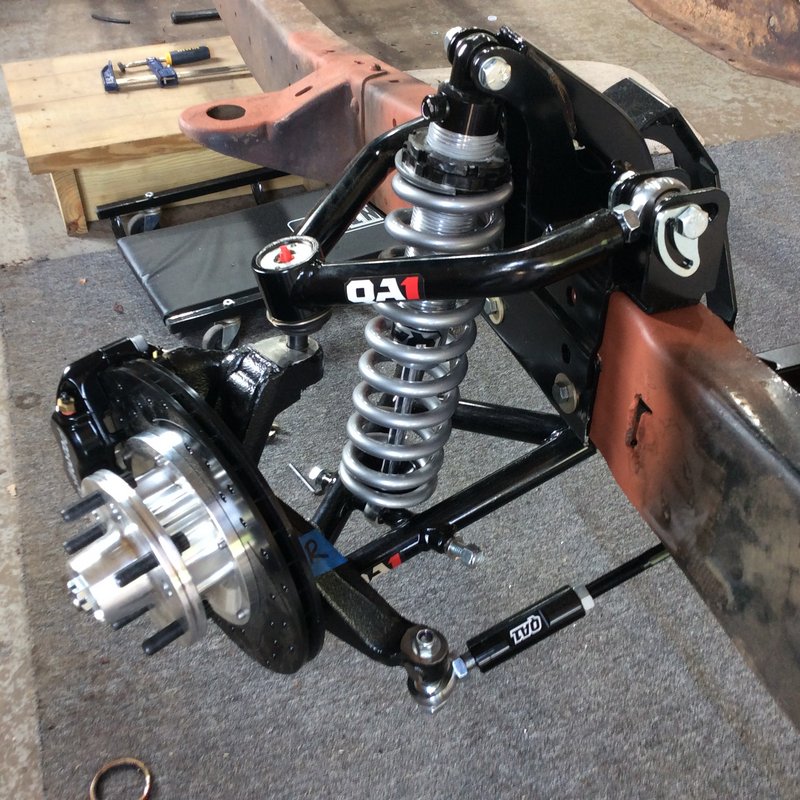
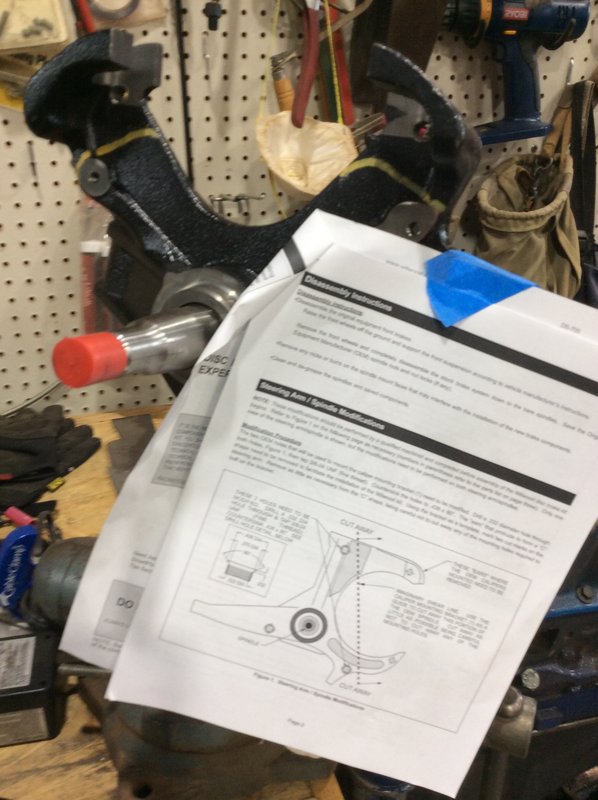
Everything has been going along pretty good so far. The kit uses 79-81 Camaro front spindles and i ordered the extra drop so they are 2” drop spindles. Kit does not include rotors or brakes, so i decided to go for Wilwood brakes.

Well the wilwood brake kit requires that you cut the stock caliper brackets.
Image

Image

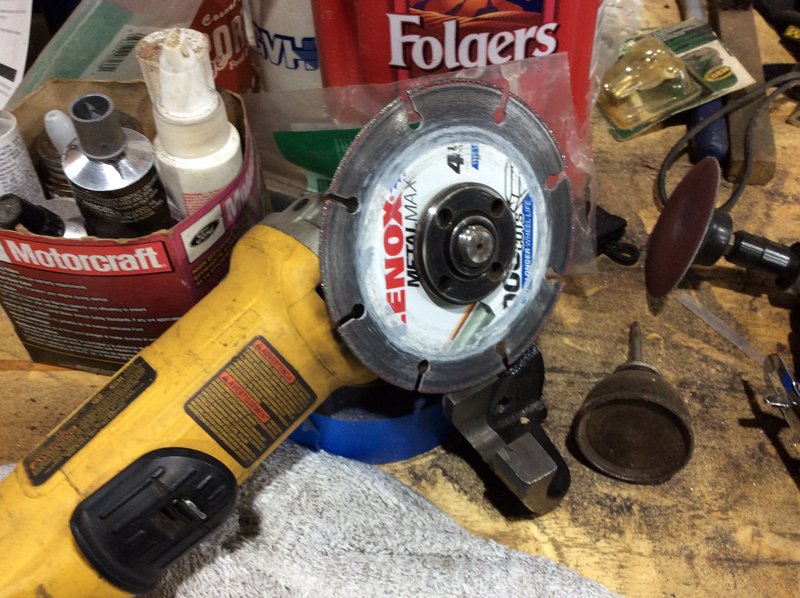
Speaking of cutting, i have been using these lenox metal blades on the grinder and really like them. They are $15 a blade, but so far seem to hold up. Found at tractor supply or lowes.
Image

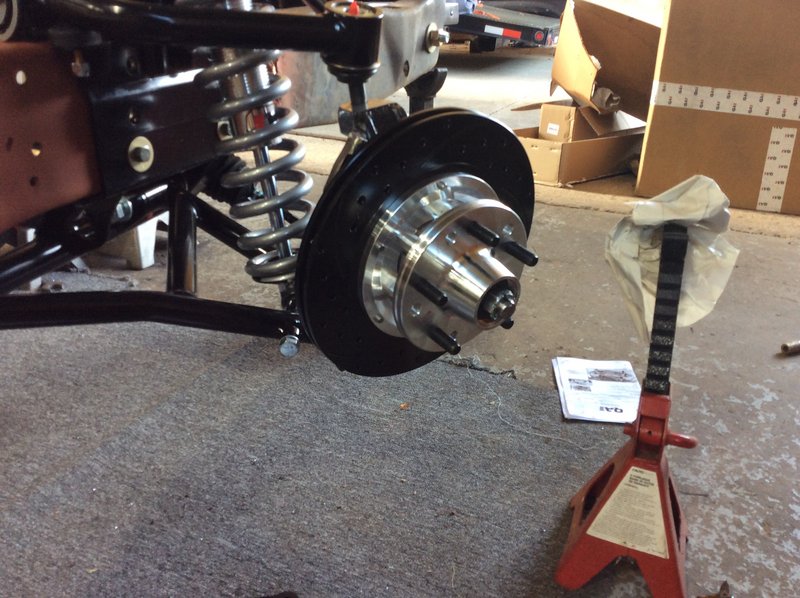
Ok, so cutting part done, put the spindles back on and mount the hubs.
Image

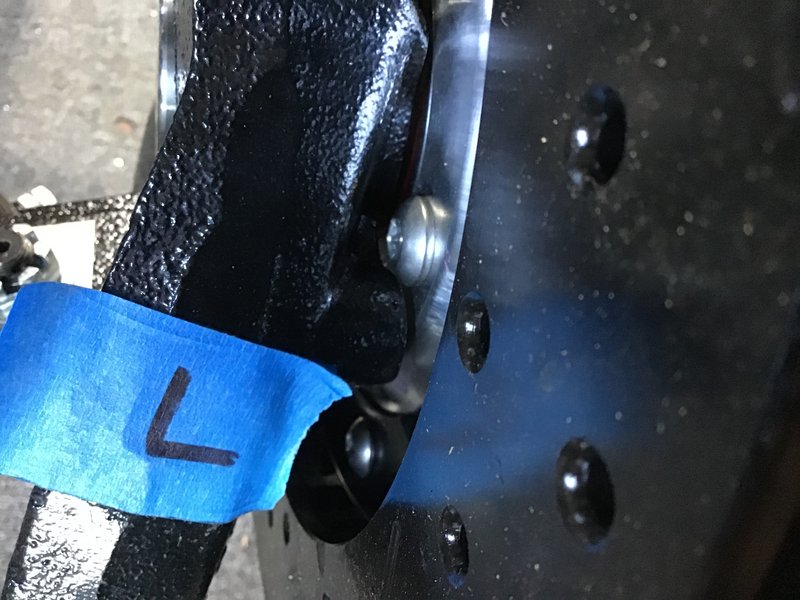
Now comes the problem, the hub and rotor assembly slide in the spindle too far and parts of the hub assembly, bolt heads etc. come in contact with the spindle bracket when rotating.
Image

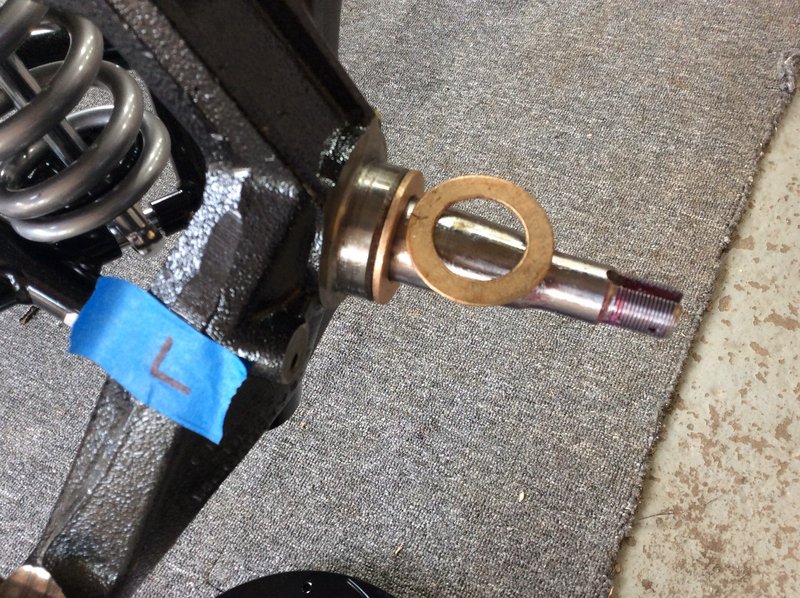
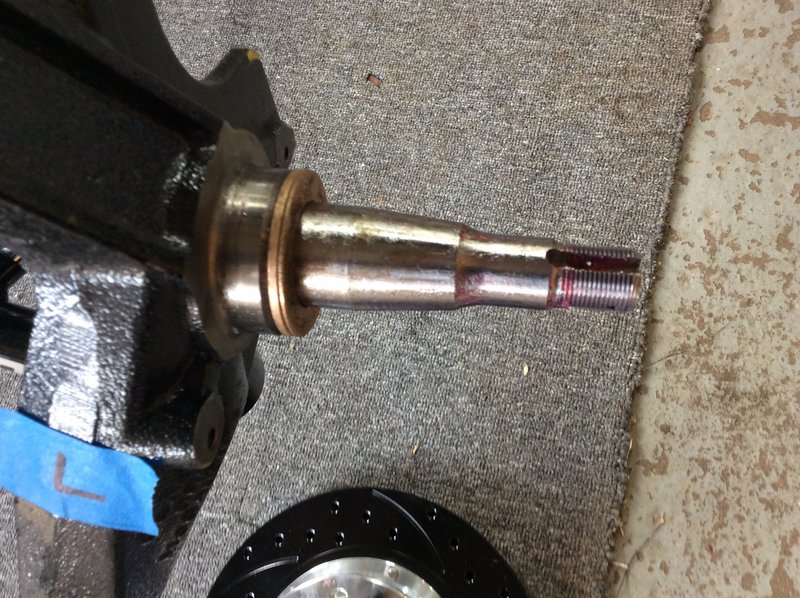
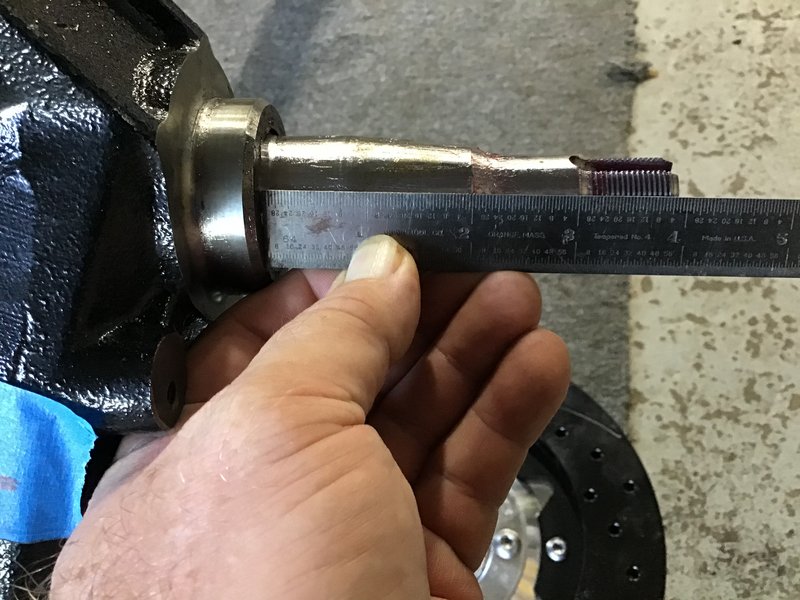
It looks like it needs maybe 1/8 or 1/4 for clearance. Drivers side is more-so than pass side. Thought maybe it was incorrect bearings, but have eliminated that, now i think it is the spindles.

Seems like the critical dimension is the turned area on the bracket, left of zero on the ruler. I wonder if i can add a shim washer to the spindle to move the assembly out a little. That is the surface that the inner bearing rides on.
Image

Anyway, that is where i am now, so looks like i will spend some time on the phone with QA1 next week. So far they have been good tech support wise.

Also still looking for a set of wheels and tires for the mock up. Need some 15” 5x4.5 or 5x4.75 bolt pattern. Hubs will allow either. Been watching craigs list, and struck out so far on salvage yards, just have not found the right yard yet.
Jeff in Mooresville
63 Flareside and 65 Styleside projects underway
JeffinMooresville
Posts: 242
Joined: January 23, 2018, 8:12 pm
Location: Mooresville, NC
United States of America

Re: BlackTruck Build 65

Post by JeffinMooresville »

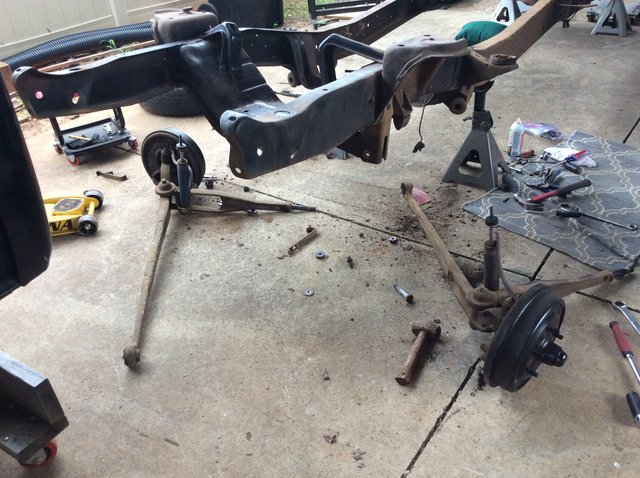
Ok, struck out with QA1 and Wilwood on the brakes / spindle clearance problem, but i think i have solution. Found some thrust bearings from McMster-Carr. They are basically precision washers that are meant to mount between bearings, i am basically using them as shims. They had a 1.25” ID that fit over the spindle perfectly and had 1/16” and 1/8” widths. So did test fit tonight and worked perfectly.
Next step is to find some temp wheels and tires i can use for the mock up.
Jeff in Mooresville
63 Flareside and 65 Styleside projects underway
JeffinMooresville
Posts: 242
Joined: January 23, 2018, 8:12 pm
Location: Mooresville, NC
United States of America

Re: BlackTruck Build 65

Post by JeffinMooresville »

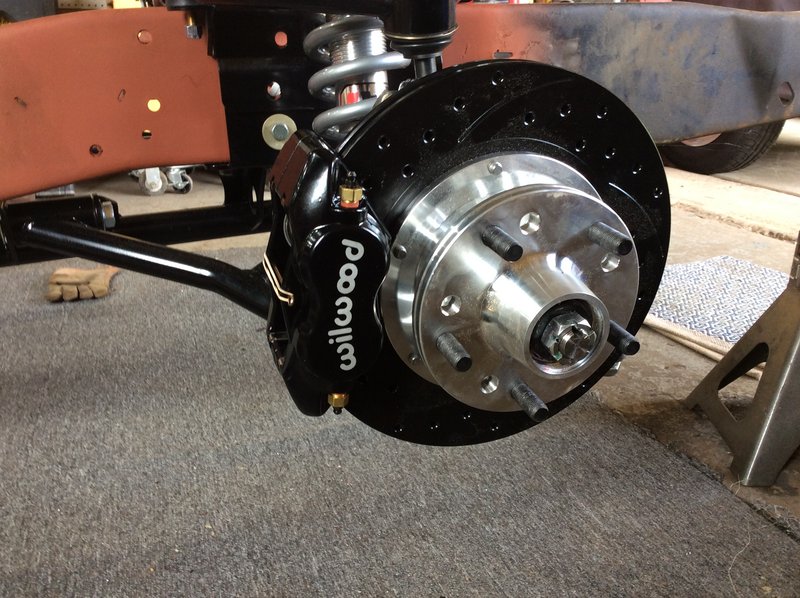
Alright, completed the initial assembly with the thrust bearing spacers, including calipers, and looks like it is going to work like a charm. Used 1/8 on one side and 1/8 and 1/16 on other.

Image

Here is the drivers side

Image

also had to do some more cutting on spindles so caliper mounting bolts had clearance.

Image

Might just work after all.

Image

Image

Image

Also found some wheels to complete the mock-up. I swear, i went to 10 salvage yards , nobody has old stuff anymore. Well, found some s10 wheels, but of course the tires were different size, dropped off at nearby shop to swap off original tires that were on truck to start with, at-least they are same size so i can see where stance is going to be.
Jeff in Mooresville
63 Flareside and 65 Styleside projects underway
Post Reply