64 SWB 5.0 M5R2 swap begins

A place just for our project & build threads.

Moderators: Kid, Casey 65

User avatar
Eallen66
Posts: 80
Joined: December 31, 2013, 5:01 pm
Location: Bargersville, Indiana
United States of America

64 SWB 5.0 M5R2 swap begins

Post by Eallen66 »

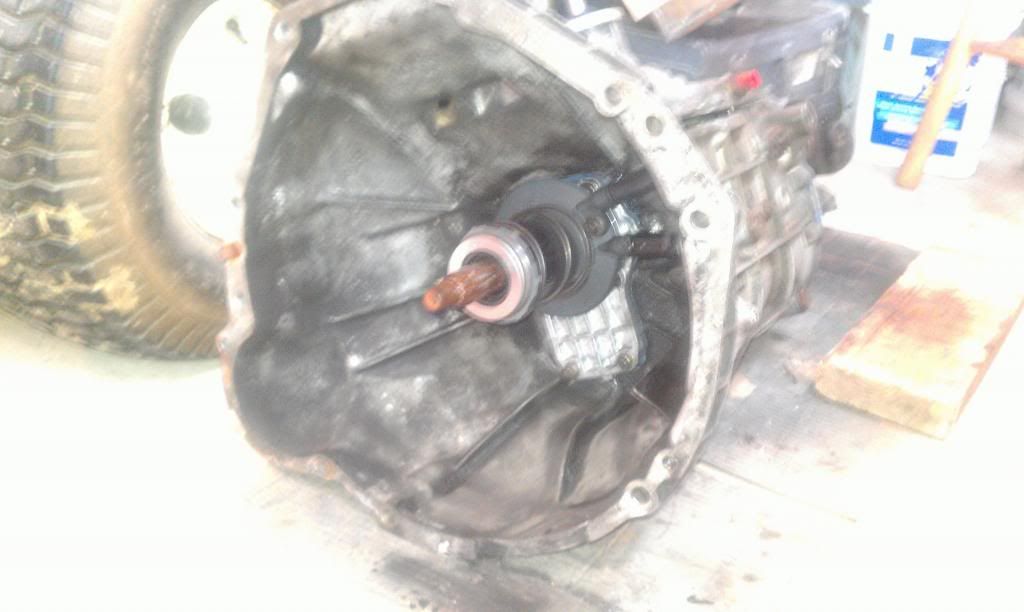
We are planning to make spring break constructive this year by pulling the 292, 3 on the tree out of my sons 64 custum cab shortly and swapping in a rebuilt 5.0, M5R2 five speed. With only a week befor we get sarted we finishing up the rebuild and tranny clean up.

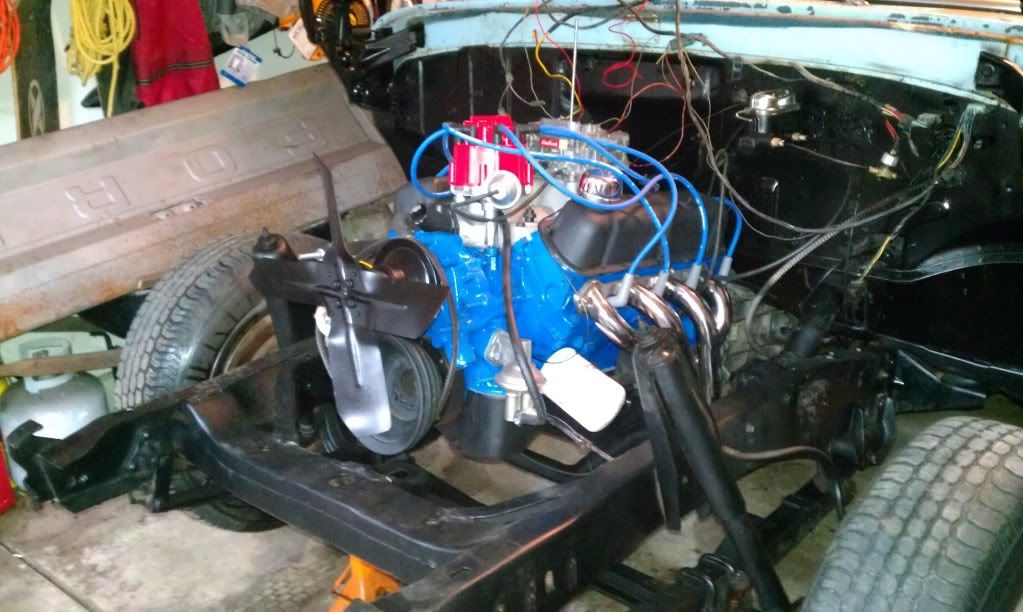
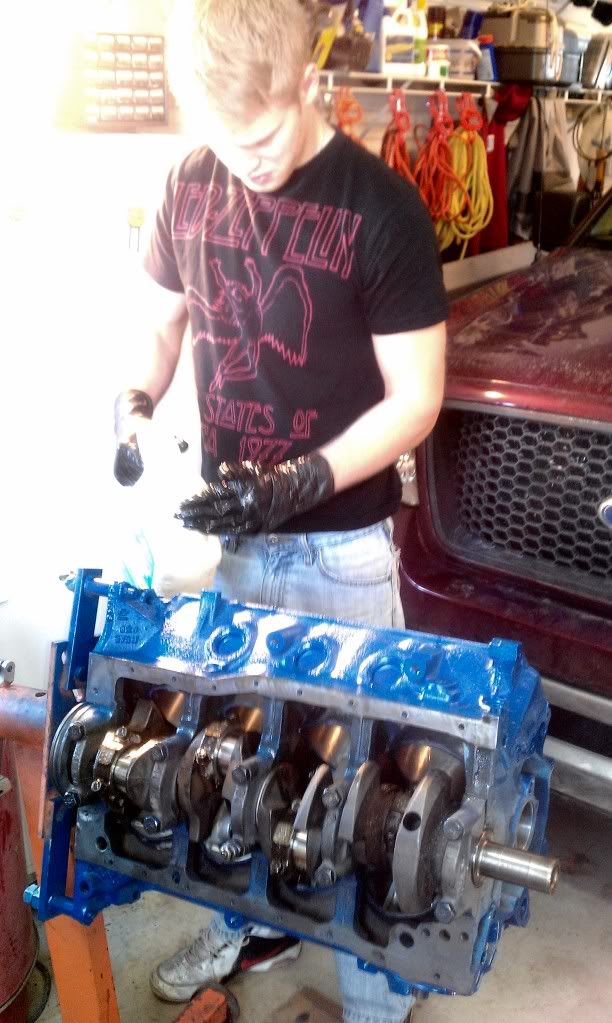
Since this is on my sons dollar as a high school senior working at a restaurant we ended up going with a good streetable hydraulic non-roller cam he can upgrade later as funds allow later. The Craig's list motor we snagged ended up not being as advertised when we tore it apart. Shock!! While it is a roller block the roller parts were long gone. An easy fix down the road. We were fortunate to snag a nice set of GT40 3 bar heads for it ready to roll. So toghether it went after the machine shop with my son learning the ropes on engine assembly.
Image

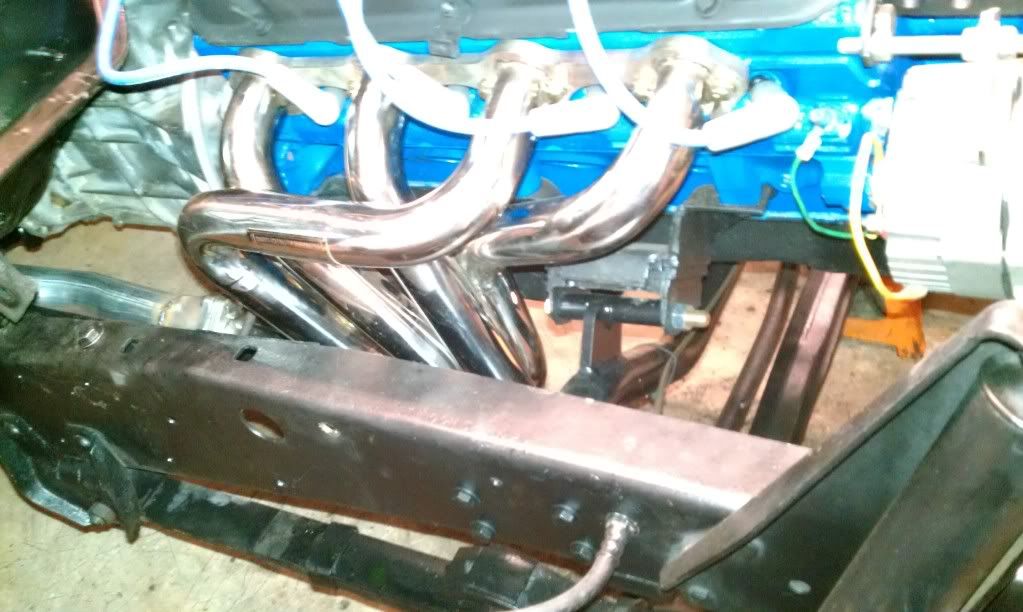
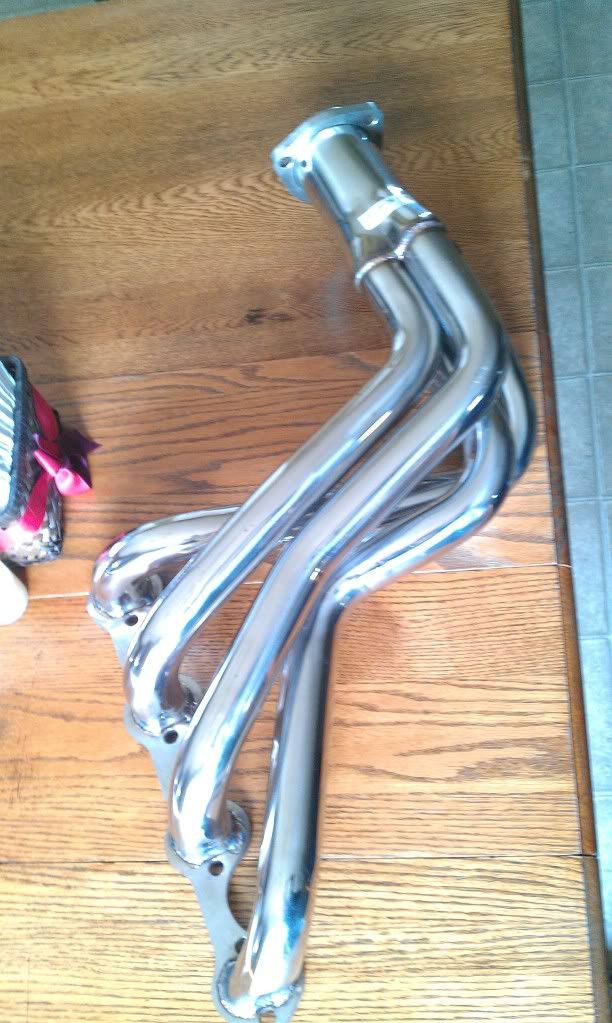
We did get some new stainless OBX headers in for a mid 70's F100 that I was pleasantly shocked with the heavy duty flanges on.
Image

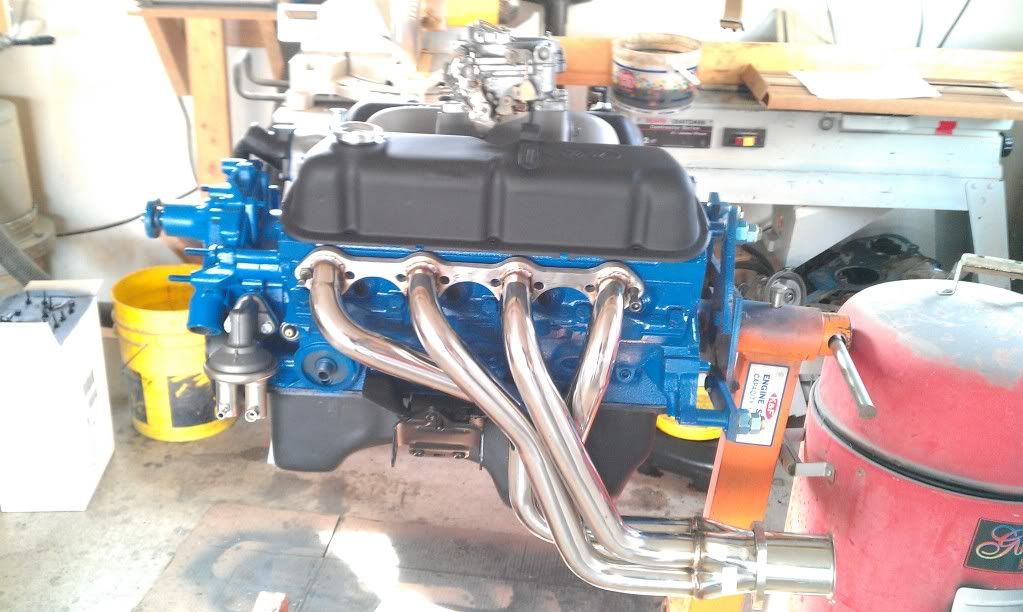
Since the original motor was a 2 barrel we got a got a good deal on a used Performer RPM and carb we rebuilt to top the motor off. A trial fit of the headers confirmed my suspicion of our need for 1" header bolts rather than the traditional 3/4" length due to the 3/8" thick flanges on the headers. Otherwise I think they are going to be good.
Image

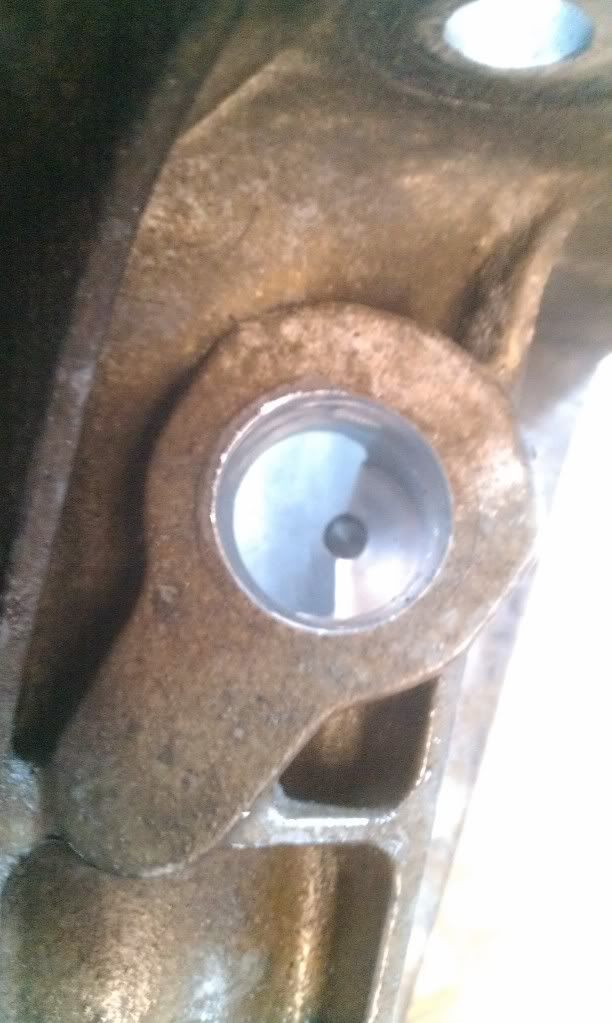
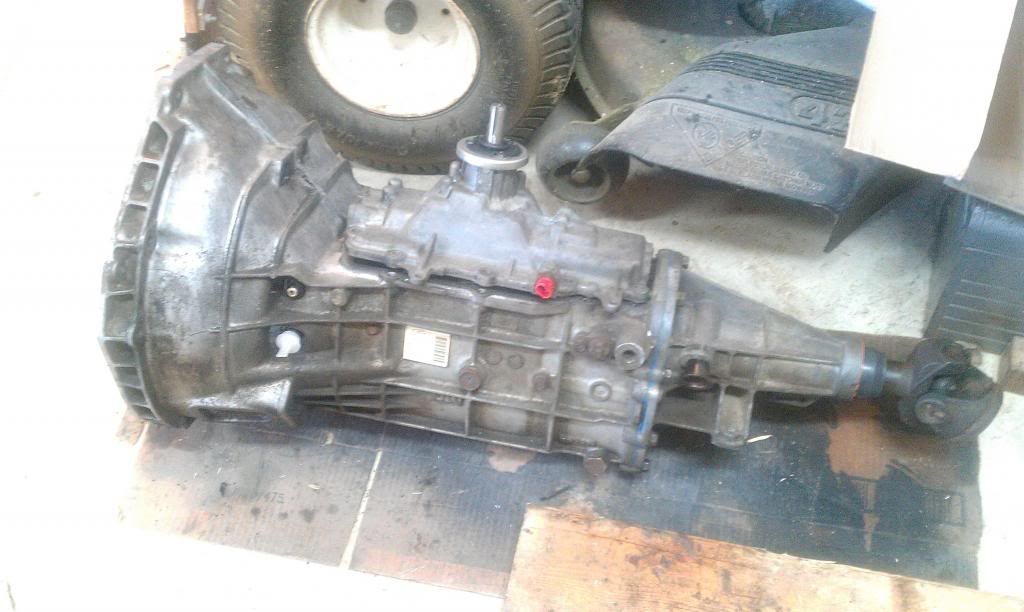
The M5R2 we got for $125 turned out to be a 1994 that runs the Speedo off the rear differential meaning it had no provisions for mechanical or electronic Speedo on the tranny of any kind. Everything I read said a new tail housing and tail shaft for a speedo gear were required. But since it had the casting for a Speedo hookup I decided to see what I could come do with a little gargage machine work. The hole is just a recess in the casting that is a dead end.
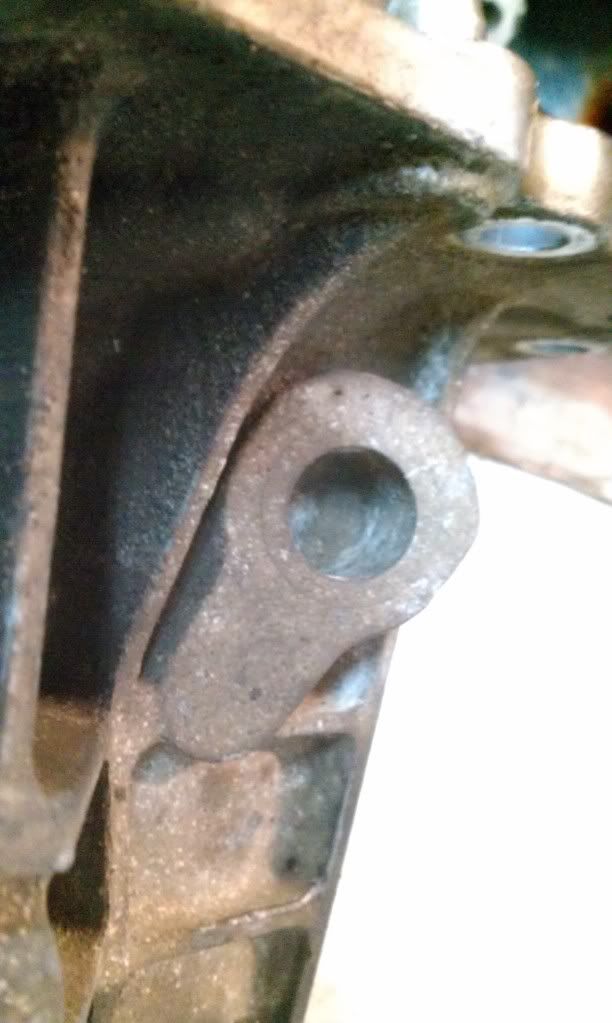
Image

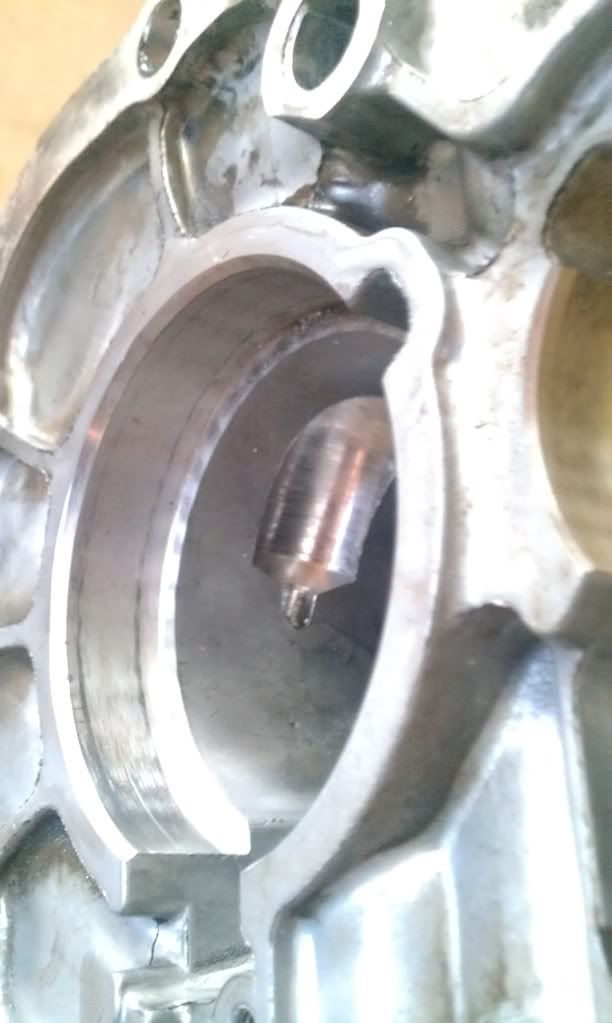
I chucked up the tail housing in the drill press with a 7/8 bit and drilled 2" deep on the outer diameter.
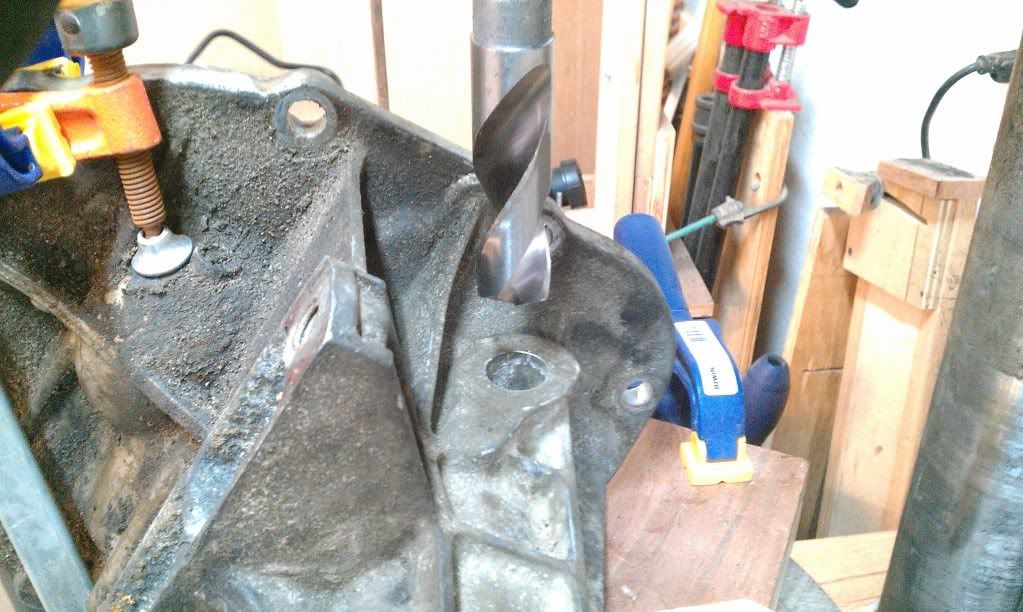
Image

Then I drilled the center deep enough to accept the tip of the Speedo gear to 13/64 diameter which is a hair over the 3/16 gear tip diameter.
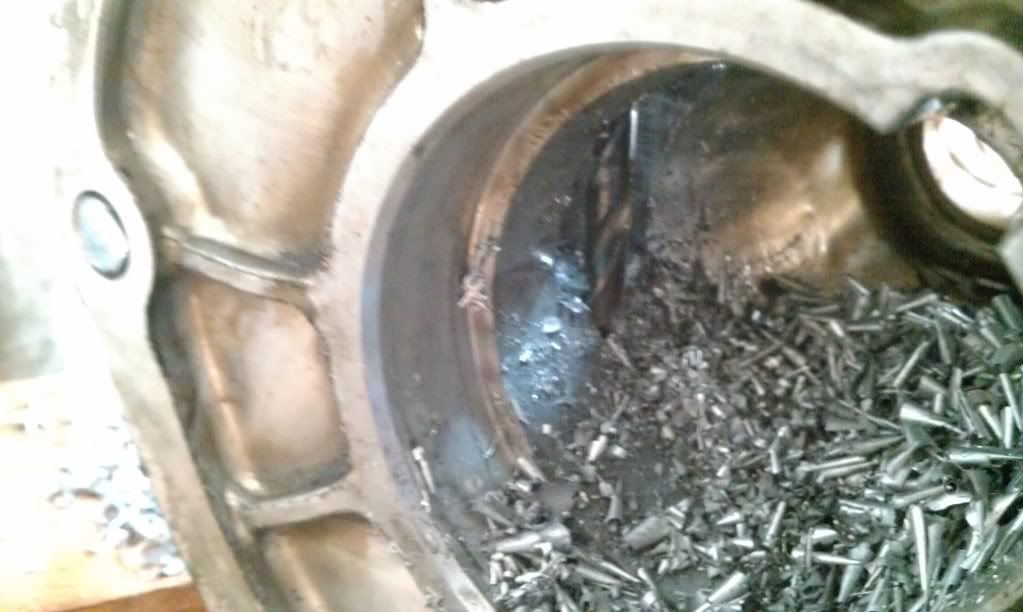
Image

Image
Image

Now for the shaft. It wasn't machined for the driven gear so I marked where the gear should go and marked it for a snap ring groove on each side. My phone went dead so unfortunately I didn't get any pics. This is where I left my precision past behind for a bit of gargage floor bubbafication. I took a dremmel with a fiber cutting wheel and held it 90 degrees to the shaft and turned the shaft by hand while holding the wheel where I wanted each groove until it was deep enough for the retaining ring. I then ground a groove the same length of the rounded recess inside the Speedo driven gear and placed a roll pin in the groove. Then I slid the driven gear over the roll pin and put in the second snap ring to hold it all on place. The roll pin is jammed between the snap ring and the gear to keep it from getting out. Unfortunately I sealed the tail housing on and blotted it down befor my camera got back up to charge but hopefully you get the idea.
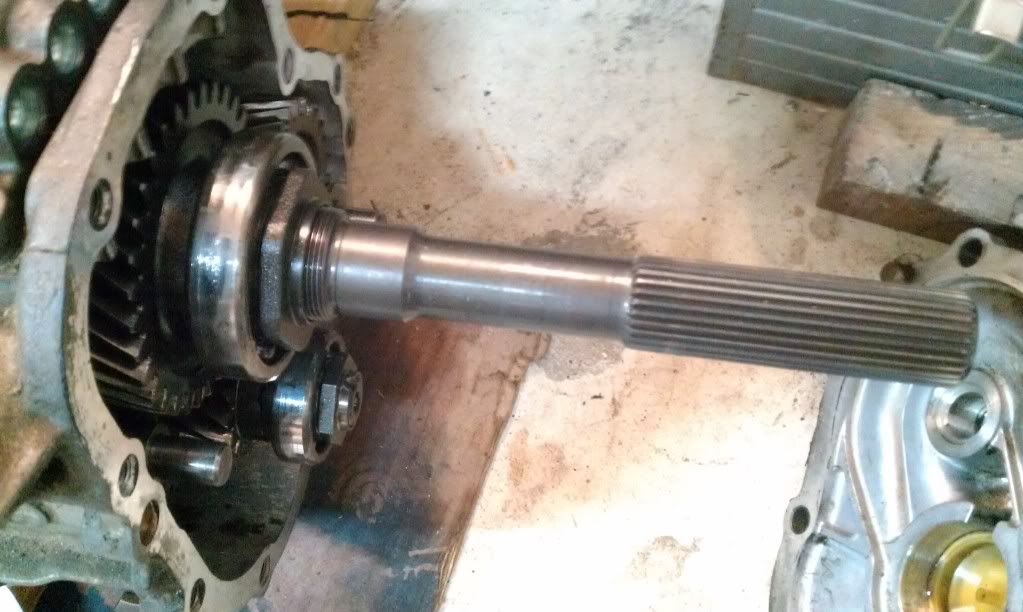
Image

The good news is when I slid the Speedo cable in it feels like it should and when I turn the tail shaft the speedometer cable turns! Hopefully it will work. If it doesn't that's what my son gets for free dad labor. :wink:

We put in a new front and rear seal, slave cylinder, and shift repair and seal kit while we have it out. My biggest strange challenge now is simply finding an actual shift lever for it. Hopefully with a few warm days ahead we can hit the junk yards and find one.
Image

Image
Last edited by Eallen66 on December 14, 2014, 6:51 pm, edited 4 times in total.
truckster
Posts: 215
Joined: June 11, 2010, 8:23 pm
Location: THE COLONY, TEJAS

Re: 64 SWB 5.0 M5R2 swap begins

Post by truckster »

i love build threads...keep the updates coming!
User avatar
Eallen66
Posts: 80
Joined: December 31, 2013, 5:01 pm
Location: Bargersville, Indiana
United States of America

Re: 64 SWB 5.0 M5R2 swap begins

Post by Eallen66 »

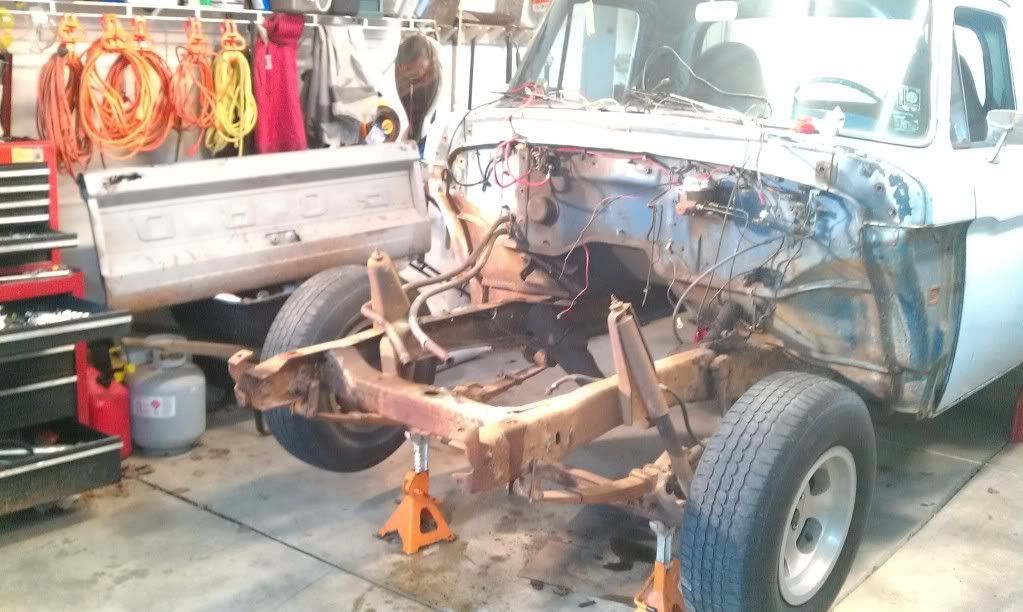
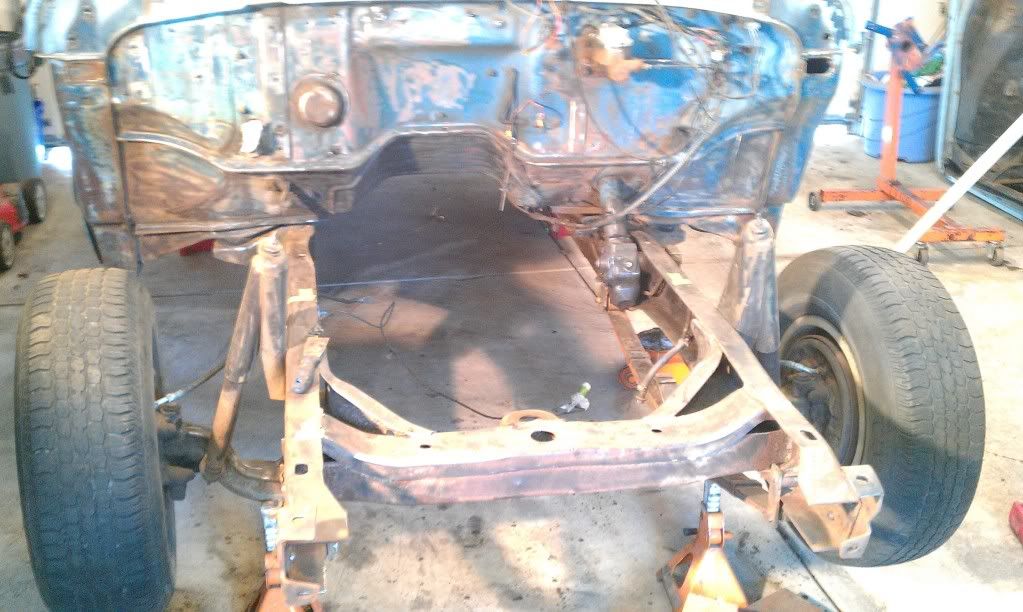
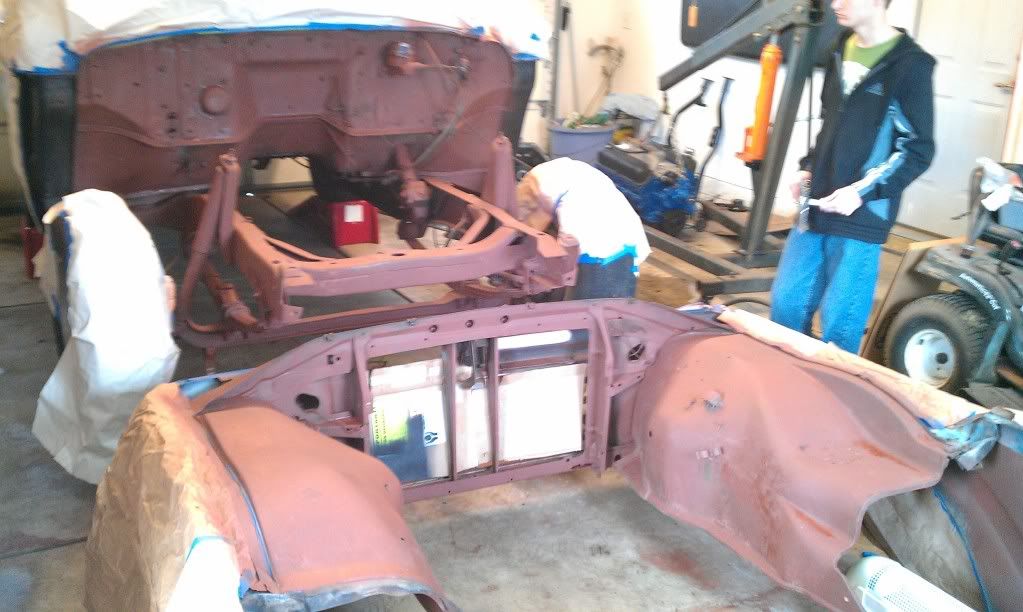
Off came the front clip & out came the 292 and 3 speed. Thankfully both are sold to be picked up tomorrow so I can uncluttered my garage a bit.
Image

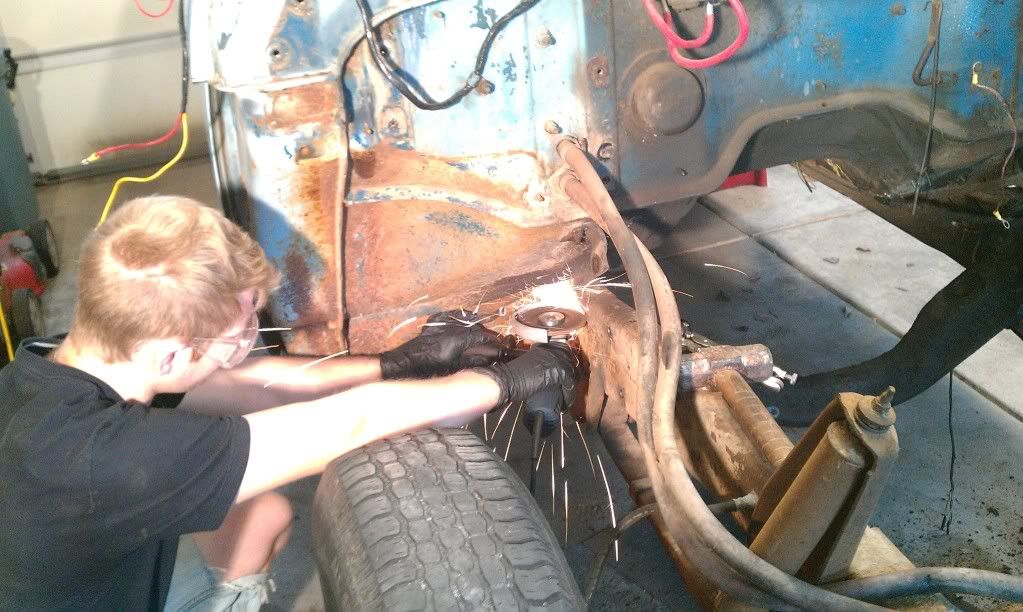
My son, Nate, gets busy removing the crossmember rivets. Since I have had the privilege of removing thousands from airplanes it is only fitting to allow him to have the joy of the experience with a few before I knock the rest out.
Image

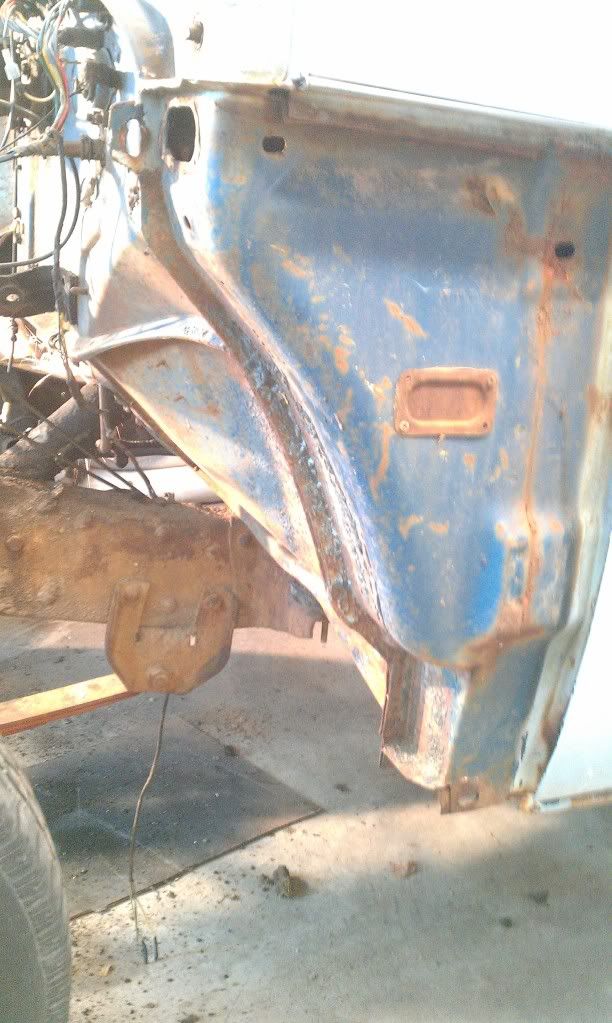
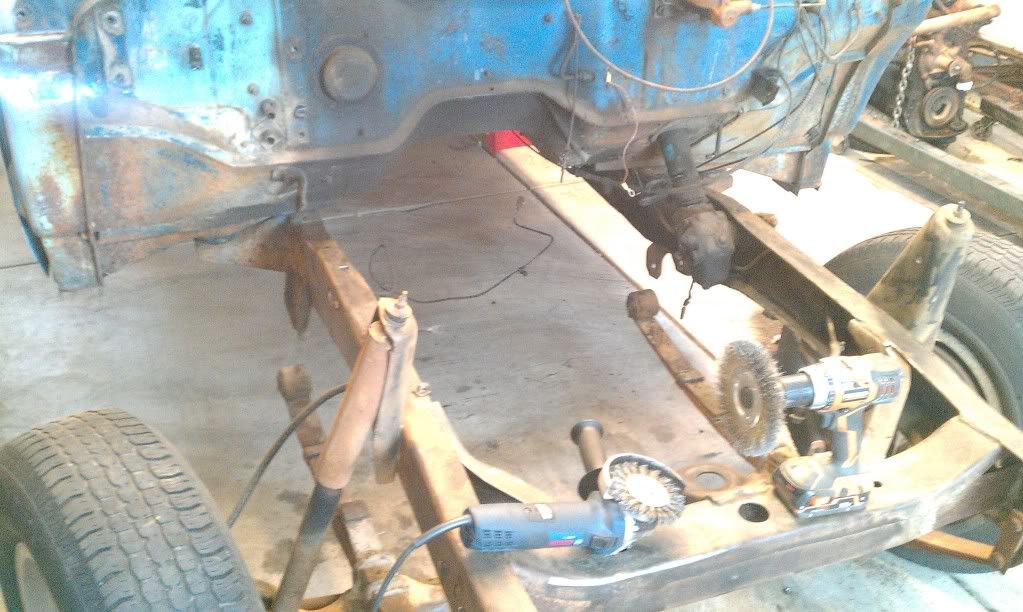
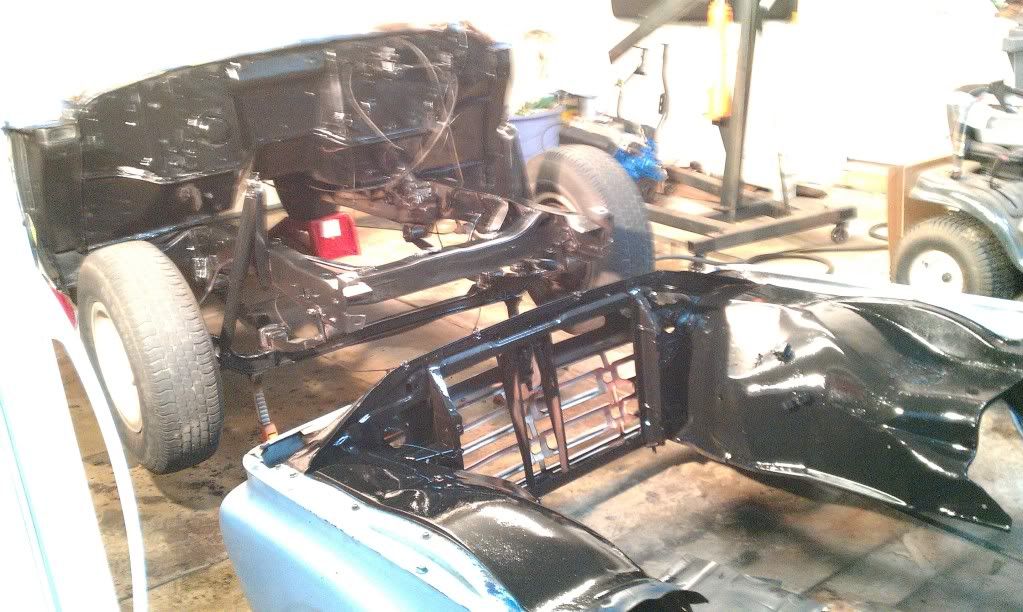
The inner fenders as well as the fenders themselves are in surprisingly good shape with only a few pin holes on the outer. Once the crossmember was out we got started with a wire wheel on the frame.
Image
Image

Unfortunately I realized today I neglected to find a crank v-belt pulley so the hunt is on since we only have 1 week to have the new motor in and back on the road as his daily driver. The joy of a week of spring break to get er done! :)

Eric
thenephilm
Posts: 542
Joined: June 25, 2009, 9:06 pm
Location: Cincinnati
United States of America

Re: 64 SWB 5.0 M5R2 swap begins

Post by thenephilm »

Looks like a good father and son project :)
Hi I'm Justin.
User avatar
JOSHF100
Posts: 86
Joined: December 2, 2012, 8:06 pm
Location: Birmingham Al
United States of America

Re: 64 SWB 5.0 M5R2 swap begins

Post by JOSHF100 »

Cool build.. And I agree, Your son will reflect back on working with his dad, for a lifetime. :thumright:
sixty8c10
Posts: 3
Joined: December 10, 2013, 4:08 pm

Re: 64 SWB 5.0 M5R2 swap begins

Post by sixty8c10 »

My son and I will be doing a similar build this summer for his 18th bithday/ High school graduation present. Best of luck to you.
User avatar
Eallen66
Posts: 80
Joined: December 31, 2013, 5:01 pm
Location: Bargersville, Indiana
United States of America

Re: 64 SWB 5.0 M5R2 swap begins

Post by Eallen66 »

Thanks guys. It is great to be able to do stuff like this that I would have enjoyed in my youth but didn't have a dad around to do so.
I am letting my son foot most of the bill since it is his truck but anticipate some additional work being part of a high school graduation gift. They are already blessed & don't want to spoil them too much! :wink:

Anybody know an affordable quick resource for crank v-pulley?
Last edited by Eallen66 on March 23, 2014, 9:01 pm, edited 1 time in total.
User avatar
skidoorulz
Posts: 359
Joined: April 11, 2013, 9:02 pm
Location: Billings MT
United States of America

Re: 64 SWB 5.0 M5R2 swap begins

Post by skidoorulz »

Nothing better than time in the garage with your son. That and in the mtns. snowmobiling. Over the years I have done many projects with mine. Many motor swaps in cars and trucks. My current rebuild of our 64. Building an open class hill climb bike, many snowmobile projects including one coming up this spring when the season is over. Building my 30 by 40 shop and him and I building his home. Those times will never be forgotten
User avatar
Eallen66
Posts: 80
Joined: December 31, 2013, 5:01 pm
Location: Bargersville, Indiana
United States of America

Re: 64 SWB 5.0 M5R2 swap begins

Post by Eallen66 »

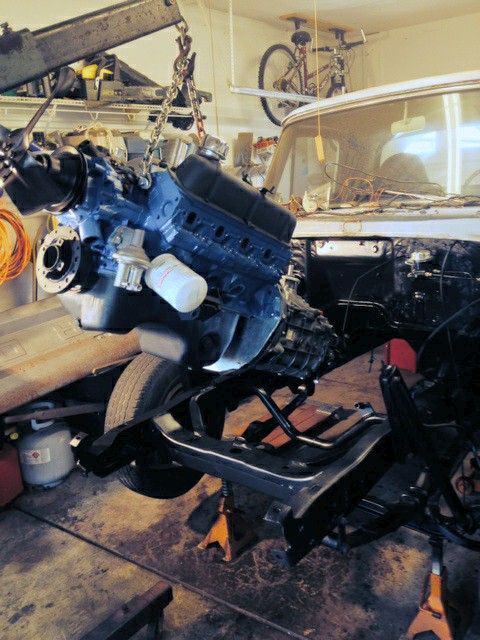
Moving along on prepping for the install. It is amazing what you can get done with 2 teen boys helping do whatever you tell them. We got the motor and tranny trial fit in place with the cross members. For the motor mount we are using a crossmember from Classic Performance and a 3" drop tranny transdapt crossmember. Thumbs up to to the Classic product. It was packed well & came flawless. Not so much for the transdapt. All the parts were thrown in the box with no packing allowing the parts to beat each other up and the paint just peeled off in yourbhands anytime you touched it. After fitting the 3" drop with the M5R2 a 6" tranny drop would have been spot on for the best mounting.

We managed to snag a couple matching water pump and crank pulleys from a local slickster which was a huge save for us. A word of learning on the M5R2, the starter plate, sheetmetal piece between motor and tranny, are virtually impossible to find. The one I was told would fit ended up being for a T5 when it arrived and will not work. With short time and the $100 after shipping price for the only one I could locate online or else where it looks like homemade time.

After reading a ton & finding a mixture of opinions on rust conversions/control I decided to give Rustoleum Rust Stipper a shot. Since they all seem to operate off a few acid principles and I have dealt with acid etch in aircraft in a past life so it seemed as plausable as any at a fraction or the cost. After getting everything brushed best we could my boys brushed it on and waited the 10 minutes befor washing it off.

Image

We dried it with the leaf blower best we could and let it set overnight befor priming. My past finish work has been with higher quality paints 20 years ago and nitro lacquer guitar finishes more recently. Due to my sons budget and hearing positive reviews on Rustoleum enamal I thought I would give it a shot. I bought Heavy Rust primer. First thing I notice is it is thick as mud. I had to thin 50/50 to get it sprayable at all. The stuff seamed to take forever to dry to touch & still had wet spots the next day.

Image

After having to use heat to get it all dry as best we could I gave the Rustoleum semi-gloss enamal a try. It was a similar thickness but not quite as bad. It seemed to spray on ok but 15 minutes later it got weird & seemed like the pigment just started sagging off like water leaving a wet almost colorless layer even when doing a tack coat. I ended up letting it set for about 45 minutes before recoating and it seemed to go on better the second time around. I noticed it was the strangest in bare metal rusted areas which leads me to wonder if the rust stripper may be the culprit in the way it etched the metal. For now it looks acceptable. Hopefully it will cure out ok overnight.
Image

Tomorrow will drop in time to be ready for our Thursday exhaust appointment.

Eric
User avatar
Eallen66
Posts: 80
Joined: December 31, 2013, 5:01 pm
Location: Bargersville, Indiana
United States of America

Re: 64 SWB 5.0 M5R2 swap begins

Post by Eallen66 »

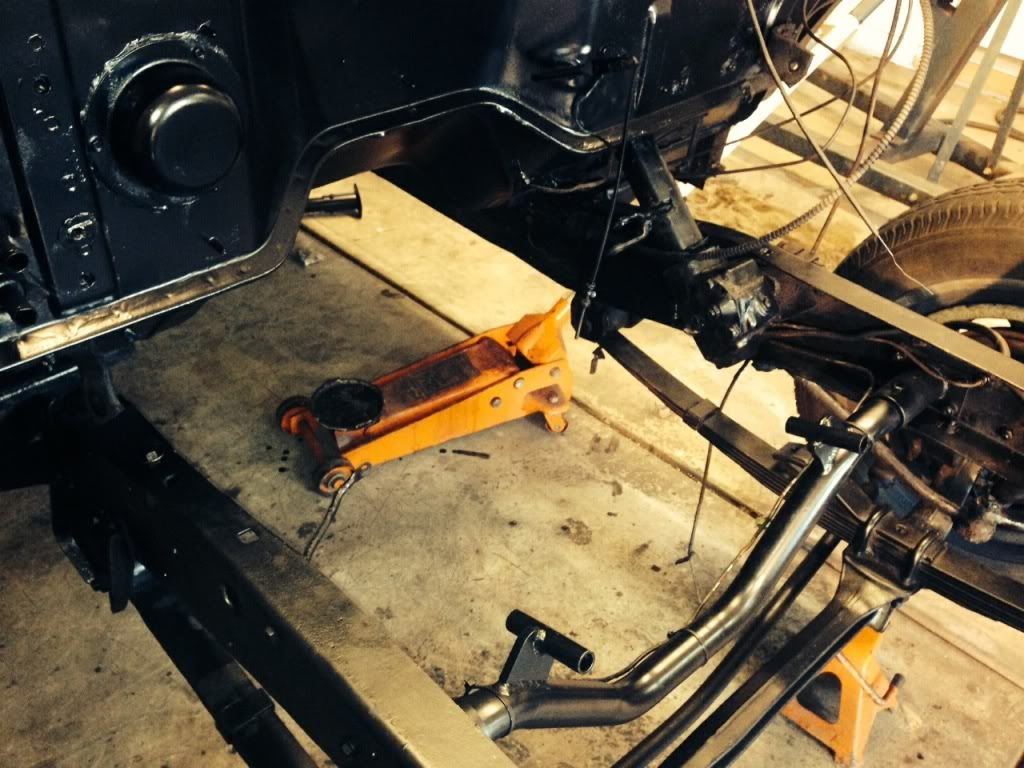
The joy of dropping a new drive train in place to make a long day feel like progress! With all the paint drying sufficiently enough over night we installed the motor mount crossmember. I choose to do a bolt in install with grade 8 bolts and can always weld it in later if need be.
Image

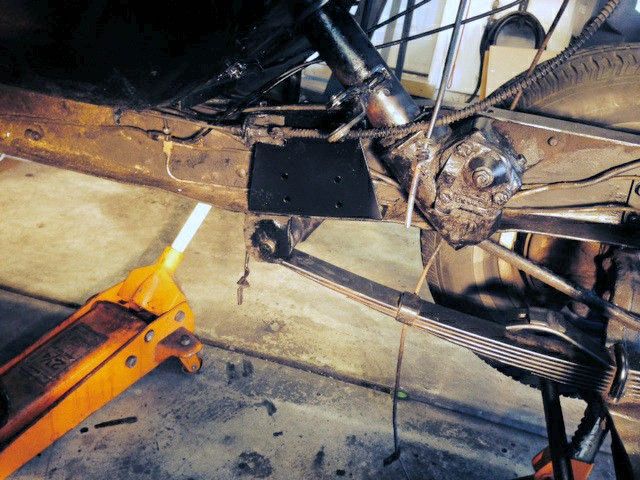
In place of the factory crossmember I installed a U-channel of sorts I had welded up by a local shop then go inside the frame rail with 2 bolts on top and 2 on bottle with 1 being the leaf spring mount. I went ahead and drilled a standard crossmember pattern in each. Once the exhaust is done I can determine what we need for a crossmember.
Image
Image

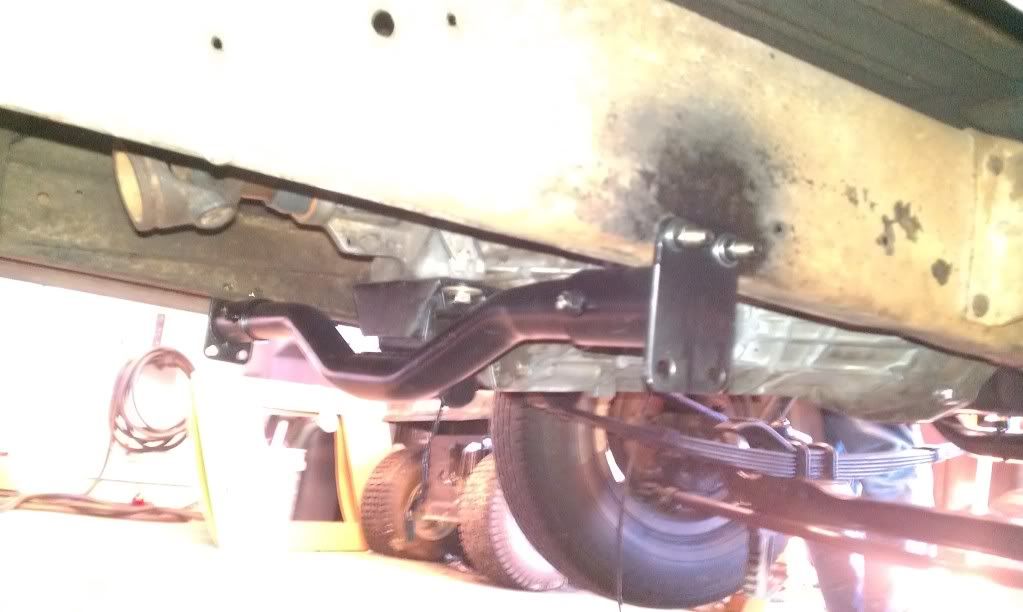
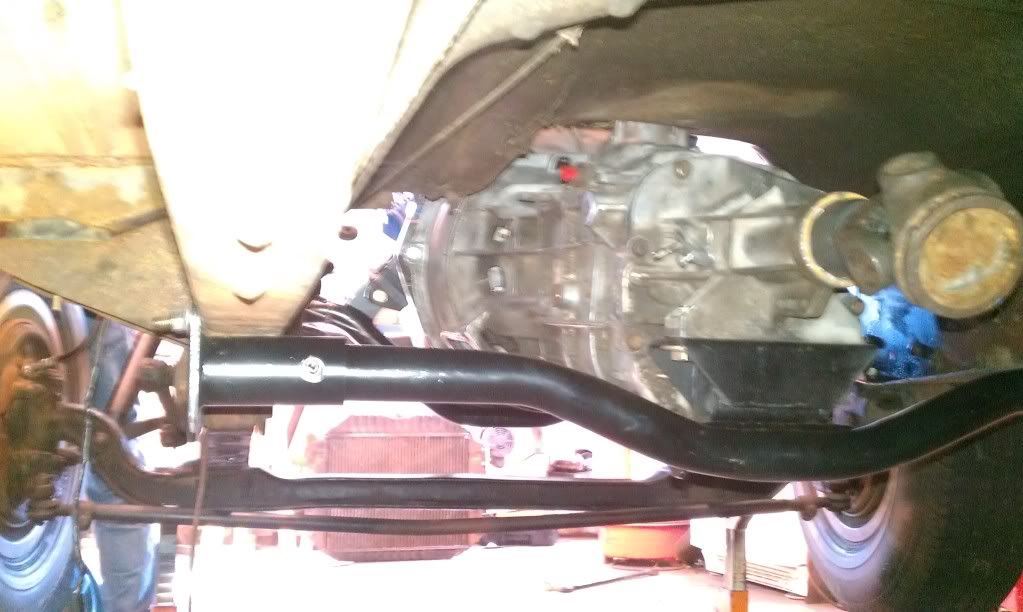
For the transmission mount I ended up having to do what the manufacture listed as an option which wasn't my preference with hanging the crossmember on the outside of the frame by 2 grade 8 bolts on each side. This is where a 6" drop would have been right on target for an full inside mount. I will see how it works for a bit
Image
Image

After getting the headers & a few other items in place it is on a trailer in the morning for a trip to a mechanic friend for a set of dual flowmaster exhaust & dropping the drive shaft off for a cut and balance. All in a long days work!
My son said it looks a lot easier on Overhaulin! :)

Eric
Last edited by Eallen66 on March 27, 2014, 10:53 am, edited 1 time in total.
User avatar
simonscr
Posts: 228
Joined: April 18, 2010, 11:41 am
Location: Oregon
United States of America

Re: 64 SWB 5.0 M5R2 swap begins

Post by simonscr »

Looking good! When one set goals, things usually get done. :)

Not a fan of the tranny cross member though, I like to have all of the possible bolts installed. Would look cleaner up inside the frame rails.
Simon

65 f 100

56 willys m38a1 SOLD ( Have had since high school )
User avatar
Eallen66
Posts: 80
Joined: December 31, 2013, 5:01 pm
Location: Bargersville, Indiana
United States of America

Re: 64 SWB 5.0 M5R2 swap begins

Post by Eallen66 »

simonscr wrote:Looking good! When one set goals, things usually get done. :)

Not a fan of the tranny cross member though, I like to have all of the possible bolts installed. Would look cleaner up inside the frame rails.


Simon, I agree totally on the tranny cross member on look and function. If the manufacturer didn't give it as an install option I would not have even tried it. If I were on a different schedule and my $ I would have ordered a 6" drop. I still may down the road. As far as goals, mine is a week's vacation, spring break, & wanting to park my own vehicle back in my garage while it is still cold. :)
User avatar
Uncle Skip
Posts: 4695
Joined: July 15, 2006, 8:30 pm
Location: Pearland, Texas
United States of America

Re: 64 SWB 5.0 M5R2 swap begins

Post by Uncle Skip »

Eric, you guys are doing an awesome job. Keep us in the loop.
U@ss
I'm not arguing with you. I'm just explaining why I'm right.
Pardon me. Does your deaug bite?
User avatar
Eallen66
Posts: 80
Joined: December 31, 2013, 5:01 pm
Location: Bargersville, Indiana
United States of America

Re: 64 SWB 5.0 M5R2 swap begins

Post by Eallen66 »

Thanks Skip! Having a blast, but not used to manual labor any more. :)

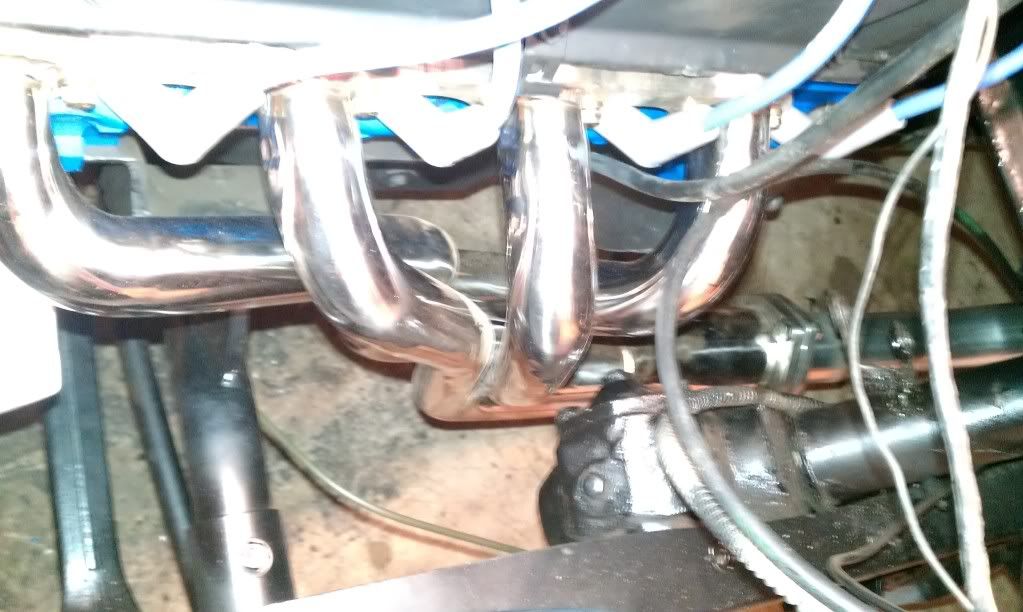
Got the new exhaust back from being installed & the drive shaft resized as planned. The offset turned out just right for header clearance. Surprisingly the original Y-block was only offset about a 1/4". Being new to the slick scene I went thru three different motor mounts from local auto parts befor I foundd the right ones for the crossmember. Mounts for a 1964 fairlane 289 ended up being the ticket & they were in stock at half the cost the crossmember company wanted.
Image
Image
Image

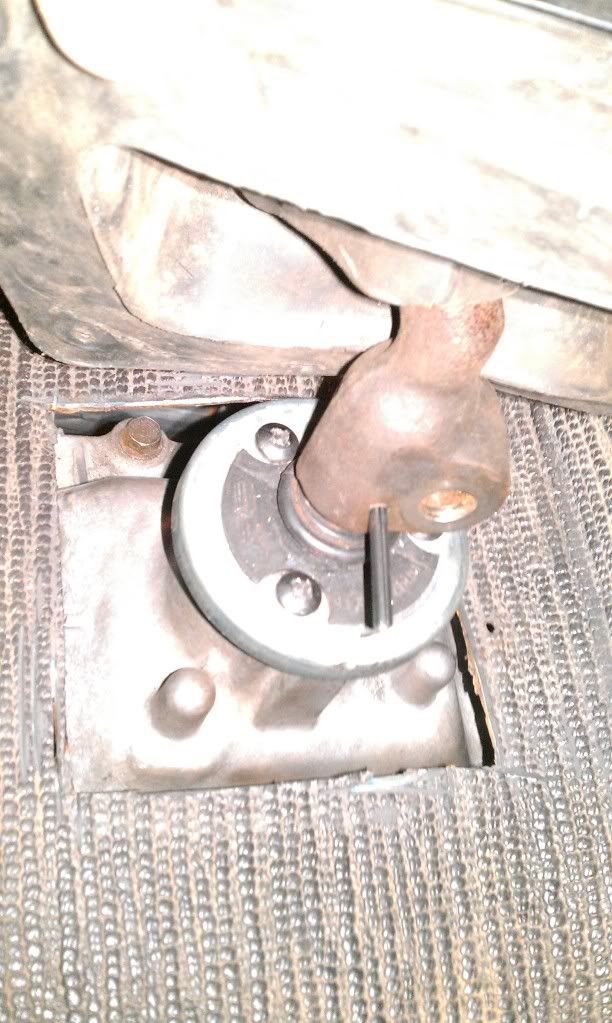
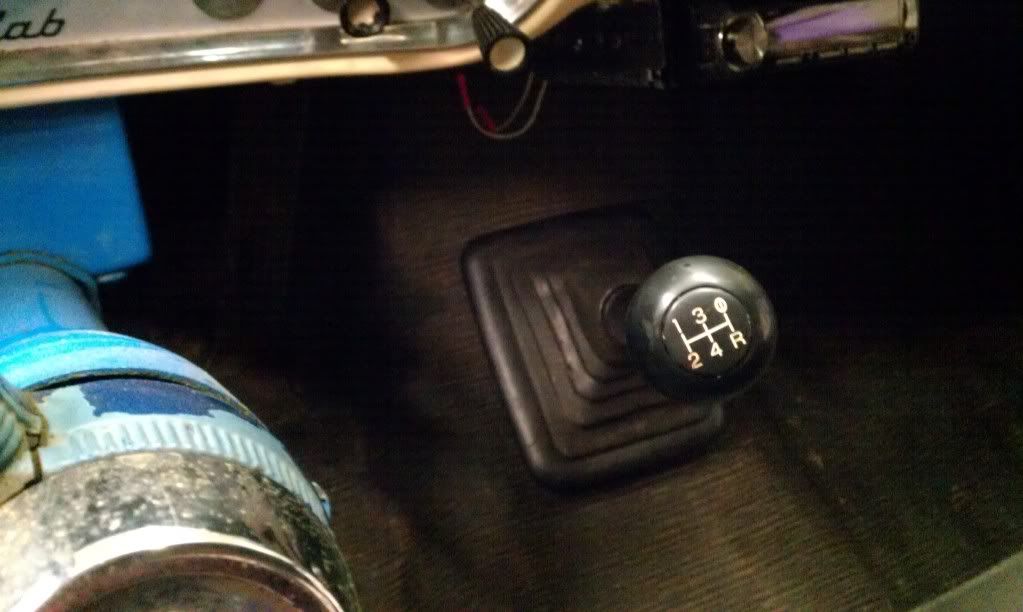
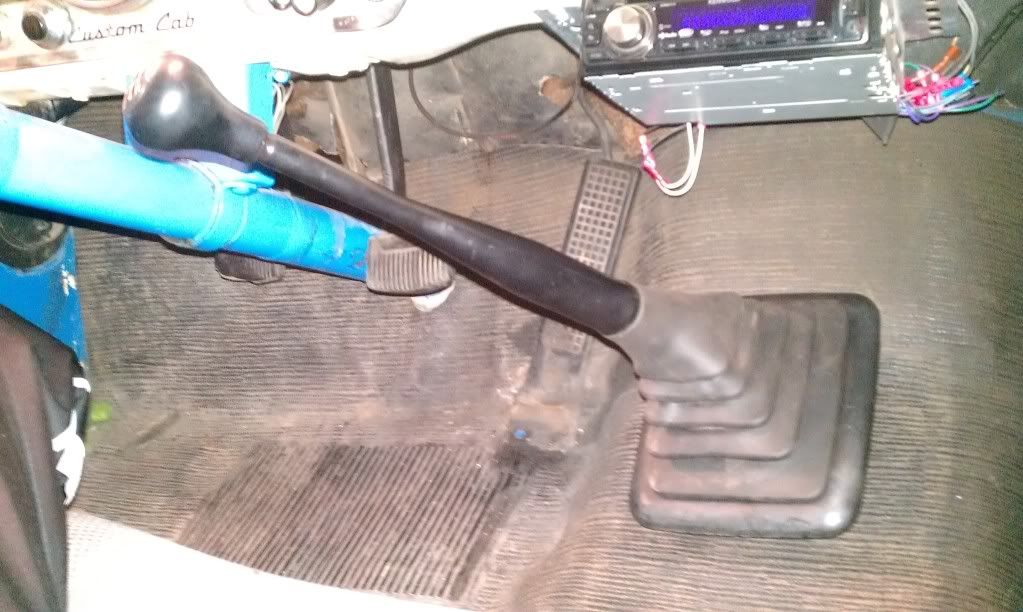
The shifter whole location turned out well. Since the tranny did not come with a shifter finding a factory one was quite a chore. The only aftermarket one is a Core Shifter which was out of budget for now at about $240. I found a curved one including the boot at a tranny core shop for $40 including shipping. The ball and numbers were pretty gouged up. I filled the low areas with super glue, sanded smooth, and painted & it shaped up nicely. The shifter fits on the tranny stub via a verticle groove for location and a screw for securing. The factory pin is much smaller than the groove and allows a lot of play. Mine sheared off twice while playing with it. I enlarged the whole and drove a 5/32" role pin in to match the slot which helped. I left the excess hanging that we will remove after everything is all fitted up incase we needed some meat to pull it back out. The shifter sets nice but may need to be bent accordingly due to the large steering wheel.
Image
Image
Image

If all goes well we hope to get it fired up tomorrow.
User avatar
Eallen66
Posts: 80
Joined: December 31, 2013, 5:01 pm
Location: Bargersville, Indiana
United States of America

Re: 64 SWB 5.0 M5R2 swap begins

Post by Eallen66 »

I still enjoy the thrill of hearing a fresh rebuild fire up an run right off the bat!

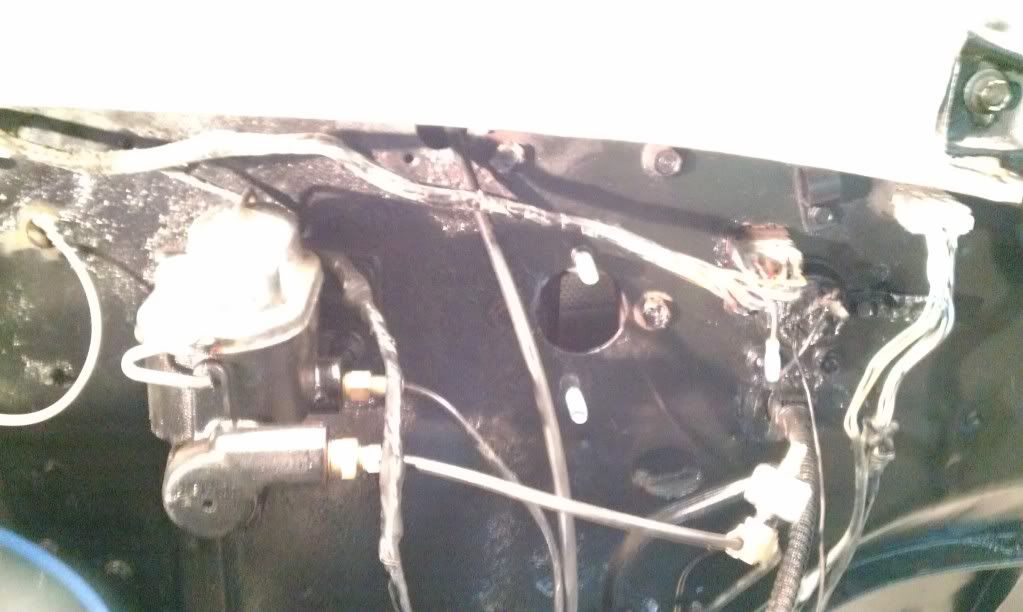
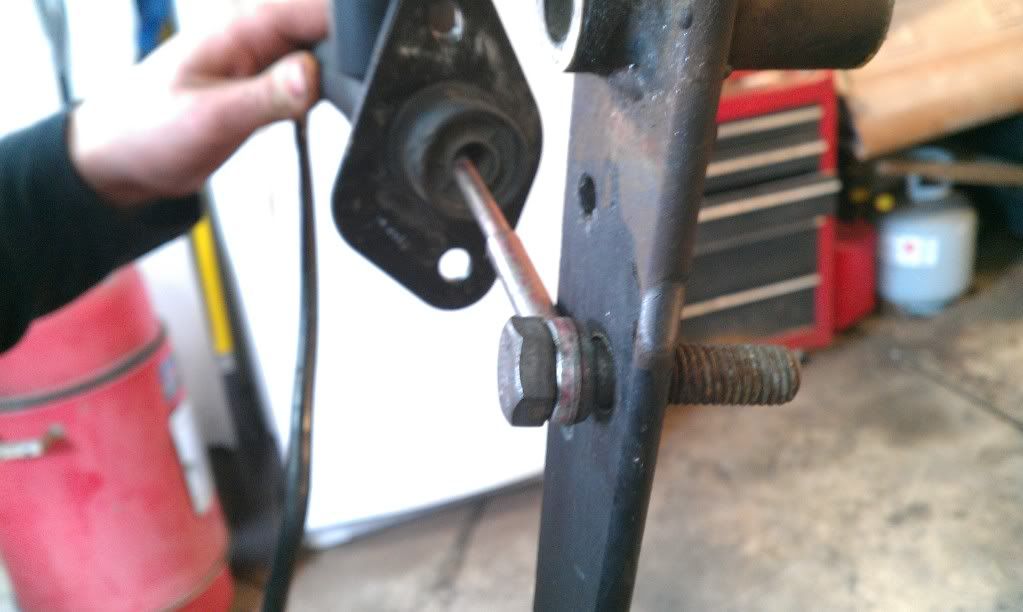
We used the knock out in the fire wall beside the brake master cylinder for the clutch master location. Since the M5R2 factory master cylinder uses verticle mounting holes we drilled those accordingly. After locating it I used the cylinder push rod to mark the slick clutch pedal for mounting the rod to it. We removed the pedal & drilled a 7/16" hole in it which is the diameter of the eylet of pushrod. I used a 5/8" spacer on the firewall in attempt to get the right distance for the eyelet.
Image
Image
Image

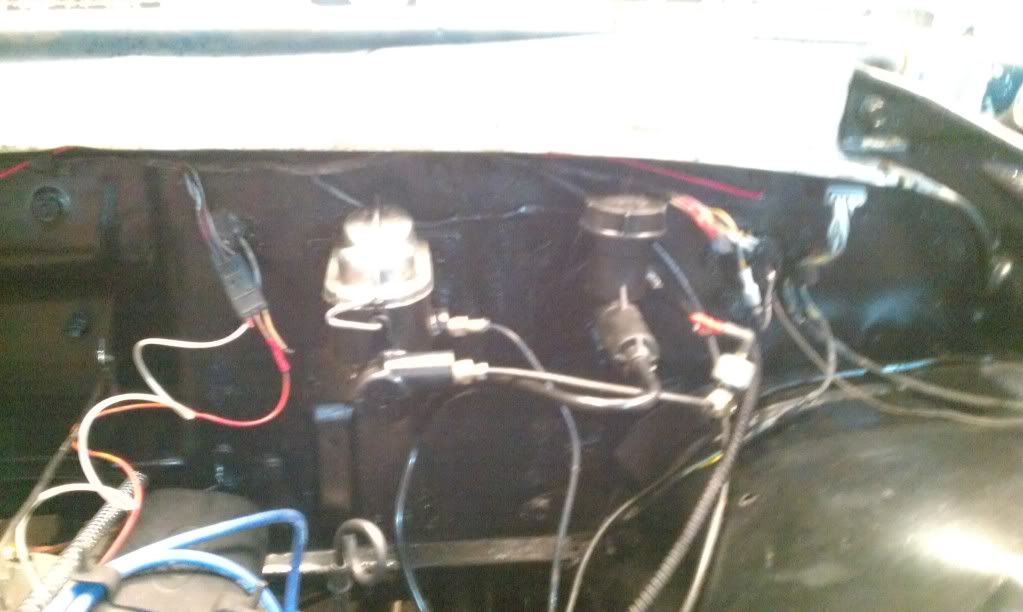
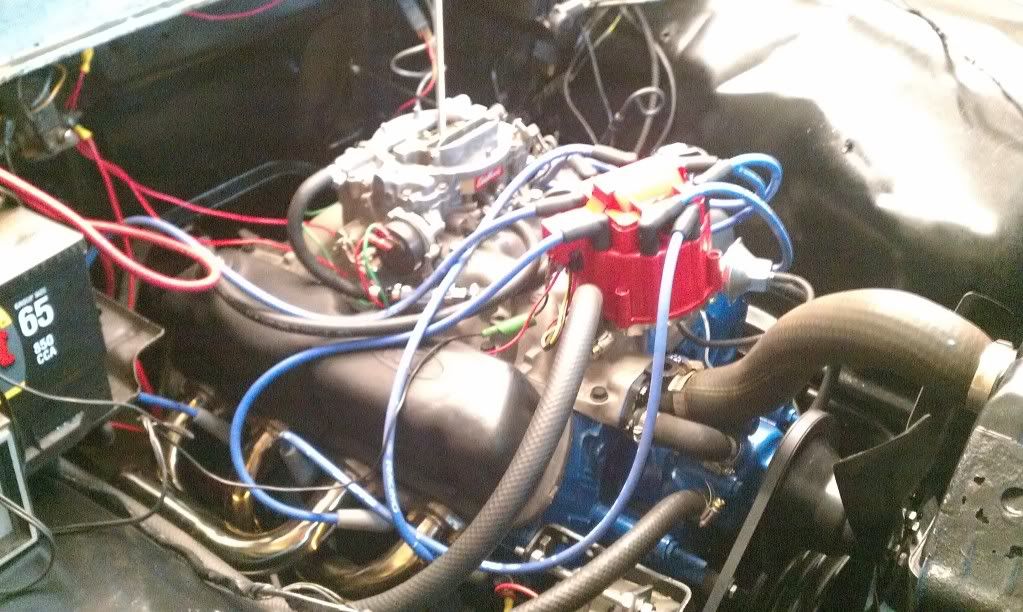
Now that we have it fired up we still have a few bugs to work out. The HEI distributor is too close to the heater hose to get any real timing movement so I am going to swap in a different on to try to get more movement. I did have a strange occurance in wiring the HEI. Originally to power it I by passed the original coil resistance wire under the dash. This worked great for start up but when we went to shut it down it didn't turn off. After some checking the factory resistance wire was receiving power at all times regardless of switch position. I assume the starter relay was previously being used to cut off the ignition in the past, prior to installing a tm alternator? I ran a new one directly off the switch from a spare switched lead and all was well.
Image

The hydraulic clutch is also not fully disengaging. One lesson learned was even if your line looks good if you can't get it to stay in the slave cylinder coupling you need a new line. The slave cylinder is moving the pressure plate but not far enough to disengage the clutch. I am assuming we are not getting enough stroke into the master cylinder. I have to figure out if there is a way to lengthen the rod or I will have to reduce the firewall spacer thickness.

Another odd bug is we have been able to get the passenger side fender lined up correctly by the door which is resulting in the door catching on it. The forwad aft gap is good but the gap at the top is too large and it won't go any higher. It also won't go inboard any further but needs to a bit. It is always the little details that are the biggest challenge. But after all, what is a project without a few glitches! :)
aarons428
Posts: 483
Joined: July 21, 2009, 9:18 pm
Location: norfolk NE
Germany

Re: 64 SWB 5.0 M5R2 swap begins

Post by aarons428 »

That's one reason why I would of just stayed with a good ford duraspark.
2010 Ford Edge
99 Ford Expedition
65 Ford f-100 swb
460 stock other than a double roller timing chain and a s475 TURBO pushing 6psi of boost (now 12lbs)
351 W Pulled and on garage floor in storage
428 4v (R.I.P)
c-6 wide ratio modified
torino front stub
home made ladder bar rear with air bags
11.96 sec @ 110mph 1\4mile (best with the 428)
LM14
Posts: 1755
Joined: August 22, 2009, 10:44 pm
Location: Bloomfield, Iowa
United States of America

Re: 64 SWB 5.0 M5R2 swap begins

Post by LM14 »

Looks like you have a lot of angle in the engine. With the truck sitting at ride height, what angle is the carb pad at? That may account for your issue with the tranny mount not sitting in the frame right.

Carb pas should be level with the ground, not angled down at the back like yours looks in the pics.

SPark
1932 Ford 5 window coupe. 302/C4
1962 8V-390/C6 Unibody Short Bed Soon to be Big Window - The Lincoln that never was
2013 F150 Super Crew Eco Boost 4x4
2015 Ford Edge for the little lady, because she said so!
2007 Mustang GT, 4.6-3V/5 Speed. Only 8680 miles on the clock.

More toys, I need more toys!!!
User avatar
Eallen66
Posts: 80
Joined: December 31, 2013, 5:01 pm
Location: Bargersville, Indiana
United States of America

Re: 64 SWB 5.0 M5R2 swap begins

Post by Eallen66 »

aarons428 wrote:That's one reason why I would of just stayed with a good ford duraspark.


I did consider the duraspark but my son wanted to go this route for a cleaner look. I swapped in a 90 degree heater fitting today & all works like a charm. The electrical challenge we had was the result of the factory resistor wire that was continuous hot despite switch position. I have owned cars of every make with gems & lemons in each removing any brand prejudice from me long ago. :)

SPark, I thought the same thing on the angle. The reality is the carb pad is level. Being a performer rpm it has quite a bit of forward slope built in to it which a level motor would leave an unlevel carb mount. The engine crossmember actual has some slope built into it as well. The tranny mount not mounting the way I had prefered is actually the crossmember I chose rather than where it is located on the frame. The tranny is a high as possible in the tunnel with the current location and as high as possible for the shifter location in the cab without adding a doghouse. At best the motor would have to be lower, which isn't possible with the motor crossmember, but the level carb mount negated any need for it. I would personally prefer it a more level look.

We got the clutch fully disendaging correctly today thru abundant slave cylinder bleeding. We do have the edelbrock carb not ideling below 2,000 rpm that I narrowed down to the primary throttle blades not fully closing for some reason. Looks like a quick carb removal & disassembly. We did get a quick trip around the block today at least.
User avatar
simonscr
Posts: 228
Joined: April 18, 2010, 11:41 am
Location: Oregon
United States of America

Re: 64 SWB 5.0 M5R2 swap begins

Post by simonscr »

How did this project end up? Is your son back to using it as a daily driver? Did you get all of the little bugs worked out of it?
Simon

65 f 100

56 willys m38a1 SOLD ( Have had since high school )
User avatar
Eallen66
Posts: 80
Joined: December 31, 2013, 5:01 pm
Location: Bargersville, Indiana
United States of America

Re: 64 SWB 5.0 M5R2 swap begins

Post by Eallen66 »

simonscr wrote:How did this project end up? Is your son back to using it as a daily driver? Did you get all of the little bugs worked out of it?


Sorry about not giving a final on the project. He is back to using at his daily driver! I had to go back to my real job and been working out bugs when possible. We got the tranny bugs worked out and it is working great. As an FYI, we used an angled F150 factory shifter which at my 6'2" height is a challenge to remember to shift my knee when I shift to 2nd & 4th. It works a little better for my son at 6' but still not optimal, though good for a middle passenger. We are going to heat it up and bend it about half way. A factory straight shifter might be a better choice for taller people. Overall the 5 speed and hydraulic clutch are a win. With the 3.89 rear gear 1st is seldom needed outside of launch & then its optional. 5th is usable at 45mph.

We finally did get the idle down decent but the idle mixture screws are still not functioning correctly so we have some idle circuit issues in the carb so it is idling rich. It is also rich at cruise speed so I assume it needs a leaner rod & jet set. I have always been a Holley user in years past so I am not edelbrock fluent. I am sure they work well but so far not my best experience. My son is dying to get back to school Monday with the sound of slight crisp cam lope.

An unfortunate setback is oil leak on the passenger side upper bellhousing area. I had hoped it was the rear intake or valve cover but after ruling those out it appears to be motor oil coming from inside the bellhousing. Ford not being my primary experience when I was in it 20 years ago we will just have to pull it and see. I may have my regular car long term mechanic friend give me his thought first.

Overall my son is definitely pleased with the new power, sound, and shifting. I may post a video if I get a chance.
Post Reply