
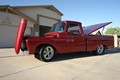
Greg's 62 Uni long wheel base

I am pretty pleased with the A pillar - there is no body filler in it - all metal.
One issue with the shaved drip rail I have - the cross section has a slight down roll up under neath. It is quite thin right at the edge and it needs a small rounded shape to match the B pillar edge at the door opening. I may have to run a bead up under it to thicken it there so it has some more material before it's shaped. I am going to finish it all the way to the A pillar before I mess with it though.
I can't shape it well with the drip rail in the way. Depending on what angle you are welding from and even with a 3" grinder pad you would be surprised how much that 1/2" of drip rail can be in your way, lol.
When I am done cutting and welding I am going back along the outside with a flat copper spoon and some wire to get a smoother edge to work with too. I may hold the copper spoon against the outside to weld up underneath. The spoons are really nice for helping control a weld you want to hold a shape.
This is all structural welding of the shave now, fill welding will be done after.
It is pretty tedious work but I am enjoying doing it. Gluton for punishment? LOL.
Thanks Guys.
1964 F 100 - I am going to do "something" with it.......
viewtopic.php?f=32&t=15942
1987 Mustang LX Convertible, 2.3 Auto - cruiser.
1994 F 150 XLT 2WD
~ Yes - I adopted another cat..............
Cam L Milan,
You'll be missed my friend.
viewtopic.php?f=32&t=15942
1987 Mustang LX Convertible, 2.3 Auto - cruiser.
1994 F 150 XLT 2WD
~ Yes - I adopted another cat..............
Cam L Milan,
You'll be missed my friend.
-
ICEMAN6166
- Posts: 11470
- Joined: July 11, 2006, 11:28 am
- Location: Dove Creek, Co. elevation 6842

A bit more work on the roof today.
I got the antennae hole filled too. That was a fun piece to cut - the hole may have been cut with a hacksaw, lol.

I got the antennae hole filled too. That was a fun piece to cut - the hole may have been cut with a hacksaw, lol.
1964 F 100 - I am going to do "something" with it.......
viewtopic.php?f=32&t=15942
1987 Mustang LX Convertible, 2.3 Auto - cruiser.
1994 F 150 XLT 2WD
~ Yes - I adopted another cat..............
Cam L Milan,
You'll be missed my friend.
viewtopic.php?f=32&t=15942
1987 Mustang LX Convertible, 2.3 Auto - cruiser.
1994 F 150 XLT 2WD
~ Yes - I adopted another cat..............
Cam L Milan,
You'll be missed my friend.
-
Anthony
-
Alan Mclennan

- Posts: 9324
- Joined: October 14, 2006, 6:16 pm
- Location: In the shed... Cranebrook NSW

Greg, you are certainly a man on a mission!, keep it up! , great work!
Honey, If I say I`ll fix something I will, there`s no need to remind me every 6 months!!
66 f100 tabletop swb 351 Clevo C6 "Beryl"
Slick Stock 3 KCMO
Slick Stock 4 Altoona
Slick Stock 5 KCMO
Slick Stock 6 Altoona
Slick Stock 7 Salina KS
Slick Stock 8..............................
66 f100 tabletop swb 351 Clevo C6 "Beryl"
Slick Stock 3 KCMO
Slick Stock 4 Altoona
Slick Stock 5 KCMO
Slick Stock 6 Altoona
Slick Stock 7 Salina KS
Slick Stock 8..............................
I actually hadn't even thought of that Jason - Hmm.
The goal of my smoothing, I don't want to change the character of the truck - just accentuate it. Guess you could say I am making my Slick a little more slick (I know - bad pun).
If I fill the vents I will need to replace them somehow - not sure how I could do that and hide it. I would also need to address the wiper pockets too then. I'll probably just leave it, I have to finish the roof before I do anything else too.
Nothing done since Saturday now, I will get back to it this week though.
Thanks for the comments guys.
Still jumping around on my paint scheme too - I came up with a different scallop job I like too. I may save that one for a 64 shorty though.
I am also considering the same paint job in different colors - don't want to spend $500 + on paint.
1964 F 100 - I am going to do "something" with it.......
viewtopic.php?f=32&t=15942
1987 Mustang LX Convertible, 2.3 Auto - cruiser.
1994 F 150 XLT 2WD
~ Yes - I adopted another cat..............
Cam L Milan,
You'll be missed my friend.
viewtopic.php?f=32&t=15942
1987 Mustang LX Convertible, 2.3 Auto - cruiser.
1994 F 150 XLT 2WD
~ Yes - I adopted another cat..............
Cam L Milan,
You'll be missed my friend.
Finally warmed up enough this weekend for some more work. No pics - just more of the same on the drip rail. I at least got the "bad" part done - made it far enough over now I can do the rest not having to sit in the windshield frame.
1964 F 100 - I am going to do "something" with it.......
viewtopic.php?f=32&t=15942
1987 Mustang LX Convertible, 2.3 Auto - cruiser.
1994 F 150 XLT 2WD
~ Yes - I adopted another cat..............
Cam L Milan,
You'll be missed my friend.
viewtopic.php?f=32&t=15942
1987 Mustang LX Convertible, 2.3 Auto - cruiser.
1994 F 150 XLT 2WD
~ Yes - I adopted another cat..............
Cam L Milan,
You'll be missed my friend.
-
Reds Rod Shop

- Posts: 317
- Joined: January 11, 2009, 6:43 pm
- Location: Anderson, SC
Good progress. A friend of mine has been encouraging me to shave the drip rail on my 64. I just wasn't sure what it would look like. From the looks of yours, I like it. Keep the pics coming. I can't wait to see it finished. Red
Red
My 1964 Restomod Project http://fordtruk.com/forums/viewtopic.ph ... sc&start=0
My 1964 Restomod Project http://fordtruk.com/forums/viewtopic.ph ... sc&start=0
Red, IMHO I wouldn't likely shave the drip rail on a 64-66 unless I swapped out for the 61-63 roof. The raise in the later roofs would stand out too much I think. The earlier roofs have a nice smooth blend that is interrupted by the drip rail. It's you truck bro - I was giving you some food for thought.
1964 F 100 - I am going to do "something" with it.......
viewtopic.php?f=32&t=15942
1987 Mustang LX Convertible, 2.3 Auto - cruiser.
1994 F 150 XLT 2WD
~ Yes - I adopted another cat..............
Cam L Milan,
You'll be missed my friend.
viewtopic.php?f=32&t=15942
1987 Mustang LX Convertible, 2.3 Auto - cruiser.
1994 F 150 XLT 2WD
~ Yes - I adopted another cat..............
Cam L Milan,
You'll be missed my friend.
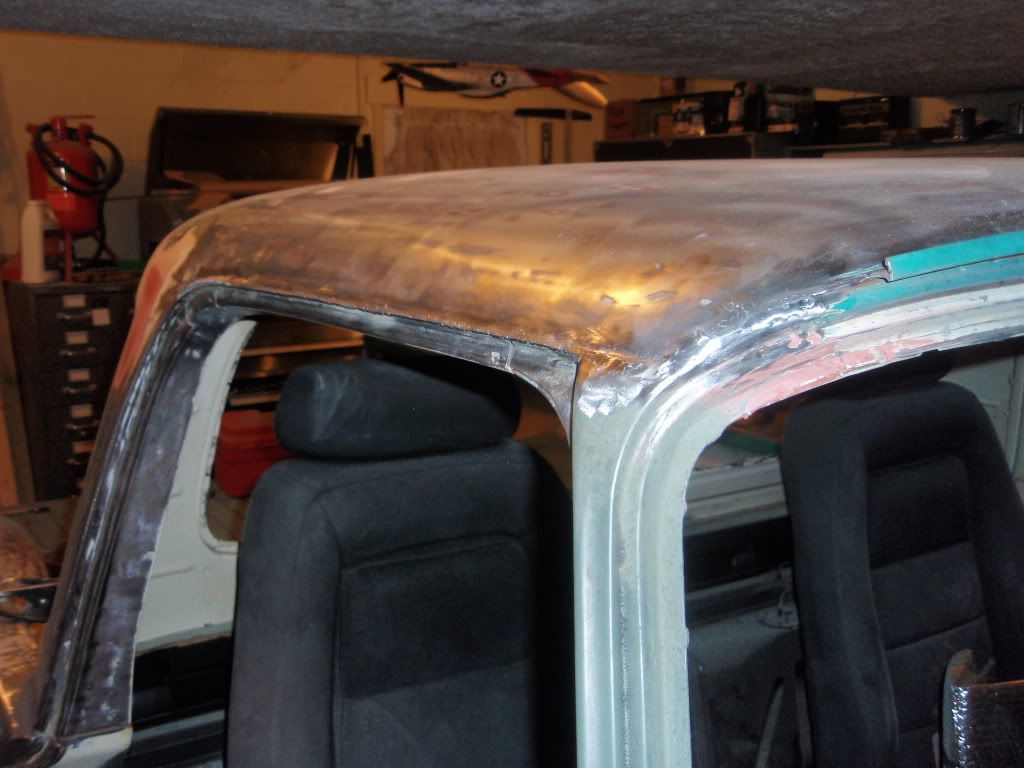
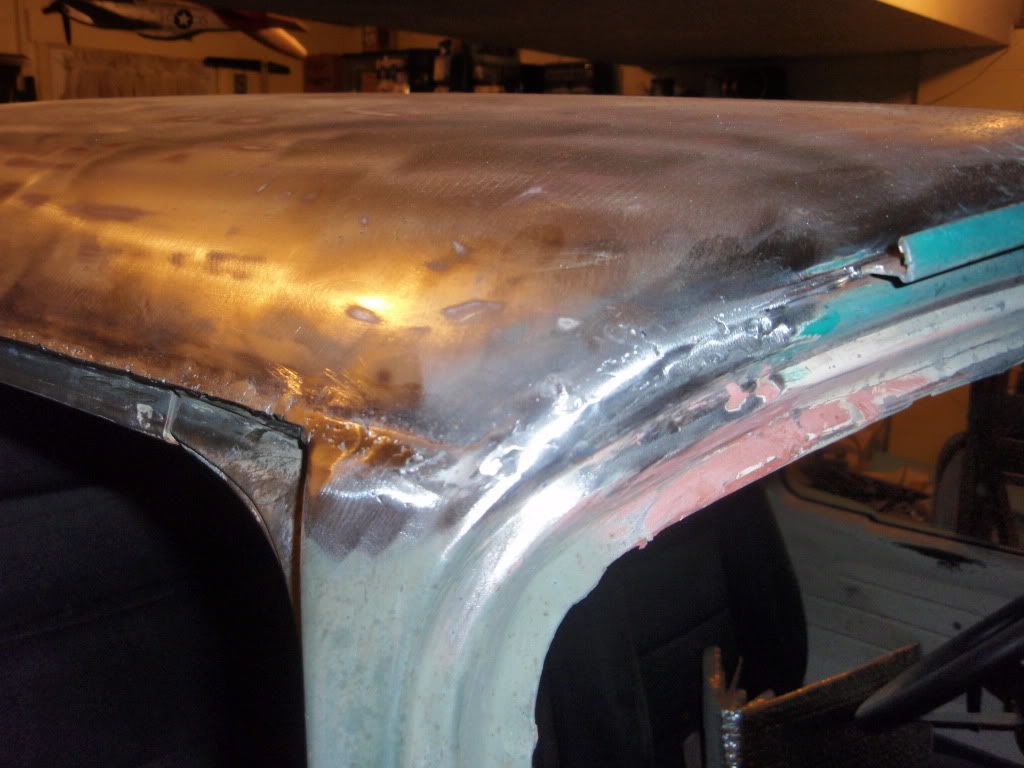
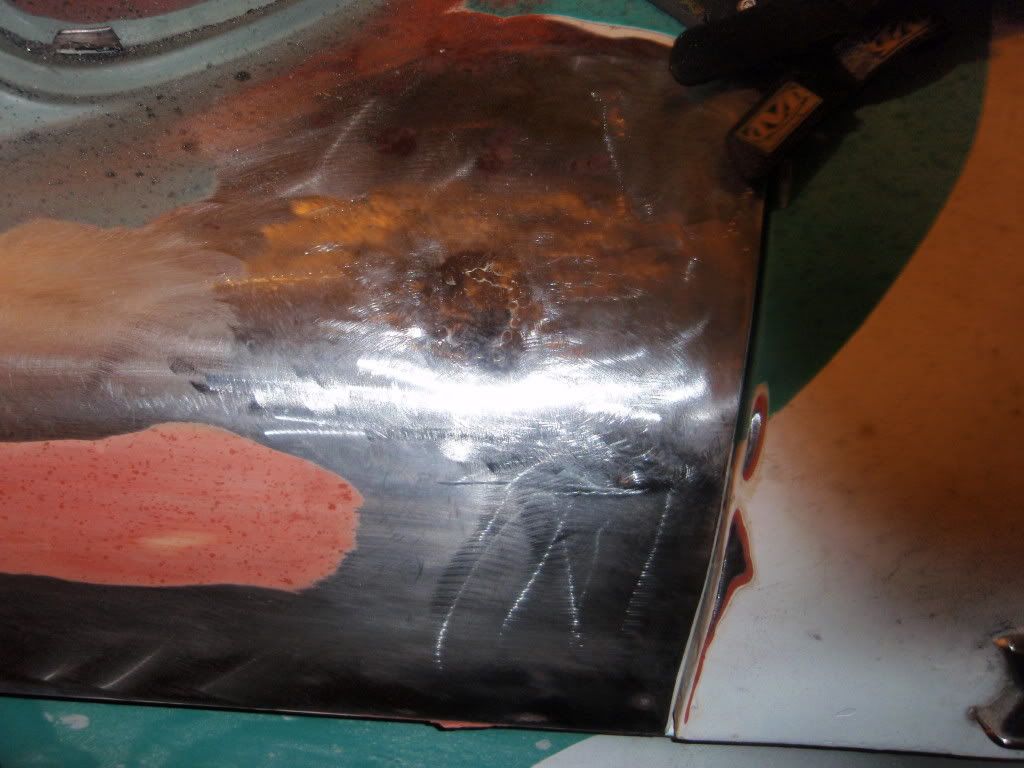
I got the rest of the drip rail off and at least welded together today. I will need to do some more fill welding but this the last I will do until I have a C 25 tank sometime this week.
I also cut up under the back 6" of the roof cap and a slit in it over the roof seam. It stuck out too far due to a bad fit from Ford. Cut it, reshaped it, clamp, tack, and then went back up underneath and filled it in. I went ahead and cleaned it up a little with a flap wheel on the grinder.
I am probably going to have to add a filler plate over the door. The drip rail actually drops down a little past the roof so the gap is too wide at the top now.
I got the seam in the drivers side A pillar welded up too, still needs shaped. I hope it comes out as nice as the other side - it needed no fill.
It still needs some fill welding, and finish work but at least it gives an idea how it will look done. Should give a nice clean, smooth roof line after the glass is back in.
I even took some pics this time, lol.
As you can see I have been using the hood as a table while doing this. The floor pad section was a real help while sitting in the windshield to work most of the front. It also made it easier to not damage the dash & cowl my fat arse, lol.
1964 F 100 - I am going to do "something" with it.......
viewtopic.php?f=32&t=15942
1987 Mustang LX Convertible, 2.3 Auto - cruiser.
1994 F 150 XLT 2WD
~ Yes - I adopted another cat..............
Cam L Milan,
You'll be missed my friend.
viewtopic.php?f=32&t=15942
1987 Mustang LX Convertible, 2.3 Auto - cruiser.
1994 F 150 XLT 2WD
~ Yes - I adopted another cat..............
Cam L Milan,
You'll be missed my friend.
LOL, those were left there last weekend - was out blowing snow. I have stuff sitting in the cab that has been there for 3 months including some tools still in the packages. One of these days I need to straighten things up out there. After it gets nice enough out I am going to put the Truck outside in the drive and rearrange the garage.
1964 F 100 - I am going to do "something" with it.......
viewtopic.php?f=32&t=15942
1987 Mustang LX Convertible, 2.3 Auto - cruiser.
1994 F 150 XLT 2WD
~ Yes - I adopted another cat..............
Cam L Milan,
You'll be missed my friend.
viewtopic.php?f=32&t=15942
1987 Mustang LX Convertible, 2.3 Auto - cruiser.
1994 F 150 XLT 2WD
~ Yes - I adopted another cat..............
Cam L Milan,
You'll be missed my friend.
-
64low-n-slow
- Posts: 296
- Joined: January 5, 2009, 4:05 pm
- Location: Daytona Beach
Great work Greg looks real good. I've been thinking about doing the same thing to my 62 and now thinking is over and that is what I'm going to do. On the forward upper door corners I will radius them too. Have you thought about doing that?
When we did the 61 I filled the extention seams with braze you can get them flush and don't have to use much filler. I used lead to finish the seam off. They came out really good.
I'll use lead to do all my seam finish work so I don't have to worry about bondo cracking. I really like to use led as much as possible, learned how to use it when I was a teenager in the body shop I apprenticed in.
Mike Kincheloe
Mikes Old Trucks
I restore old trucks and cars
1962 UNI Short Box, Stock Y block, 4 speed
1972 F 250 4X4 429 4 speed Dana 70 rear
1977 F 350 Camper Special, Ranger, Super Cab
1950 F7 Cab and Chassis
1976 F150 4 Speed 4 X 4
1996 Taurus
Mikes Old Trucks
I restore old trucks and cars
1962 UNI Short Box, Stock Y block, 4 speed

1972 F 250 4X4 429 4 speed Dana 70 rear
1977 F 350 Camper Special, Ranger, Super Cab
1950 F7 Cab and Chassis
1976 F150 4 Speed 4 X 4
1996 Taurus
Greg, It's looking good. Think about "oldtrucks" idea of doing a radius on the front corners of the doors. That would look great especially with the drip rails gone. I wish that I had thought about that.
Kevin
Kevin
kstones63
_______________________________________
63 F100
29 Ford Sedan Delivery
99 F250 PSD, 4x4, CC
95 F350 Flatbed Dually Diesel
_______________________________________
63 F100
29 Ford Sedan Delivery
99 F250 PSD, 4x4, CC
95 F350 Flatbed Dually Diesel