
OK, I got all the patch panels I think I am going to need. Now I wanted to know what you guys thought is the best corse of action.
1) Brase the Cab and cut out all the cancer. Then recreate it with good metal.
or
2) Cut out little by little and replace as I go.
This is going to be my first time doing this (it's the step area on my 63) so I want to make sure I am doing it right.
Thanks Guys!
Patch Panel Repairs
-
FORDMANLCRACKEL

- Posts: 1237
- Joined: July 11, 2006, 9:48 pm
- Location: williamston, n.c.
- Contact:

I would do one place at a time welding in the panels. the when its time to do the body filler i would do all the different places at one time. Dont waste as much body filler by mixing to much but work fast with it, it dont take long for it to set. Some one else might have a different idea. Read them all then do what suites you best.
Lonnie
Lonnie
The most rewarding job i ever had was being a dad.
1988 Ranger Build http://s275.photobucket.com/albums/jj31 ... %20RANGER/
1988 Ranger Build http://s275.photobucket.com/albums/jj31 ... %20RANGER/

Definitely option 2. Reason is, you'll get better and better with the cutting, welding and finishing as you go. Once you cut, if you screw it up it's more to fix later. No reason to cut everything out at once.
I look at the welding that I did early on and laugh now (and have acutally redone some of it). Most of it is hidden though.
I look at the welding that I did early on and laugh now (and have acutally redone some of it). Most of it is hidden though.
"If you don't want to stand behind our Troops, feel free to stand in front of them."
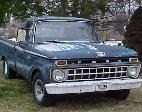
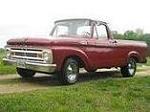
1964 Ford F100
1967 US Army M416
1964 Ford F100
1967 US Army M416
ya, I am fixing what I "fixed" when I was in Highschool.
I am doing the steps and cab mounts. But I might do the cab corners first just to get the hang of it.
On the steps I am going to have to do the rocker panels, steps and step riser, the curved portion below the hinge pocket, portins of the cab floor and the cab mount. It sounds bad but it is only on the seams so I can still tell how it was put together.
Measure twice...measure again...get your cutting equipment set up...messure again....so on. Same with welding in metal. Tack weld stuff together...measure...drink some coffee...measure....so on... The important thing I learned about welding sheet metal in the fab shop was start with the heat too low and increase as needed and weld a few inches then let it cool. Good Luck
1965 F100 "Papaw's Pride"
"So I'm working on a cistern inlet valve and the guy hands me a lock nut wrench! I was like 'What is this, a drainpipe slipknot!'" -Flo
"So I'm working on a cistern inlet valve and the guy hands me a lock nut wrench! I was like 'What is this, a drainpipe slipknot!'" -Flo
If you have any exterior panels to replace, I would recommend you save them for last. Replace all of your unseen panels first. That way by the time you get to the outside, you have that much more practice. Depending on your time frame, try to make even your repairs that will be hidden invisible. This again is just so when it comes time for exterior repairs, they will be that much nicer. Patch panels are not hard if you take your time and pay attention to what you're doing.
Just to reinforce:
Measure twice, cut once.
Weld in small sections, moving around frequently.(Keep your air hose nearby. Weld a section, wait a second, then cool with air. This will help to limit warpage)
Buy a can of weld through primer. Coat the backs of all your panels with it. This will prevent the panels from rusting from the inside out. Especially important when the backside of the panel is not accessible.
Remember that when you are grinding your welds, you are also
creating heat. Be mindful of this to avoid warpage.
Also, when grinding, only grind the weld. Grinding on the surrounding metal will weaken it by making it thinner.
I hope this helps and wish you good luck. As I said earlier, if you take your time and pay attention, your repairs will come out great.
Good Luck.
Well I started the repair today. I was going to go with my option #2 but I think I will have to do #1.  The area is all rusted out and needs a LOT of work...
Here are the before...
Drivers side
[albumimg]1319[/albumimg][albumimg]1320[/albumimg][albumimg]1321[/albumimg][albumimg]1322[/albumimg]
[albumimg]1330[/albumimg]
Pasenger Side
[albumimg]1323[/albumimg][albumimg]1324[/albumimg][albumimg]1325[/albumimg][albumimg]1326[/albumimg][albumimg]1327[/albumimg][albumimg]1328[/albumimg][albumimg]1329[/albumimg]
Here is a shot of the CC hinge pillars...
[albumimg]1331[/albumimg]
Looks like they should fit realy well.
And here is the carnage of today...
[albumimg]1332[/albumimg][albumimg]1333[/albumimg]
I was going to start with the floor (as it will be coverd anyway) but it is atached to so many other rusty parts and bad repairs that I just ended up takeing out the entire cab mount. But it was bad and needed to come out anyway.
More carnage to come...
Here are the before...
Drivers side
[albumimg]1319[/albumimg][albumimg]1320[/albumimg][albumimg]1321[/albumimg][albumimg]1322[/albumimg]
[albumimg]1330[/albumimg]
Pasenger Side
[albumimg]1323[/albumimg][albumimg]1324[/albumimg][albumimg]1325[/albumimg][albumimg]1326[/albumimg][albumimg]1327[/albumimg][albumimg]1328[/albumimg][albumimg]1329[/albumimg]
Here is a shot of the CC hinge pillars...
[albumimg]1331[/albumimg]
Looks like they should fit realy well.
And here is the carnage of today...
[albumimg]1332[/albumimg][albumimg]1333[/albumimg]
I was going to start with the floor (as it will be coverd anyway) but it is atached to so many other rusty parts and bad repairs that I just ended up takeing out the entire cab mount.
More carnage to come...
Dan the man... keep taking pics! I've been doing the same to mine and you'll be glad you did in the end. Besides, it's great inspiration for others who may think they can't do this to their own.
"If you don't want to stand behind our Troops, feel free to stand in front of them."
1964 Ford F100
1967 US Army M416
1964 Ford F100
1967 US Army M416
-
66fordtrucknut
- Posts: 1289
- Joined: July 11, 2006, 11:48 pm
- Location: Eastern Shore - MD

Cool, progress! 
Looks like your left floor patch fropm high school held pretty nicely. Your cab corners look like the ones on my 66...well ventilated.
Looks like your left floor patch fropm high school held pretty nicely. Your cab corners look like the ones on my 66...well ventilated.
My "Slickitis" affliction began here...

66 F100 CC/65 F100 CC/66 F250 CC
If it starts to rain, they'll tax the splash.
If you want to fish, they'll tax the bass.
If you plant a yard, they'll tax the grass.
If you don't play nice, they'll fine your *$#!
66 F100 CC/65 F100 CC/66 F250 CC
If it starts to rain, they'll tax the splash.
If you want to fish, they'll tax the bass.
If you plant a yard, they'll tax the grass.
If you don't play nice, they'll fine your *$#!
-
DaneW1962Uni
- Posts: 11
- Joined: August 2, 2006, 8:14 am
- Location: Sparta, Wi
Looks like fun - I'm also about to start this job myself. I have the new floor pans from CC and am gonna order up my steps and risers and the door jamb patch this month. OH and new cab mounts too.
Yer doin' good!
Keep postin, I love these kind of posts!
Dane
Yer doin' good!
Keep postin, I love these kind of posts!
Dane
1961 Uni LB
1962 Uni SB
1941 Dodge 3-win
1950 Hudson FB Coupe
1953 Hudson Hornet
1936 Ford "Roadster" Pickup
1941 Chrysler Club Coupe
1936 Ford 4dr Sedan "Gasser"
**WANTED-- 1941 Mopar frame**
1962 Uni SB
1941 Dodge 3-win
1950 Hudson FB Coupe
1953 Hudson Hornet
1936 Ford "Roadster" Pickup
1941 Chrysler Club Coupe
1936 Ford 4dr Sedan "Gasser"
**WANTED-- 1941 Mopar frame**
Hey Dane,
I did a big price comparison with all the panels and found that after shipping Dennis Carpenter was the cheepest for everything but the hinge pillars and the floor pans, those are best bought from Carolina Clasics.
I saved $100 for what I got. The only thing I am not happy with are the rocker panels, the rolled lip is too big.
I will try to post some more pics of what I am talking about.