Page 10 of 19
Re: '66 F100 Custom Cab Short/Styleside Factory Correct Rest
Posted: October 17, 2013, 10:44 am
by theastronaut
Starting the radio patch panel.

Shaped to fit the contour of the dash.

Cut line scribed.

Fitted and tacked in place.

Fully welded and smoothed.


Leveled the cab, then leveled the face plate mount to mark the holes that need to be drilled.

Radio mounted.

Made a support brace from 1/8" plate.

Picked up the fenders, hood, splash, and grill panel from the blaster.

This one needs a bit of work!

Re: '66 F100 Custom Cab Short/Styleside Factory Correct Rest
Posted: October 17, 2013, 5:14 pm
by theastronaut
After lunch I bolted up the glove box door to check its fit. I remembered it being pretty bad before we dissassembled the truck. The top right corner was overlapping it's jamb if I adjusted it up enough so the bottom edge was flush.


Cut lines laid out.

After cutting it still wouldn't shut all the way. The hinge brace was hitting the jamb, so I had to reshape those areas for better clearance.

Fitting flush now.

1/8" welding rod will fill in the gap.

Right edge still needs trimming.

The ash tray fit worst than the glove box door, with no way to adjust it from the factory.

The hinge rod is crooked...

The inner hinge bracket fit the dash so tightly that it couldn't be adjusted outward.

After trimming the edges of the bracket to allow ample adjustment.

Starting to reshape the edges to fit flush.

Fits level now after reworking the hinge rod. Gaps still need to be tightened up with welding rods.

Way closer than it was, ran out of time to finish them today.


Before dissassembly.


Re: '66 F100 Custom Cab Short/Styleside Factory Correct Rest
Posted: October 18, 2013, 12:19 pm
by MadMaxetc
You are a busy guy! Looks good. I plan to just fill my ash tray.
Re: '66 F100 Custom Cab Short/Styleside Factory Correct Rest
Posted: October 18, 2013, 5:25 pm
by Shadow
MadMaxetc wrote:You are a busy guy! Looks good. I plan to just fill my ash tray.
With Cigarette Butt's?

Re: '66 F100 Custom Cab Short/Styleside Factory Correct Rest
Posted: October 19, 2013, 9:52 am
by MadMaxetc
Shadow wrote:MadMaxetc wrote:You are a busy guy! Looks good. I plan to just fill my ash tray.
With Cigarette Butt's?
SMART ASS!
A Cigarette is part of the reason my '63 was removed from the roadway. Long story.
Re: '66 F100 Custom Cab Short/Styleside Factory Correct Rest
Posted: October 19, 2013, 9:59 am
by Shadow
MadMaxetc wrote:Shadow wrote:MadMaxetc wrote:You are a busy guy! Looks good. I plan to just fill my ash tray.
With Cigarette Butt's?
SMART ASS!
A Cigarette is part of the reason my '63 was removed from the roadway. Long story.
Sorry, I Just Couldn't Help It With That One!
.....
Re: '66 F100 Custom Cab Short/Styleside Factory Correct Rest
Posted: October 19, 2013, 10:48 am
by loosrp
[quoteloosrp wrote:
Very nice build! Was wondering, what determines the application of the K36 or Slick Sand? K36 a urethane primer?
Thanks,
Russ
Russ, we use Slick Sand on outside panels that need to be absolutely straight. It builds very thick so we can long-block the panels flat with 80 grit.
We use K36 on non-exterior areas like the door jambs, firewall, and interior panels that aren't flat- they all have stamping stretch marks and complex shapes that would be difficult to block sand. For these areas we do the bodywork on the places that need it, shoot, K36, then wetsanded with 500 grit, usually with a soft sanding pad. That gets it smooth enough to paint and saves the stamping details that Slick Sand and blocking would remove. Minor ripples and waves won't show on areas like the jambs or kick panels like they would on the roof skin or a bedside, for example, so there's no need to shoot a "dry blocking' build primer on everything.
Also, when using DPLF we can shoot K36 (or whatever else) over the epoxy within one week without having to sand or scuff the epoxy (DPLF stays "open" for 7 days) so it's a single step from epoxy to having a surface that's ready to wetsand and paint- that really saves time on the inner panels that don't need to be blocked. Slick Sand is also paintable, but it lays out much rougher and makes for more work to get it smooth enough to paint. We like to do as much as we can within 7 days of spraying DPLF so everything that goes over it bonds chemically instead of just mechanically (sanding scratches would be mechanical adhesion). Since the epoxy stays open, whatever is applied on top etches or interlocks with the epoxy so you don't have to worry about adhesion problems.
][/quote]
Thanks for the explanation, I used Slick Sand pretty muck everywhere... I understand and now know to use a urethane primer on the jambs and under hood/carriage.. I'm a huge fan of epoxy primer. The process I used was to start with bare metal, 2 coats epoxy, 2 coats slick sand, block, 2 more coats slick sand, block, then 2 coats epoxy and dry block to 400. Love the "chemical adhesion" of the epoxy, I even reduce it and spray it for a sealer before paint. The paint on my truck is almost 5 years old and nothing silly has happened to the paint job thus far..
Very nice build, definite top dollar truck under construction!!
Russ
Re: '66 F100 Custom Cab Short/Styleside Factory Correct Rest
Posted: October 23, 2013, 7:41 am
by theastronaut
loosrp wrote:Thanks for the explanation, I used Slick Sand pretty muck everywhere... I understand and now know to use a urethane primer on the jambs and under hood/carriage.. I'm a huge fan of epoxy primer. The process I used was to start with bare metal, 2 coats epoxy, 2 coats slick sand, block, 2 more coats slick sand, block, then 2 coats epoxy and dry block to 400. Love the "chemical adhesion" of the epoxy, I even reduce it and spray it for a sealer before paint. The paint on my truck is almost 5 years old and nothing silly has happened to the paint job thus far..
Very nice build, definite top dollar truck under construction!!
Russ
Thanks, and you're welcome! Slick Sand will work everywhere but urethane is easier to sand and goes on smoother so there's less sanding to get it flat. The nice thing about Slick Sand is that it doesn't shrink. Urethanes will shrink a little, the better quality primers aren't bad but if you shoot over deep scratches then the scratch will eventually show through. Slick Sand won't do that.
Re: '66 F100 Custom Cab Short/Styleside Factory Correct Rest
Posted: October 23, 2013, 7:46 am
by theastronaut
Been slacking on posting pics, here's where we're at.
Doors installed and aligned.

Skim coated across the panel gaps. After blocking the panels will be dead flush.

Frame wrapped with moving blankets, macking paper, and stretch wrap to protect from overspray.


Cab back on frame so we can install and align/fit the front clip.


Re: '66 F100 Custom Cab Short/Styleside Factory Correct Rest
Posted: October 25, 2013, 11:44 am
by theastronaut
Got most of the kinks worked out of the front clip.
The hinge bottoms were hitting the pinchweld and wouldn't let us adjust the hood down far enough.

After:

The radiator support was too high, so the fender didn't fit right and the hood ran uphill.

The fender also didn't fit the shape of the door edge, so we had to flatten it.

After standing on it with the inner brace supported top and bottom.

Hood adjusted/bent to fit flush with the cowl.

The fender to filler panel fit was horrible, paint would have chipped as soon as the bolts were snugged up.


After straightening the gap out.


Driver side fender gap. Needs to be opened up a hair at the top.

Hood damage.

Bumper slots in the filler panel didn't line up, even though the bumper fit perfectly with the holes in the frame horns.

Fender and filler panel corners stuck out past the hood edge.

After cutting and reshaping.


Frame/engine protected from welding splatter with a fiberglass blanket.

Found some pinholes in the hood edge so we cut it out.


New piece welded in.

Re: '66 F100 Custom Cab Short/Styleside Factory Correct Rest
Posted: October 26, 2013, 8:08 am
by thenephilm
Your fit and finish is fantastic. I hope mine fits together half this good when its all said and done lol.
Re: '66 F100 Custom Cab Short/Styleside Factory Correct Rest
Posted: November 5, 2013, 5:55 pm
by skidoorulz
Hey astro where you at?
Re: '66 F100 Custom Cab Short/Styleside Factory Correct Rest
Posted: November 5, 2013, 6:00 pm
by theastronaut
skidoorulz wrote:Hey astro where you at?
I'm here.

Rough bodywork is nearly finished, we'll have it all in Slick Sand this week. Have some post missing that I need to go back and add again...

Re: '66 F100 Custom Cab Short/Styleside Factory Correct Rest
Posted: November 7, 2013, 1:03 pm
by theastronaut
Re: '66 F100 Custom Cab Short/Styleside Factory Correct Rest
Posted: November 7, 2013, 1:08 pm
by theastronaut
With the metalwork smoothed out and the panels aligned, we skimmed all the panels together then blocked them together. This way they're all exactly flush.

Hood shot with PPG DPLF epoxy.

After all the rough bodywork was done we shot it with Slick Sand.


Even gaps.

Hood corner fit, starts to poke out around the curve so to match the front panel to hood edge fit.

Re: '66 F100 Custom Cab Short/Styleside Factory Correct Rest
Posted: November 8, 2013, 8:44 am
by thenephilm
Looks flippin awesome sir
Re: '66 F100 Custom Cab Short/Styleside Factory Correct Rest
Posted: November 14, 2013, 5:37 pm
by SixtySix Ford
All I can say is WOW!!!

Re: '66 F100 Custom Cab Short/Styleside Factory Correct Rest
Posted: November 18, 2013, 2:42 pm
by theastronaut
thenephilm wrote:Looks flippin awesome sir
SixtySix Ford wrote:All I can say is WOW!!!
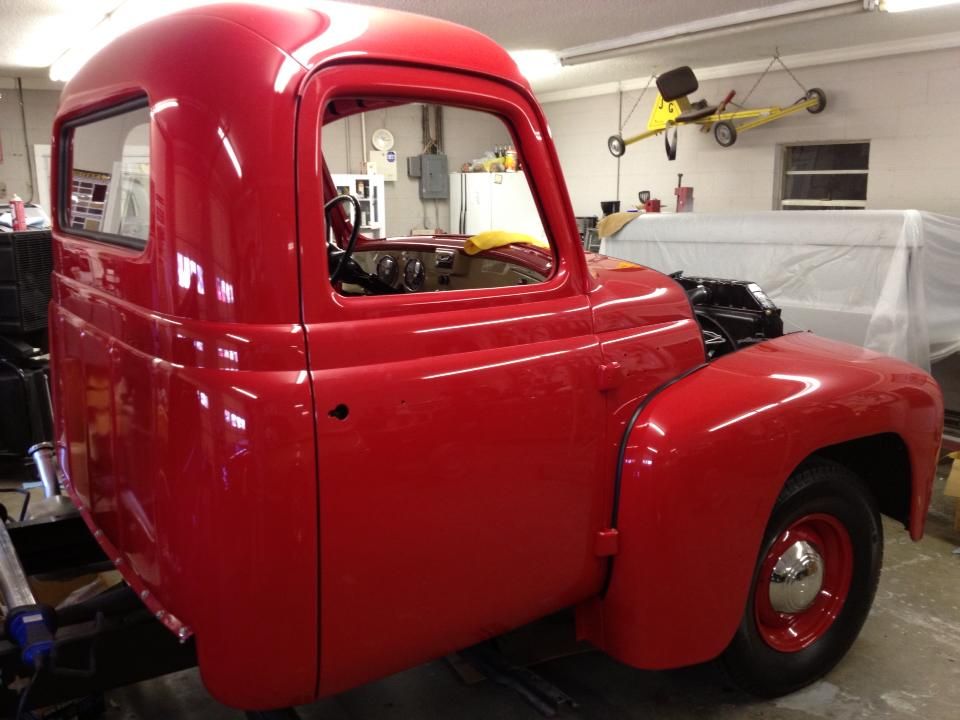
Thanks guys! We're finished with the first round of Slick Sand and blocking, will shoot another 3 coats today or tomorrow and start over again. Also ordered Lizard Skin heat and sound insulation to spray inside the cab, that should be here today. We have a '55 International Pickup back in the shop for reassembly (painted it last year) so that's slowed us up some on the F100.
Re: '66 F100 Custom Cab Short/Styleside Factory Correct Rest
Posted: November 22, 2013, 8:55 am
by theastronaut
Re: '66 F100 Custom Cab Short/Styleside Factory Correct Rest
Posted: November 22, 2013, 8:56 am
by theastronaut


