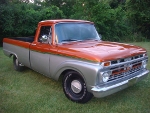
wyatts 65 4x4

A place just for our project & build threads.

Moderators: Casey 65, Kid

quietwyatt
Posts: 513
Joined: January 8, 2010, 3:56 am
Location: york

Post by quietwyatt »

Here's a pic of the motor after clean up and inspection. It will be going back in as soon as I get the firewall cleaned and painted.
Sorry for the poor pic quality. I'm using my cell phone.

Image
User avatar
greenindian
Posts: 130
Joined: June 30, 2007, 1:44 pm
Location: Gettysburg, PA

Post by greenindian »

Wyatt:
Motor looks good. Cleaned up real nice, looks to be a solid mill in your truck. Did you repaint the valve covers already? If not they look great.
Damon
User avatar
1965fordf100
Posts: 483
Joined: February 25, 2008, 3:32 pm
Location: Reno, NV
United States of America

Post by 1965fordf100 »

Lookin Good! Nothin better than a nice clean power plant!
Phil
quietwyatt
Posts: 513
Joined: January 8, 2010, 3:56 am
Location: york

Post by quietwyatt »

Yep, We repainted the valve cover and the engine. The fan and pulleys are also painted and ready to go on after install.
I like a clean engine, Makes it much easier to work on.
Should look real purty sittin in between the new inner fenders along with the freshly painted firewall. I'm gettin excited just thinking about it :lol: .
Thanks guys.
Wyatt
User avatar
Alan Mclennan
Posts: 9324
Joined: October 14, 2006, 6:16 pm
Location: In the shed... Cranebrook NSW
Australia

Post by Alan Mclennan »

Crikey Wyatt!, you aren't hanging about are you!, and about the pic`s, I thought you were using my photographer for a sec!
Honey, If I say I`ll fix something I will, there`s no need to remind me every 6 months!!
66 f100 tabletop swb 351 Clevo C6 "Beryl"

Slick Stock 3 KCMO
Slick Stock 4 Altoona
Slick Stock 5 KCMO
Slick Stock 6 Altoona
Slick Stock 7 Salina KS
Slick Stock 8.............................. cry.gif
quietwyatt
Posts: 513
Joined: January 8, 2010, 3:56 am
Location: york

Post by quietwyatt »

Well, Today I finished the lower door hindge on the passenger side.

Image
I had to cut the battery access panel out of the new floor pan after I installed it. I believe in the saying," Waste not Want not".
My battery tray was rusted out bad so I used the piece that I cut out of the floor pan and used it for the bottom of the battery tray.
I also had to trim part of the floor pan off at the hump , so I used that piece with the other piece to make a lip so the battery was protected better along the bottom and also would keep it from shifting out of the tray.

Image

Here it is all together and sprayed with undercoat to protect it from the elements.

Image

Thanks for looking at my daily driver project.
Wyatt
Anthony

Post by Anthony »

lookin' good Wyatt. If you keep moving at this pace you will pass me up!! :lol: :lol: Looks like we have very similar projects and ideas. Mine will be my Daily also when she is done.... keep us posted on the progress, your Slick is coming together nicely.....
quietwyatt
Posts: 513
Joined: January 8, 2010, 3:56 am
Location: york

Post by quietwyatt »

Well, the passenger side is done enough to let me move on to the driver side.

Image

So, Here we go again. Yikes!!!!!!!!!!!!!!!!!!

Image
User avatar
jwh f-100
Posts: 1903
Joined: June 11, 2007, 6:25 pm
Location: Equinunk, PA
United States of America

Post by jwh f-100 »

Looks great!
Jason

Beer will change the world.

I don't know how but it will.
Sinc
Posts: 544
Joined: July 13, 2006, 6:47 am
Location: Holland, Pa.

Post by Sinc »

Outstanding! Keep up the GREAT work!
User avatar
Max
Posts: 3456
Joined: July 11, 2006, 11:53 am
Location: 29°35'07.00"N 95°09'07.49"W
Contact:
United States of America

Post by Max »

Very nice work! Same stuff I did to mine - lower door pillars, floors (no battery box though, mines under the hood).
"If you don't want to stand behind our Troops, feel free to stand in front of them."

1964 Ford F100
1967 US Army M416
MadMaxetc
Posts: 2600
Joined: July 10, 2006, 12:00 pm
Location: Wichita, KS
Contact:
United States of America

Post by MadMaxetc »

Is there a sertain order you need to replace all the metal in the last picture?

I need to do the Floor, Step, Riser, Pillar, and everything behind it. :(
Dan
Project: '63 F-100 LWB / 460 / C6 / 2x4
My Build Thread
quietwyatt
Posts: 513
Joined: January 8, 2010, 3:56 am
Location: york

Post by quietwyatt »

Dan, I don't know if there is an order to do this.
After I cut the floor and kick panel out I had to make a new kick panel 1st which goes all the way to the bottom of the part that the fender bolts to.
Then I had to refab the whole part that the fender bolts to.
Then I tac welded the lower hindge panel in place to get everything lined up. Once I was satisfied with the way everything lined up I welded the hindge panel in place.
Then I welded the floor pan in and put the cab mount up under into its position and welded it in place. My floor pan was not long enough so I had to add another 3" to it. If you look close enough, you can see where I added it. I over lapped that part so the water would not be able to find its way in easily. I have a tool to make a 1/2" lip for over lapping. I'm not saying it is the right way to do it but it makes it a lot easier to spot weld it in.
Then I cut the hole in for battery access. I put bondo around the edges to help seal it from the inside. I will also use some kind of caulk on the under side. Once that is all sealed I am going to undercoat the whole underside.
Once I get both sides finished, I am going to get a bed liner kit and do the whole inside of the floor. That should seal that baby up nice.
The best advise I can really give you is take your time and think it through. It's almost like putting a puzzle together. Take measurements before you cut it apart. That way you know where things go.
I'm sure there are several ways to do this. My way probably rates close to the bottom of the list.
Remember, Measure, Think, measure, think and measure and think again. Good luck and maybe someone else can offer a better way.
Wyatt
quietwyatt
Posts: 513
Joined: January 8, 2010, 3:56 am
Location: york

Post by quietwyatt »

Drivers side lower hindge support finished.

Image
The light at the end of the tunnel is getting brighter or is that a different light coming at me :shock:
Wyatt
quietwyatt
Posts: 513
Joined: January 8, 2010, 3:56 am
Location: york

Post by quietwyatt »

I just realized I made the hump in the center a bit too wide. The fender won't sit back where it belongs due to the upright brace in the back side of the fender. I will redo that part sometime this week. Too many hours of burning the mid night oil. That's when mistakes start popping up.

Image
quietwyatt
Posts: 513
Joined: January 8, 2010, 3:56 am
Location: york

Post by quietwyatt »

The front of the driver door was rusting below the hindge. that was cut out and replaced.

Image
User avatar
jwh f-100
Posts: 1903
Joined: June 11, 2007, 6:25 pm
Location: Equinunk, PA
United States of America

Post by jwh f-100 »

Looks great man!!! Keep the pics coming.
Jason

Beer will change the world.

I don't know how but it will.
User avatar
slickmainer
Posts: 2555
Joined: October 8, 2007, 6:41 pm
Location: Auburn Maine
Contact:
United States of America

Post by slickmainer »

how do you fix this part?
Image

Mine is rusted there too. Do you just start welding pieces of metal together? Does that part have a name?
--Gregg--
you can't get there from here
User avatar
Paranoid!
Posts: 172
Joined: March 8, 2010, 12:06 pm
Location: Festus,MO

ford

Post by Paranoid! »

Hey great work!!
Keep'm coming!!

I believe I would dub that the PITA Support. :lol:
I thought I was wrong once...
Turned out I was right!!
-----------------------------------------
Russell
quietwyatt
Posts: 513
Joined: January 8, 2010, 3:56 am
Location: york

Post by quietwyatt »

Gregg, I don't know what that area is called but I have a few names for it that I would not rather post. But yes what I did was welded pieces in and shaped them as I went. I've been useing 22 gauge metal. It's stiff but still easy to work with a hammer as you progress. I'm not saying it is the right gauge to use but it works for me. I should take pics as I go so the members can see how I did it. The undercoat covered up the weld seams pretty good. I will be repairing the hump that I made too big so I will post a few pics on that. Thanks for asking and I will keep the pics coming.

Russ, The pita pretty much sums it up :lol:

Wyatt
Post Reply