Page 1 of 2
latest on my Fairlane paintjob
Posted: April 7, 2009, 10:31 pm
by Phil
Feel free to roll your eyes at my further hack-ness. I know I am.

So yesterday I decided to scuff up the trunk lid and take it to work to reshoot it. The orange peel was horrific
I grabbed some 600 and went over with a block it but it still held the gloss pretty bad.
I then tried 400. It seems that this spray I did is harder than the stuff the painter I axed put on the car.
No clue why, its the same mix/product. I did let the body sit for 2 months before wetsanding so maybe that's it.
When I did the quarters with 1000 the orange peel was gone
and the driveway looked like I killed somebody with a hammer.
All that happens on the parts I shot is my boots get wet.
I decided to get medieval. I stuck a sheet of 400 on my palm sander and hit a spot in the middle of the trunk.
Screw that mamby pamby testing a discreet area crap.
Instantly the orange peel was gone and the spot was dulled. Now that's progress.
I grabbed the hose, flushed the lid and palm sanded the whole thing risking electrocution.
I then blocked with 600 then 1000.
I polished the lid. It was like glass.
I did miss some spots and you could see those jitterbug fine swirled scratches all over though.
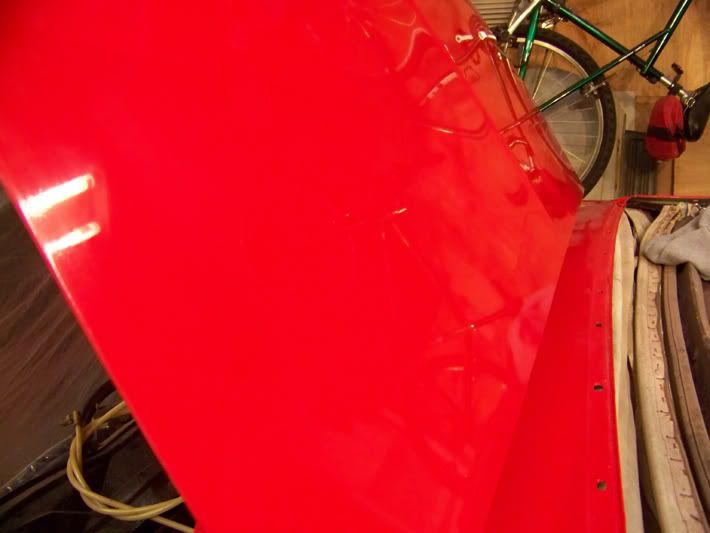
Today I grabbed the sander and scuffed with 600 then block sanded with the 600. I then block sanded with 1000 and hit the whole deal with the buffer.
Under florescents you can see the jitterbug marks but outside I couldn't. It's supposed to be sunny tomorrow so Ill roll the car outside to look again. Why roll it outside? Cause I put the lid on the car! Kind of a milestone anyway...
Then I got stupid and hung a door for kicks. The latch assy is still out of the door though so alignment won't happen any time soon.
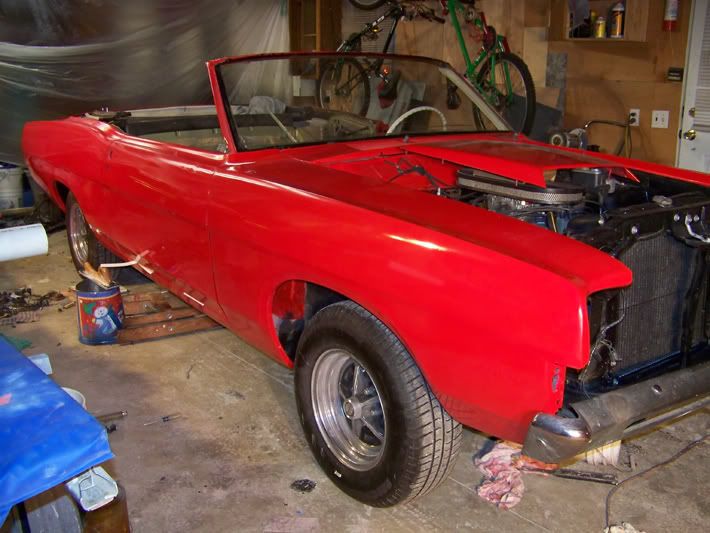
But here is the cold reality.
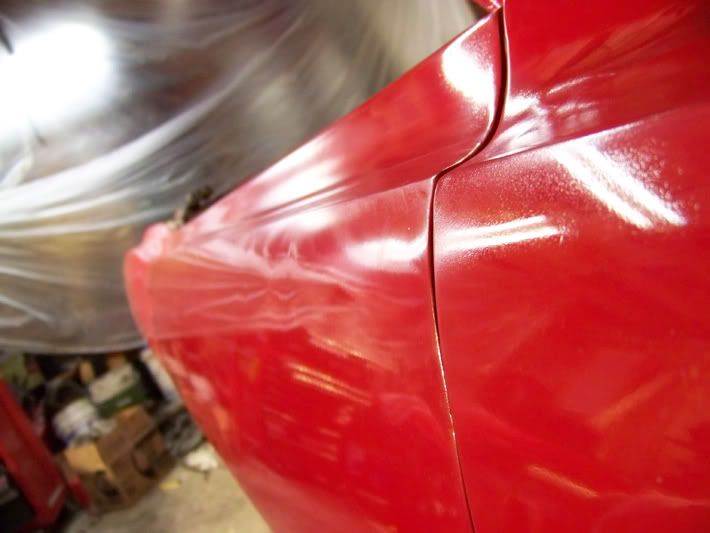
My bodywork and spraying generally sucks. This fender needs massive sanding and a repaint. I went thru color on the body line in one spot

You can see the moulding holes I welded at the top of the door too. I think the filler shrunk there.
maybe some day Ill block the whole car and reshoot it but don't bet on it. I think it will be OK. Guess we'll see.
Posted: April 7, 2009, 10:57 pm
by slick4x4
its not perfect....so what, its pretty darn good
a vehicle that a guy restores and does 90% + of the work himself impresses me more than the guy that hands $ to someone else to do the work.
besides thats a nice shade of red...
Posted: April 7, 2009, 11:42 pm
by Max
I'm with Pat. Talk to any darn good painter and they'll tell you the same story you just told, just maybe 10 or 15 years earlier in their careers.
Paint work is intimidating for a lot of people for some reason. It's just paint. Sand the crap off and redo it. I think you did a hell of a job and are learning from it.
Posted: April 8, 2009, 3:52 am
by deviant1
If you get the paint too nice you'll be scared to drive it... and you can't have a car like that and not drive it.
Posted: April 8, 2009, 4:59 am
by Anthony

with slick4x4. I'd rather talk to and admire a car done by the owner him/herself that can tell me ALL about the trials than someone saying " yup, I bought her just the way she sits". I think the car looks great and a few "jitterbugs" wont hurt my impression of it at all, as long as you have a story with them.. just my

. Anthony
Posted: April 8, 2009, 6:22 am
by scoutmaster
Phil,
Great job!, A pro done paint job will chip just as easy as one you have done yourself, but you will have the skills to fix it yourself. Painting is something I have always been afraid of, but have started to try this year. Can't wait to see it done!
Posted: April 8, 2009, 7:07 am
by Phil
Thanks guys. I'm 1/2 way there and I already want to redo some stuff but It'll keep. It is cool not to be afraid to screw it up.
I wish I could get over my fear of rebuilding a trans. I just paid a guy $400 and the 1st time I started the car id sprayed 2 qts of ATF all over.
At 1st I thought it was the vent but I think its coming from the Servo
Posted: April 8, 2009, 9:12 am
by Greg D
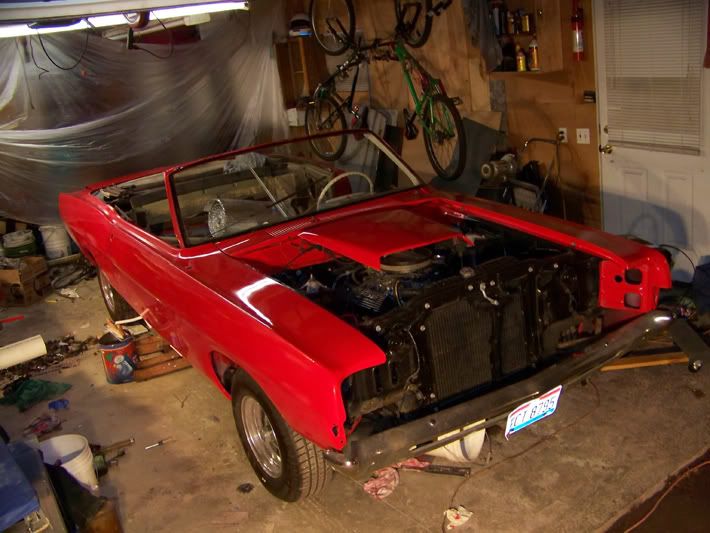
Even with the imperfections it looks like you are still going to have a decent driver quality paint job and the car is a driver right? That red with the white top & interior is going to be pretty - you going to add a white GT stripe along the rocker (I would, lol)? I'd love to have a mid to late 60s Torino or Fairlane vert, restomod it with a roller cam 5.0 & AOD - be a cool driver for sure and with that combo the mileage would be pretty decent.
Posted: April 8, 2009, 10:17 am
by Slick Fan
I agree with these guys, I think it looks great! I'm sure my first attempt wouldn't turn out half as good, by any means.
I like the invisible hood effect, with the scoop sitting there.

Posted: April 8, 2009, 10:24 am
by Phil
Trust me it looks better than the real hood
As for stripes I was really excited about using a 68 C stripe but the painter I hired F'd up the body line so bad I have to put the side trim back on.
I'd ignore thet but I paid him to weld up 30 trim holes and he forgot 1
Again, making the trim necessary. Worst $1500 I ever spent. Ever.
Here is what I wanted to do

Posted: April 8, 2009, 12:07 pm
by Greg D
That would be even cooler than the rocker stripe of course. I like your wheels better than that car's. I'd personally run late Mustang Bullitt's if I did one though.
Phil, is your choice of red brighter or is it the pics? I like yours better.
Posted: April 8, 2009, 1:00 pm
by Phil
That's Rangoon red.
Mine's single stage 95 Viper red. The color flop in sun looks orange.
Its very bright out of the gun but sanding and buffing makes it about 5% duller
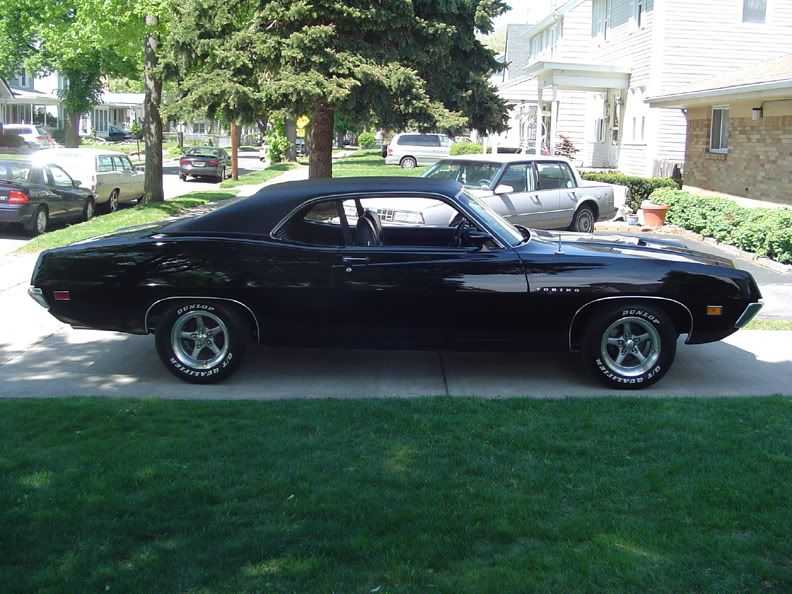
Those wheels are 69 GT wheels in that pic, I may put the ones from my black car on because they are 15s
Posted: April 8, 2009, 1:03 pm
by Greg D
Those would look real good too.
Posted: April 8, 2009, 4:35 pm
by Fanatic
Phil, pick up an air powered DA sander. No electrical shock and no jitterbug marks. You will be glad you got one. Start alittle fine with the paper and use low pressure until you get the feel of it.
Tim
Posted: April 8, 2009, 6:28 pm
by Phil
Fanatic wrote:Phil, pick up an air powered DA sander. No electrical shock and no jitterbug marks. You will be glad you got one. Start alittle fine with the paper and use low pressure until you get the feel of it.
Tim
Thanks Tim.
I may just do that.
Painting
Posted: April 8, 2009, 7:59 pm
by Truckrat
Phil, buddy, there isn't a painter out there that doesn't screw up stuff now and then. I ought to know, I've been doing it for over 35 years. You have a great looking job on that red car of yours and with any single stage paint, it just takes some time to work out the little things. By using single stage, you are losing your topcoat with all that sanding and blocking to get her slick as a baby's behind, but you can always shoot some more over it. May I suggest checking with your paint supplier to see if there is a urethane clear topcoat that would be compatable with your red color. This way you could shoot the clear over the red and then color sand out any dust or orange peel, and you would be buffing the clear and not your red. With the price of paint being what it is, I am sure the clear would be a lot cheaper than having to buy another gallon or two of that expensive red. Seems to me PPG made a real good clear that was a universal that could be used over single stage paint. Check with your local paint guy to be sure. I also really like that "C" stripe in that picture too. Sure would like to see your car when it is done.
Keep up the great work, Phil. TR
Re: Painting
Posted: April 8, 2009, 9:10 pm
by Phil
Truckrat wrote:Phil, buddy, there isn't a painter out there that doesn't screw up stuff now and then. I ought to know, I've been doing it for over 35 years. You have a great looking job on that red car of yours and with any single stage paint, it just takes some time to work out the little things. By using single stage, you are losing your topcoat with all that sanding and blocking to get her slick as a baby's behind, but you can always shoot some more over it. May I suggest checking with your paint supplier to see if there is a urethane clear topcoat that would be compatable with your red color. This way you could shoot the clear over the red and then color sand out any dust or orange peel, and you would be buffing the clear and not your red. With the price of paint being what it is, I am sure the clear would be a lot cheaper than having to buy another gallon or two of that expensive red. Seems to me PPG made a real good clear that was a universal that could be used over single stage paint. Check with your local paint guy to be sure. I also really like that "C" stripe in that picture too. Sure would like to see your car when it is done.
Keep up the great work, Phil. TR
The problem I have is that every time I shoot it orange peels.
I know what I am doing wrong but it doesn't seem to matter.
Also my compressor broke (I let work use it like a dope) so I am taking my parts to work 2 at a time and shooting them, Red makes a hell of a mess on the booth filters and I am trying to be low key about it. I am certain the color is super thin now after all my sanding.
Today I did a door and before I painted it there was a spot where I sanded thru the hi build and exposed the epoxy primer. That dark spot showed through the paint. Luckily that side trim will cover that spot.
I dunno I keep thinking about scuffing and shooting the entire car but I have no place to do it and I am 100% outta cash.
Thanks for the advice. I appreciate it and I will be taking it all into acct when I do my truck someday. I will do a base clear on it though I think
Posted: April 10, 2009, 11:05 am
by Johnny Canuck
PHil I commend you for having the brass cajones to attempt that project. I too had more than my fair share of -let's say- 'go 'rounds' with body men, but still never considered pulling the work home

This bud's for you man.
Posted: April 10, 2009, 1:58 pm
by Slick Fan
What are those rims on your black car? I think you said before, but I either didn't make note of it, or I just plain lost the note. Those things look absolutely great & I think my Charger would be very happy wearing a set.

Posted: April 10, 2009, 3:03 pm
by kstones63
Phil,
My painter was originally talking about shooting my truck with single stage, then letting me assemble it, fix anything I didn't like, block sand it out one more time and then shoot the outside with beascoat/clearcoat. That way way I could sand out and polish the clearcoat. I got lucky and he was very pleased with the body work so he decided to just shoot 1 time with base/clear. The only problem with that is now I have to be extra careful in assembly.
You might consider doing the base/clear over what you have done so far. It is a lot more forgiving even though it does look good so far.

Keep up the good work,
Kevin