'62 Unibody Build (back) Up

A place just for our project & build threads.

Moderators: Kid, Casey 65

User avatar
Gary Seymour
Posts: 1192
Joined: September 15, 2006, 5:17 am
Location: Brown County, Indiana
United States of America

Post by Gary Seymour »

Okay, so I didn't take any pictures of the uni body coming off the frame. But at this point I'm down to the bare frame. I removed the big crossmember at the bell housing and made a removeable one. I will be adding two additional bolts to the flange this winter.
Image

Boxing plates:
Image

Removeable crossmember:

Image

Engine and trans moutns for the 351C/C6:

Image

These mounts were fabbed first with the bod on - clip off. I mounted the Cleveland 1" over the to pass. side, and at the same crank angle that the 292 was set at relative to the frame.

Image
User avatar
Gary Seymour
Posts: 1192
Joined: September 15, 2006, 5:17 am
Location: Brown County, Indiana
United States of America

Post by Gary Seymour »

Moving on the the rear end. Two things I wanted to do. C-notch and moe the axle forward. Also had to flip the front spring perch so the reversed-eye spring wasn't rubbing like it was. The reason for moving the axle forward was to better center the wheel/tire in the wheelwell opening. It's my personal opinion that on the lowered truck the wheel looked to far back. I determined I could easily move the rear axle forward 1-3/4" by drilling the spring pad on the axle and just sliding it up.

Here's my luan box plate template - designed for the axle to be forward the 1-3/4"

Image

I made the plates with 1/4" steel, and welded them in before trimming away the outside frame rail Then the underside was boxed together with 3/8" plate.

Sadly, I am "short" any more pics of the frame work, so I'll have to skip the the pics I have of the finished frame.
User avatar
Gary Seymour
Posts: 1192
Joined: September 15, 2006, 5:17 am
Location: Brown County, Indiana
United States of America

Post by Gary Seymour »

Here's some pics of the finished frame.

Image

Image

Image

Image

Image

Image

Not sure if all the mods are noticeable int hese pics or not. But, see the front rear spring perch move, c-notch, boxing, sway bars, etc. It's been fun so far.
User avatar
Gary Seymour
Posts: 1192
Joined: September 15, 2006, 5:17 am
Location: Brown County, Indiana
United States of America

Post by Gary Seymour »

Another frame mod to mention was that I moved the rear shock mounts forward by the same amount the rear end was moved, 1-3/4". I felt I needed to do this, since I matched the shock extended / compressed length with what I needed for the lowering. I didn't include the axle move, so I moved the shock mounts too. I really wanted to redo the shock mounts to have staggered shocks, but I didn't do it. I wish I had done it now, just for the sake of doing it. Modern trucks have staggered shocks, so it must be better in some way. Shoulda, woulda, coulda........

Now it was time to get the body ready to go back on the frame. And I DO have pictures of this process so:

Stay Tooned.
User avatar
HiBoy63
Posts: 1235
Joined: March 12, 2007, 1:48 pm
Location: Colbert Wa
Ireland

Post by HiBoy63 »

Gary it looks like it will be a sweet little ride when it is done. Should look good crusin down the Blvd.
1963 F250 4x4x292
1965 F100 4x4x352
1998 F150 4x4x4.6
2001 Sport Track 4x4x4.0

In case you are wondering thats Ireland......Freedom is not Free!!!!!!!!

Heritage country Flag
User avatar
Gary Seymour
Posts: 1192
Joined: September 15, 2006, 5:17 am
Location: Brown County, Indiana
United States of America

Post by Gary Seymour »

Thank you HiBoy, I want it to be seen and heard, so I am going to have exhaust cut outs and a line lock on it. Flamethrowers.........?
User avatar
Gary Seymour
Posts: 1192
Joined: September 15, 2006, 5:17 am
Location: Brown County, Indiana
United States of America

Post by Gary Seymour »

So now, I had to get the body ready to go back on the frame. I cleaned the underbody with a wire brush on an angle grinder, scrapers, sandpaper - you name it....

Then I rolled on some Rustoleum semi gloss black everywhere I could and brushed the rest.

Image


Image

The new wood blocks were a gift from my friend Stoney (Stoney64). He made an extra set just for me out of some treated oak or something.


I cleaned the firewall the same way as the underbody, but used SOS pads on it too. A few coats of primer and some sanding on it. I am not building a show truck. I sprayed on Rustoleum semi gloss black.

Image

Got the frame positioned under the body. I used rims only on the rearend so I keep the body closer to the ground. To have the body high enough to clear the tires mounted, made me nervous.

Image
MadMaxetc
Posts: 2600
Joined: July 10, 2006, 12:00 pm
Location: Wichita, KS
Contact:
United States of America

Post by MadMaxetc »

Looks like you are having fun today!

Keep the truck porn coming!! :D

I did rustolium on my 67 inner fenders in the engine bay and it is holding up realy well.

I used it on the suspention and 10,000 miles later you can't tell that I used anything. :(
Dan
Project: '63 F-100 LWB / 460 / C6 / 2x4
My Build Thread
User avatar
Gary Seymour
Posts: 1192
Joined: September 15, 2006, 5:17 am
Location: Brown County, Indiana
United States of America

Post by Gary Seymour »

These are the lift contraptions I made. I used my engine hoist up front with the chain, and hyd. jacks in the back.

Image
User avatar
Gary Seymour
Posts: 1192
Joined: September 15, 2006, 5:17 am
Location: Brown County, Indiana
United States of America

Post by Gary Seymour »

Thanks for the backup on the rustolem paint MadMaxetc. It goes on really good. I think the truck will definitely out-live me as solid as is is, so I didn't see the need to do anything more to it. I have to drive a mile on a gravel, hilly road before I get to blacktop, so......I'll never put mirrors under it at a cruise-in... :)
User avatar
Gary Seymour
Posts: 1192
Joined: September 15, 2006, 5:17 am
Location: Brown County, Indiana
United States of America

Post by Gary Seymour »

Let's get ready to RUMBLLLLLLLLLLLLLLLLLLLLLLE!

Image

Actually, I've decided to focus on some body work at this point. I am going to get the cleaning, blasting, cutting done outside, and get it on the warm side of the garage for the winter, where the bondo will flow like milk and honey....

More to come, details at eleven, stay tooned. Rumor has it that some bed patch panels from ICEMAN6166 may be involved.... :shock:
User avatar
Alan Mclennan
Posts: 9324
Joined: October 14, 2006, 6:16 pm
Location: In the shed... Cranebrook NSW
Australia

Post by Alan Mclennan »

Nice work Gary!, the pic`s are great to!. no shots of the Clevo yet! :cry:
Honey, If I say I`ll fix something I will, there`s no need to remind me every 6 months!!
66 f100 tabletop swb 351 Clevo C6 "Beryl"

Slick Stock 3 KCMO
Slick Stock 4 Altoona
Slick Stock 5 KCMO
Slick Stock 6 Altoona
Slick Stock 7 Salina KS
Slick Stock 8.............................. cry.gif
User avatar
Greg D
Posts: 10113
Joined: September 13, 2006, 4:39 pm
Location: Podunk Iowa
United States of America

Post by Greg D »

Very Nicely done!
1964 F 100 - I am going to do "something" with it.......

viewtopic.php?f=32&t=15942

1987 Mustang LX Convertible, 2.3 Auto - cruiser.
1994 F 150 XLT 2WD


~ Yes - I adopted another cat..............

Cam L Milan,
You'll be missed my friend.
User avatar
HiBoy63
Posts: 1235
Joined: March 12, 2007, 1:48 pm
Location: Colbert Wa
Ireland

Post by HiBoy63 »

I used rustoleum gloss black on my frame after cleaning most of the rust off with a wire brush and drill and hand. Its still holding up pretty good but some rust is comming back but after 20 yrs of no cleaning and just sitting there I think thats pretty good.
1963 F250 4x4x292
1965 F100 4x4x352
1998 F150 4x4x4.6
2001 Sport Track 4x4x4.0

In case you are wondering thats Ireland......Freedom is not Free!!!!!!!!

Heritage country Flag
User avatar
Gary Seymour
Posts: 1192
Joined: September 15, 2006, 5:17 am
Location: Brown County, Indiana
United States of America

Post by Gary Seymour »

Thank you everyone for the comments! The feedback is good to have, and it's inspiring.

Alan, fellow Cleveland fan (351 Cleveland - not the Cleveland Browns or Cavaliers), I was going to move on to the engine assembly, but I've decided to spend the winter smoothing the body and fixing some rust. Also getting the inside of the cab done, wiring fixed up, brakes plumbed, etc. Then when the warmer weather returns I can finish cleaning the rest of the engine parts - oil pan, timing cover, etc. I can take a few shots of the block and all the pieces for you???

I want to be ready to fire the engine as soon as it's assembled and dropped in. Everything for the Cleveland is ready, though. The block has been cleaned, bored .03 over, new cam bearings, freeze plugs. The heads have been redone, the pistons are on the re-sized rods, crank ground .10/.10.

I have an Edelbrock Performer intake, Holley 600 carb, a set of headers (don't know what they were made for but they fit) and an HEI distributor (GM HEI design - but it's on a 460/Cleveland housing).

I had the Celveland given to me. A friend had it disassembled in his shed, and when he moved, he didn't want to take it with him. So I had the engine way before I got the truck. I think it came out of a '73 Torino. It appeared to have had an easy life, or it had low miles.

Another thing - I am considering running this on propane or natural gas in the future.

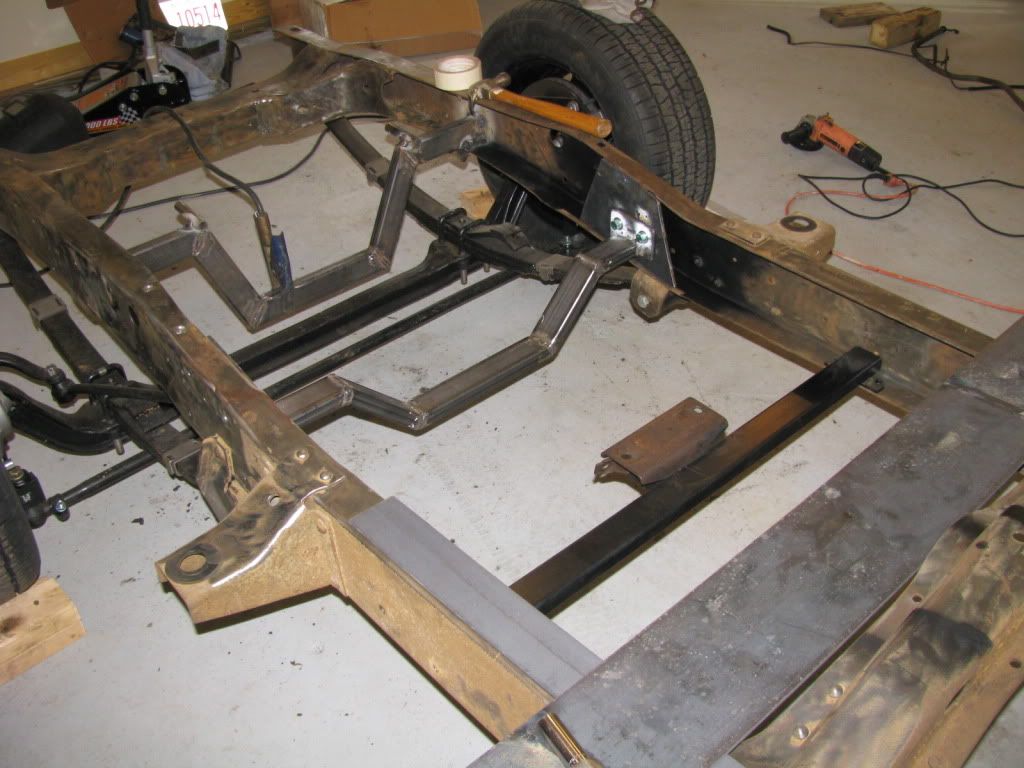
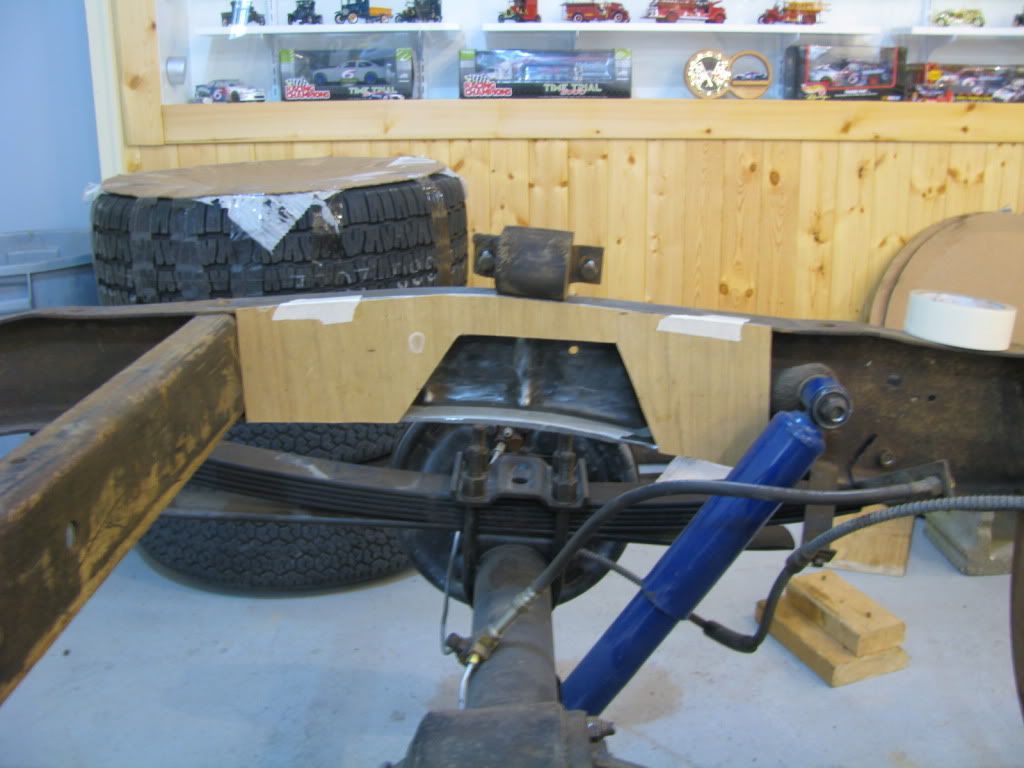
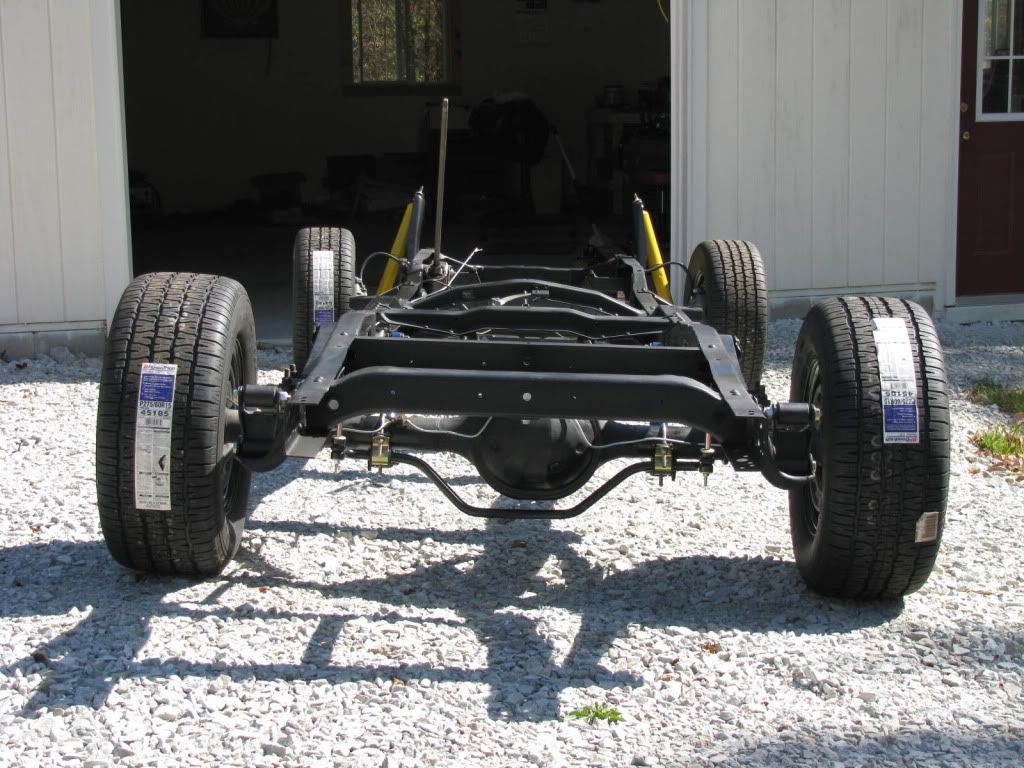
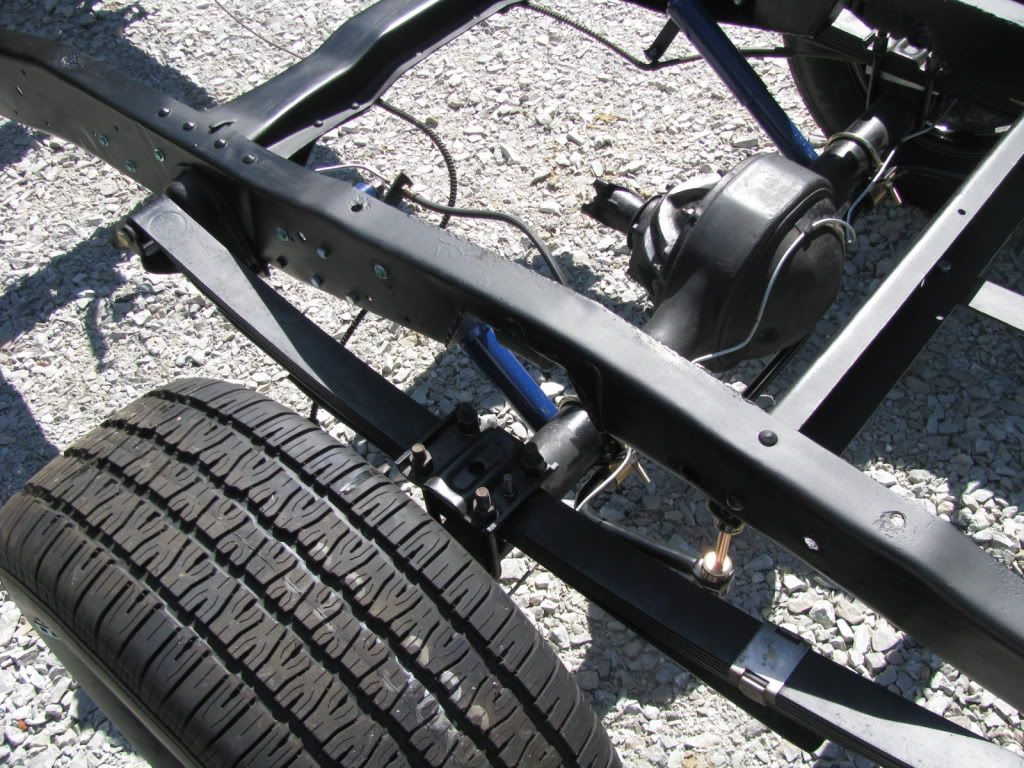
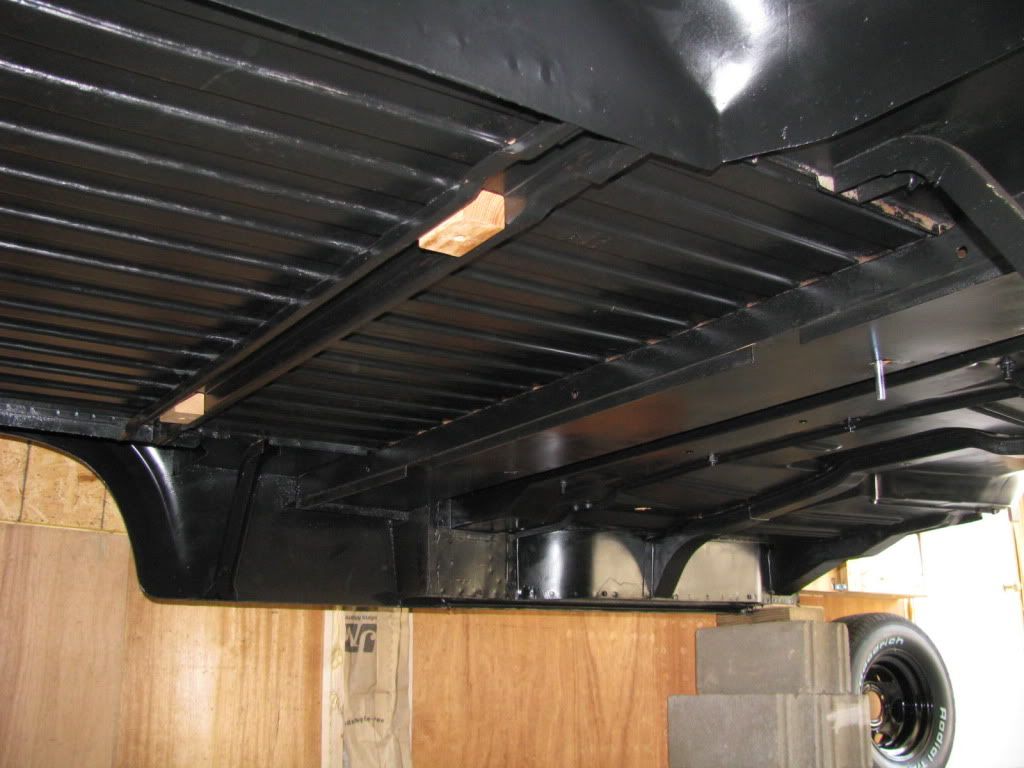
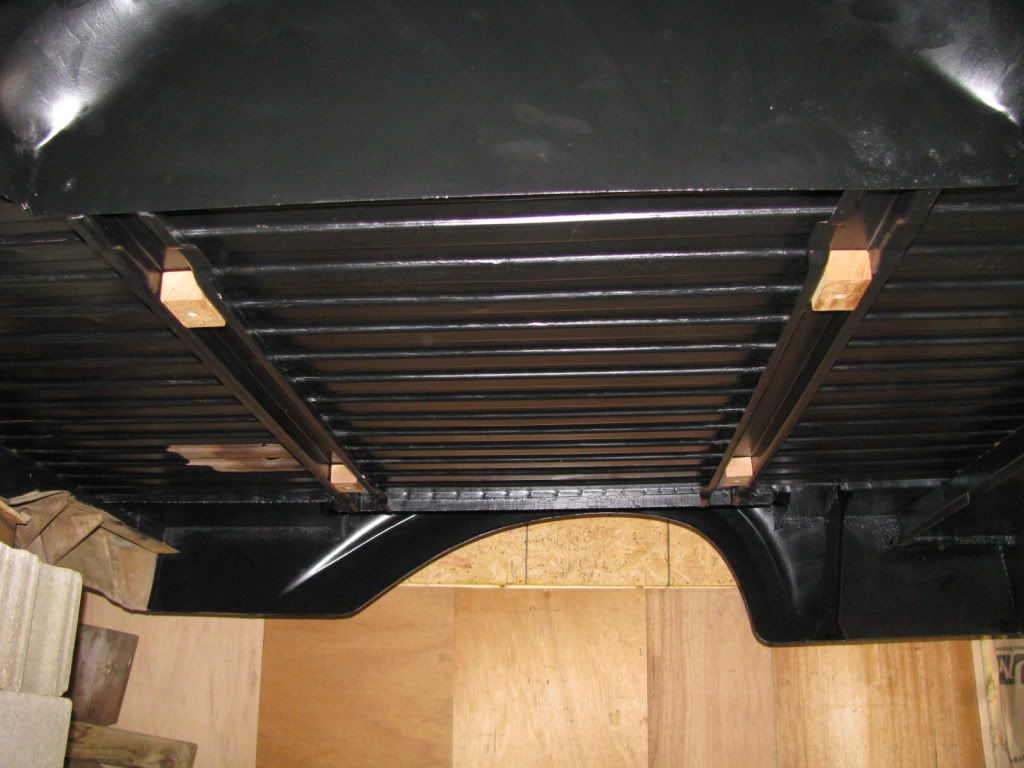
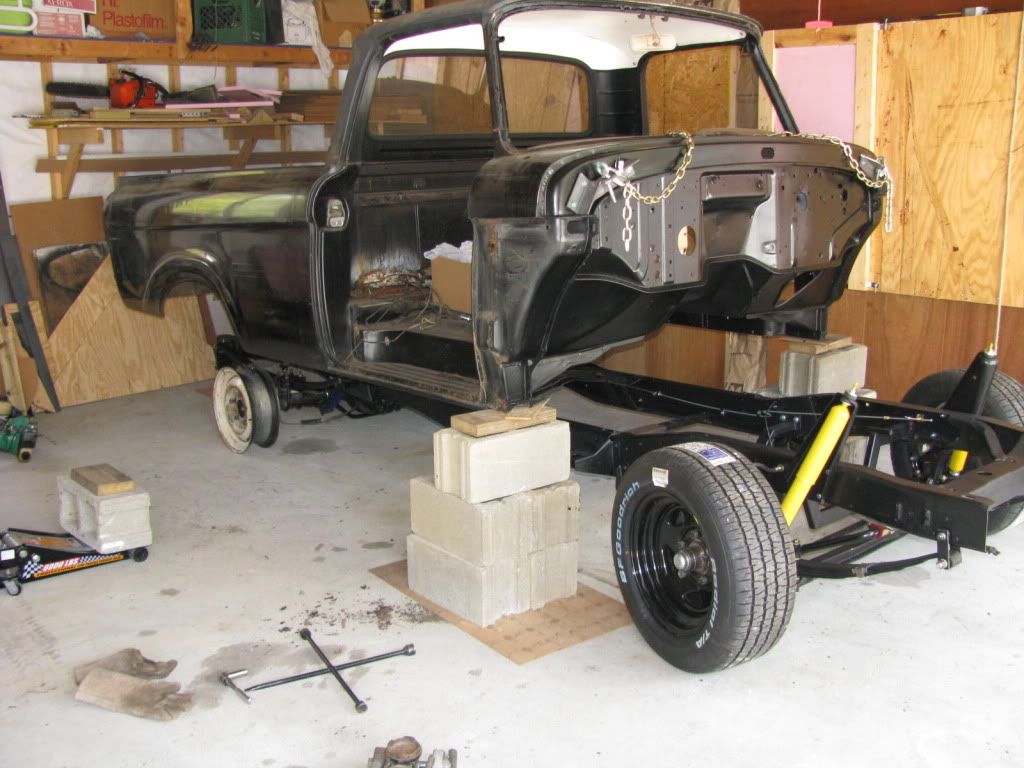
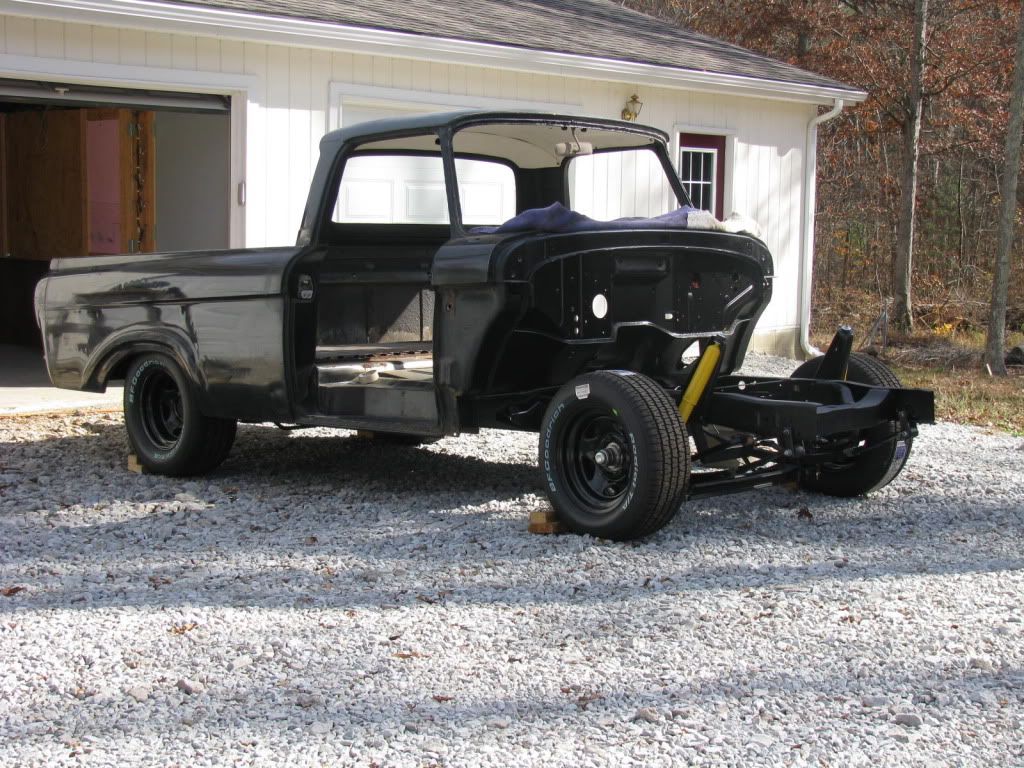
I've got some pics of the body work I've started, so I'll try to get this posting up to date.

I bought some sand yesterday to blast some areas on the body, but I saw on the bags it says "DO NOT USE FOR SANDBLASTING" What??? :(

So I guess I wont do that today.......
User avatar
twistedfreak
Posts: 381
Joined: February 7, 2008, 8:53 pm
Location: lebanon ohio

Post by twistedfreak »

looks very nice bro keep up the good work
""WE THE WILLING, LED BY THE UNKNOWING, ARE DOING THE IMPOSSIBLE FOR THE UNGRATEFUL""
Image
User avatar
Gary Seymour
Posts: 1192
Joined: September 15, 2006, 5:17 am
Location: Brown County, Indiana
United States of America

Post by Gary Seymour »

Fixed up the instrument cluster. Went with gray, and will go with same on the lower dash. Found some old "day glo" orange to touch up the needles with.

Image

Also cleaned up some knobs and bezels. Are the knob inserts available? Thinking about what to use in the knobs. Maybe marbles??

Image
User avatar
64low-n-slow
Posts: 296
Joined: January 5, 2009, 4:05 pm
Location: Daytona Beach

Post by 64low-n-slow »

Gary - Knob inserts are avail from Dennis Carpenter.

I love that truck. You had a great starter and the work you've done so far is outstanding. Keep it up. Can't wait to see your progress.
User avatar
ezernut9mm
Posts: 9141
Joined: July 21, 2006, 9:37 pm
Location: KCMO
Sweden

Post by ezernut9mm »

they make marbles in different sizes. i think 14mm is the right size.

http://www.moonmarble.com/c-76-decor-ma ... ?pagenum=1
always
"i believe i've achieved satisfaction".-bubbles
"should i be gettin" baked for this boys?"-bubbles


i could no longer keep "r.i.p.ing" all of our fallen brothers and sisters, so i say here, slick loads of love and much respect to all you beautiful people.
Post Reply