
'62 Unibody Build (back) Up
-
Gary Seymour

- Posts: 1192
- Joined: September 15, 2006, 5:17 am
- Location: Brown County, Indiana

-
ICEMAN6166
- Posts: 11470
- Joined: July 11, 2006, 11:28 am
- Location: Dove Creek, Co. elevation 6842

-
Gary Seymour
- Posts: 1192
- Joined: September 15, 2006, 5:17 am
- Location: Brown County, Indiana
Iceman, I have not made any progress on the bed work. I've made so little progress on the truck this winter, I should be ashamed of myself.
The bed floor patching has me scratching my head some too. I need to study the pics you have in your build thread to better understand what I need to slice and dice.
Thanks for the comments everyone!
The bed floor patching has me scratching my head some too. I need to study the pics you have in your build thread to better understand what I need to slice and dice.
Thanks for the comments everyone!
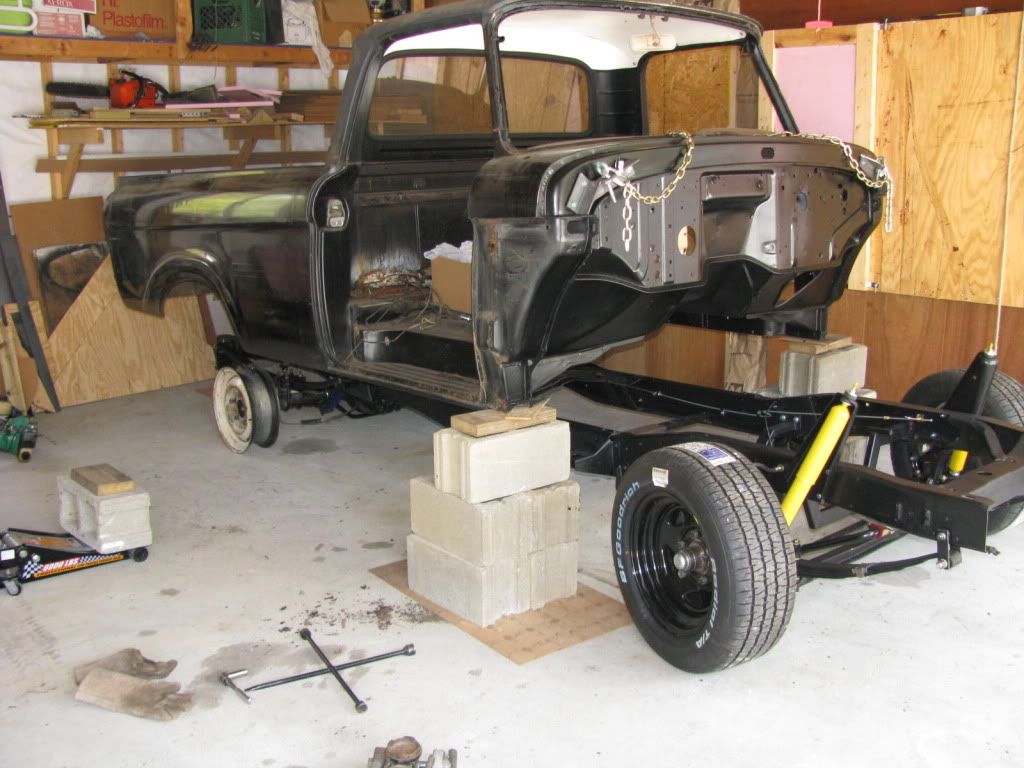
my question is are the wooden blocks required for the unibody bedsGary Seymour wrote:So now, I had to get the body ready to go back on the frame. I cleaned the underbody with a wire brush on an angle grinder, scrapers, sandpaper - you name it....
Then I rolled on some Rustoleum semi gloss black everywhere I could and brushed the rest.
The new wood blocks were a gift from my friend Stoney (Stoney64). He made an extra set just for me out of some treated oak or something.
I cleaned the firewall the same way as the underbody, but used SOS pads on it too. A few coats of primer and some sanding on it. I am not building a show truck. I sprayed on Rustoleum semi gloss black.
Got the frame positioned under the body. I used rims only on the rearend so I keep the body closer to the ground. To have the body high enough to clear the tires mounted, made me nervous.

-
Gary Seymour
- Posts: 1192
- Joined: September 15, 2006, 5:17 am
- Location: Brown County, Indiana
Bill W: I don't think I can take credit for the marbles idea, I believe I saw it on this site before (?).
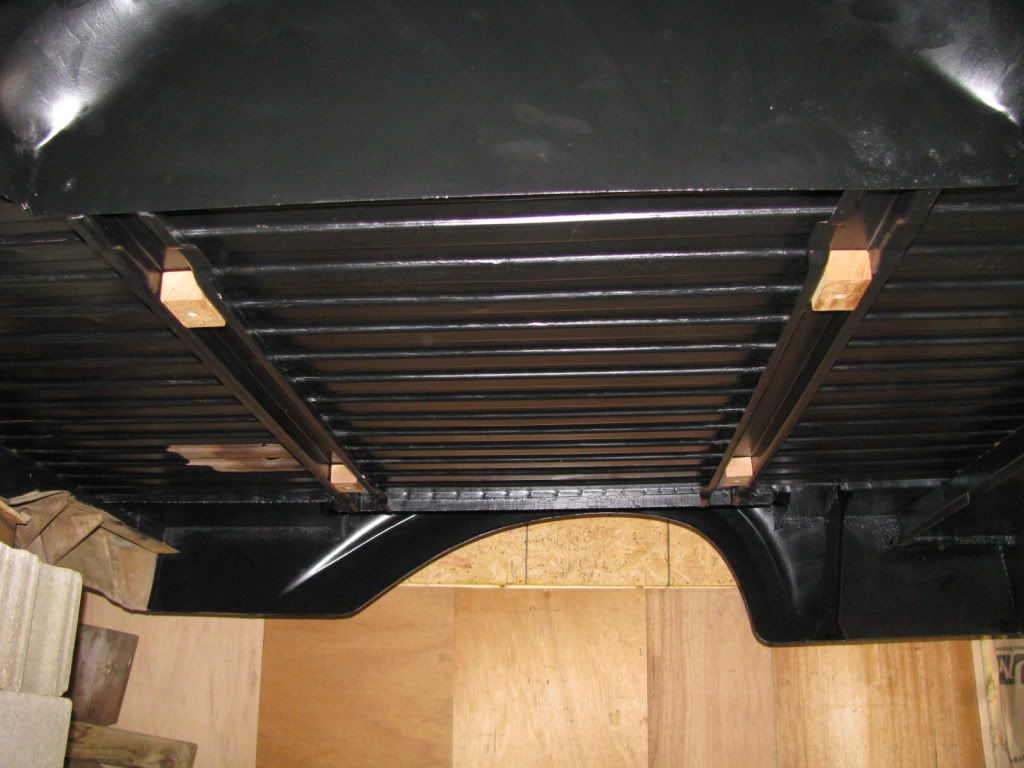
Robert, the uni's had these blocks in the channels under the bed. Mine had 1/4" rubber strips between the wood and the frame, which I also put in. The carriage bolts go through the wood. I think the regular-bed Fords had blocks too.
Thank you Tray, and every one else for the comments and replies.
Progress has been slow this winter, but I'm kindling some activity. I am working on the wiring, cab floor, under dash stuff. That's where I'm focused now. Want to hang the brake pedal so I can mount the dual master cylinder and run the brake lines.
The big stuff like grinding blasting, etc. will have to wait until it's warm weather again!
It's supposed to warm up this weekend, BUT being Valentines weekend Tammy and I are going to Belle Terra for some massages, a little blackjack, and REO Speedwagon! Sacrifices must be made.......
Robert, the uni's had these blocks in the channels under the bed. Mine had 1/4" rubber strips between the wood and the frame, which I also put in. The carriage bolts go through the wood. I think the regular-bed Fords had blocks too.
Thank you Tray, and every one else for the comments and replies.
Progress has been slow this winter, but I'm kindling some activity. I am working on the wiring, cab floor, under dash stuff. That's where I'm focused now. Want to hang the brake pedal so I can mount the dual master cylinder and run the brake lines.
The big stuff like grinding blasting, etc. will have to wait until it's warm weather again!
It's supposed to warm up this weekend, BUT being Valentines weekend Tammy and I are going to Belle Terra for some massages, a little blackjack, and REO Speedwagon!
-
Gary Seymour
- Posts: 1192
- Joined: September 15, 2006, 5:17 am
- Location: Brown County, Indiana
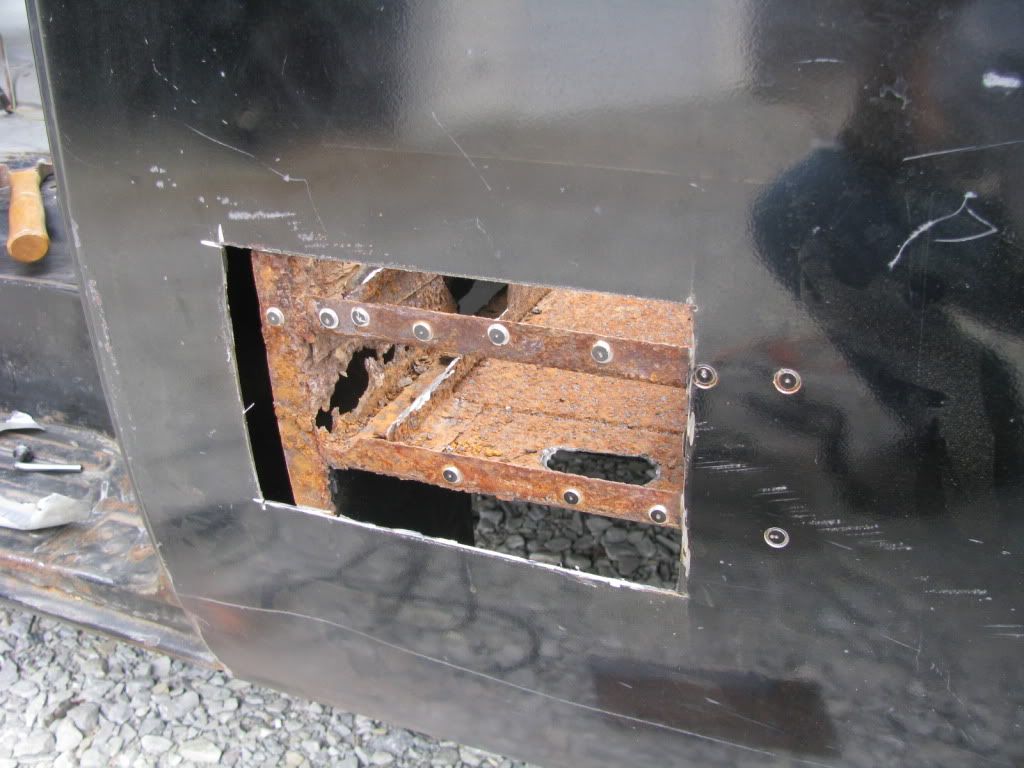
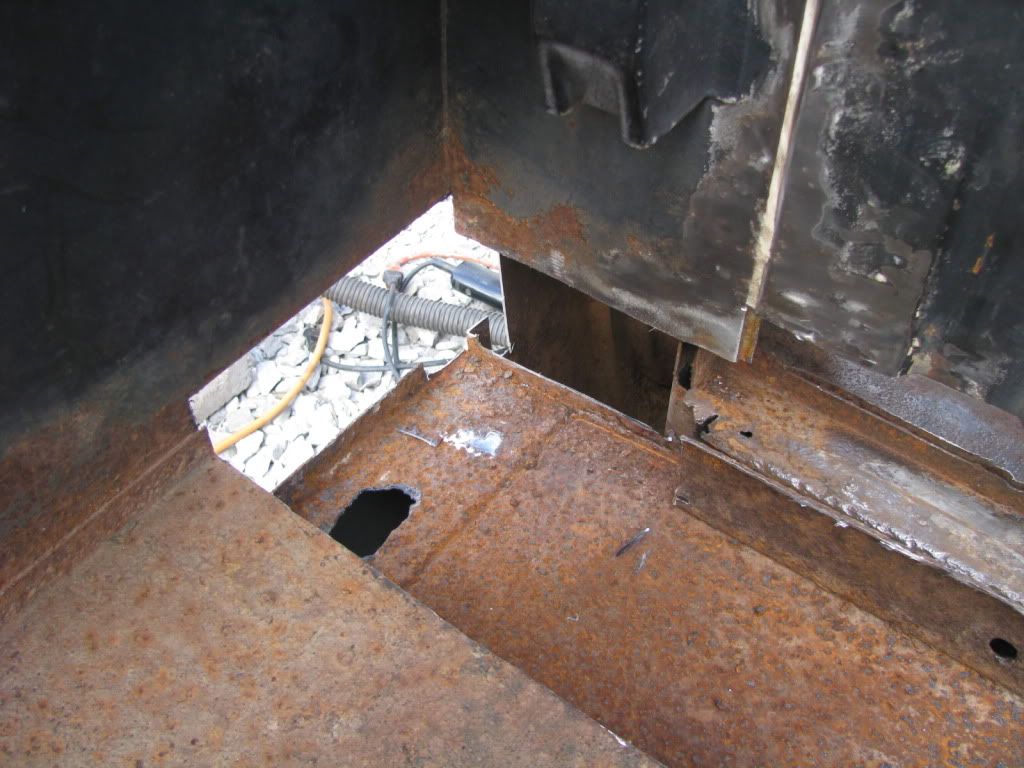
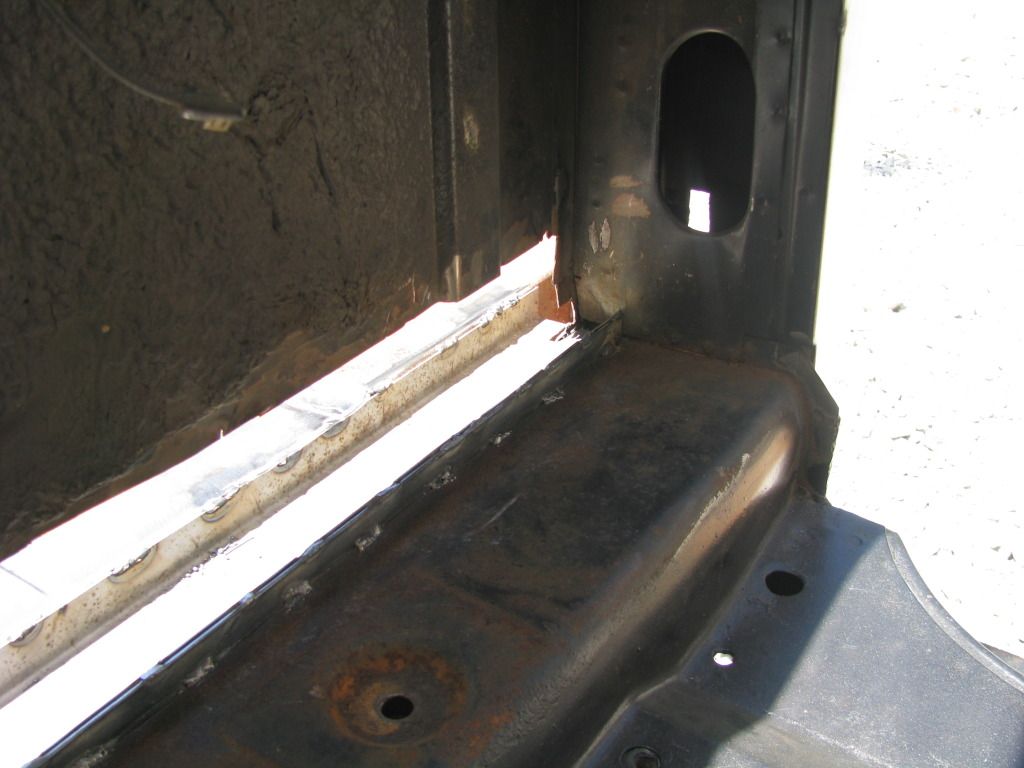
Some of you may have seen my post in the Truck Talk section "How to fix THIS". If not here's what I am talking about. Got me kind of discouraged finding this much rust on my rust-free unibody.
http://s419.photobucket.com/albums/pp27 ... kBuild.jpg
I decided if I took out the rusted out section of the bedside first, that this would open the area to get at the badly rusted area behind the door jamb. So, I bought a Blair spotweld cutter through Summit. Good tool - made in the USA! Cut out the spotwelds and used my cutoff wheel to remove the hole-y bedside area. Thank you Ford Motor Co., for not applying finish bodywork over the spotwelds, making them easy to find!
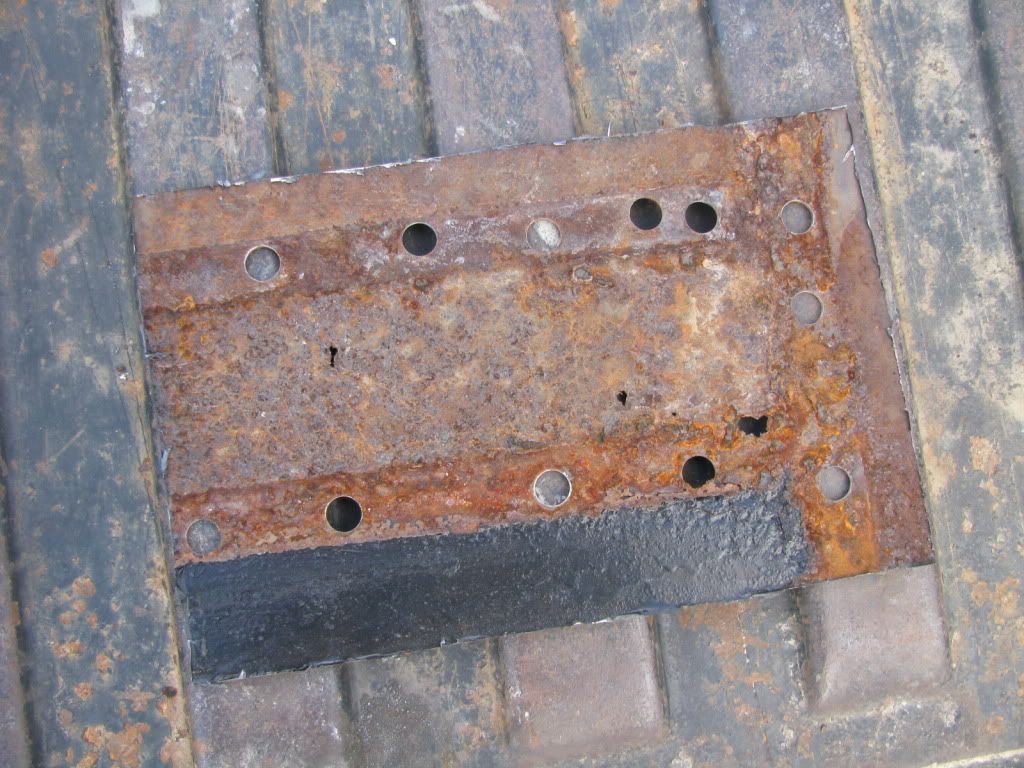
Backside of the bedside panel:
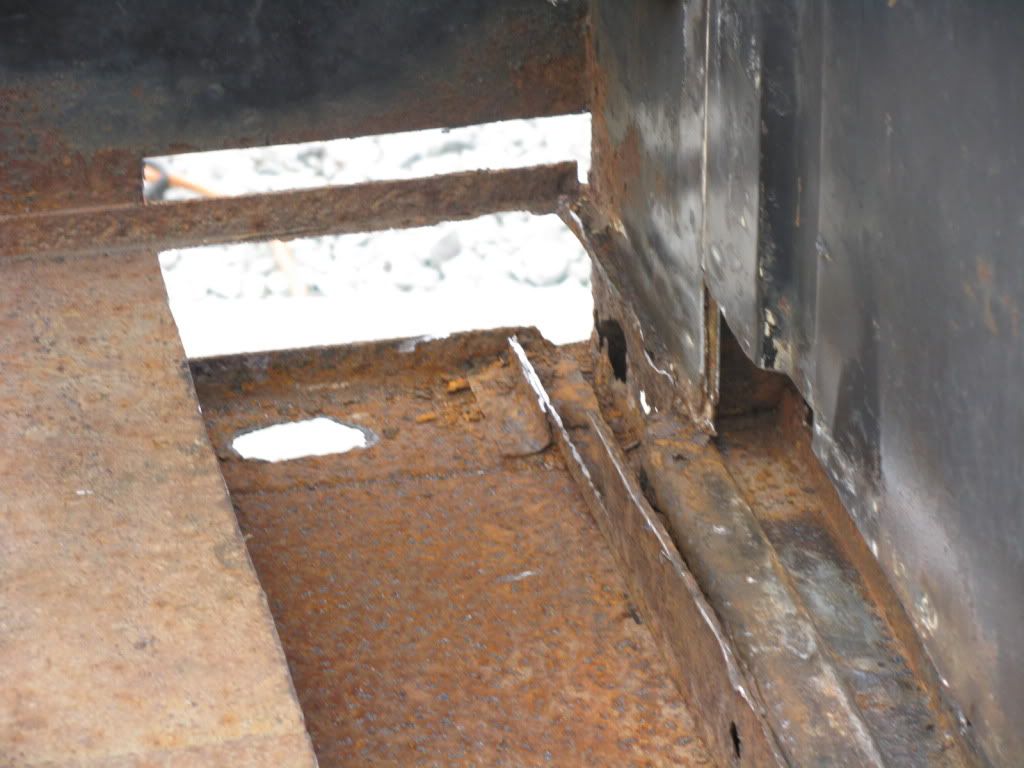
Now with a new window of opportunity, I started to trim away the metal that the Tin Worm has gotten to:

Something to note. I had access tot he area behind the door jamb down to the rocker panel area, and saw it was full of flakey rust and crud. I used a heater hose taped to the end of my shop vac hose to get all the way down in there and remove all that crud and rust. I will apply rust inhibitor the best I can in that cavity. Good thing Ford used some real metal when they built these trucks!
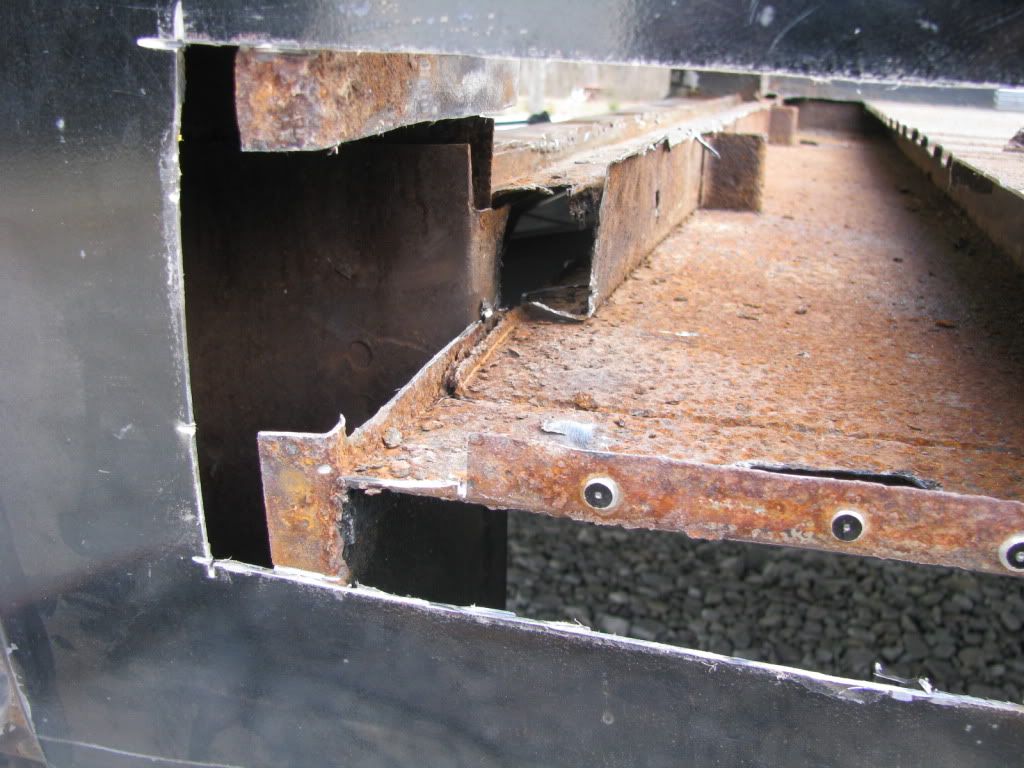
Still have some more trimming to do, then I will sandblast the areas and begin to make up some patch pieces to weld in. Here's where it is now:
I thank God for the nice weather yesterday, and my friend stoney for some inspiration to get back on the truck. I am glad I attacked this rust, and will be even more happy when I can weld it all back up again. Because I am really starting to get the itch the begin assembling the 351C!
http://s419.photobucket.com/albums/pp27 ... kBuild.jpg
I decided if I took out the rusted out section of the bedside first, that this would open the area to get at the badly rusted area behind the door jamb. So, I bought a Blair spotweld cutter through Summit. Good tool - made in the USA! Cut out the spotwelds and used my cutoff wheel to remove the hole-y bedside area. Thank you Ford Motor Co., for not applying finish bodywork over the spotwelds, making them easy to find!
Backside of the bedside panel:
Now with a new window of opportunity, I started to trim away the metal that the Tin Worm has gotten to:
Something to note. I had access tot he area behind the door jamb down to the rocker panel area, and saw it was full of flakey rust and crud. I used a heater hose taped to the end of my shop vac hose to get all the way down in there and remove all that crud and rust. I will apply rust inhibitor the best I can in that cavity. Good thing Ford used some real metal when they built these trucks!
Still have some more trimming to do, then I will sandblast the areas and begin to make up some patch pieces to weld in. Here's where it is now:
I thank God for the nice weather yesterday, and my friend stoney for some inspiration to get back on the truck. I am glad I attacked this rust, and will be even more happy when I can weld it all back up again. Because I am really starting to get the itch the begin assembling the 351C!
-
RangerSteve62
- Posts: 19
- Joined: April 23, 2010, 9:53 pm
- Location: Ft Bragg NC
-
Gary Seymour
- Posts: 1192
- Joined: September 15, 2006, 5:17 am
- Location: Brown County, Indiana
Well Ranger Steve, I have made some progress lately. Although I am ashamed at the lack of work I did on the truck over the winter, I have picked it back up again.
I have fixed some holes in the kick panels and painted them. Fixed up the dash and am going to paint that this weekend. Then the firewall insulation goes in, and I can mount the brake pedal, dual master cylinder and plumb the brake lines with a proportioning valve in the rear line and I have a line lock kit for the front.
I want to be able to enter it in a burnout contest, you see......with open exhaust cut-outs, and maybe flame throwers.
I bought some of that FedHill brake line, and their "nut pack" (not nut sack...) which came today! It has the two "special" nuts for the master cylinder and a bunch of the small line nuts. The FedHill line is supposed to be really easy to bend and flare, and seals really well too. And it doesn't rust either.
I also added another set of mounting holes to the removeable crossmember (so there's four instead of just two), and beefed up my engine mount crossmember with boxing plates.
I will try to post some pics this weekend.
-
Gary Seymour
- Posts: 1192
- Joined: September 15, 2006, 5:17 am
- Location: Brown County, Indiana
Well, there's some progress to report and I took some pics. So:
First of all, I am going with gray on my dash instead of white. So I welded up the classic "radio hole", sanded and painted the dash.
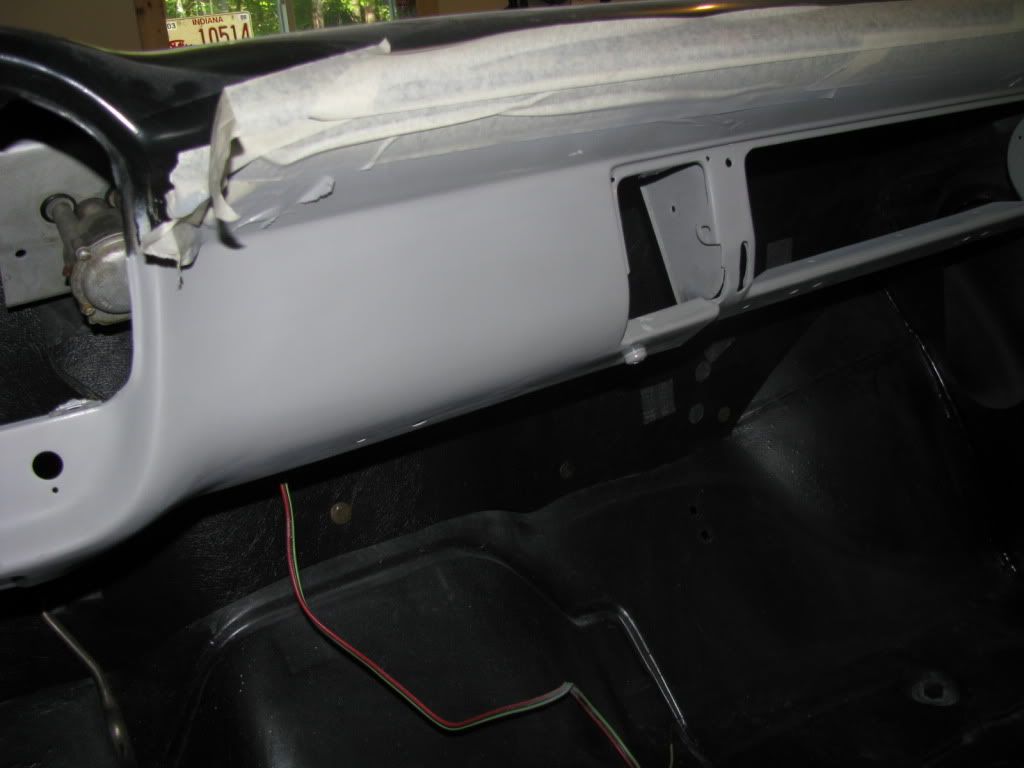
I also painted the kick panels and the under dash area. Which allowed me to install the new firewall cover/insulation.
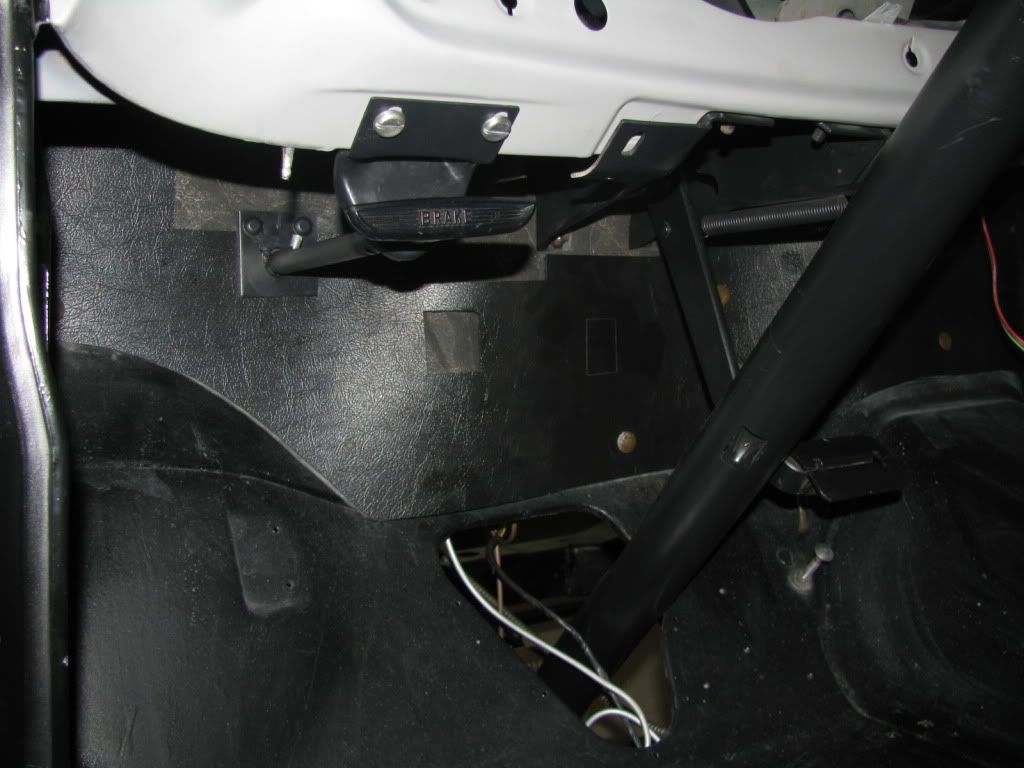
You can see, I could then mount the brake pedal and got the e-brake all hooked back up and adjusted.
I'll submit this aprt and make sure I still know how to post pics.
First of all, I am going with gray on my dash instead of white. So I welded up the classic "radio hole", sanded and painted the dash.
I also painted the kick panels and the under dash area. Which allowed me to install the new firewall cover/insulation.
You can see, I could then mount the brake pedal and got the e-brake all hooked back up and adjusted.
I'll submit this aprt and make sure I still know how to post pics.
-
Gary Seymour
- Posts: 1192
- Joined: September 15, 2006, 5:17 am
- Location: Brown County, Indiana
Okay, that's good.
So I could then move on to a step I'd been looking forward to. Mounting the master cylinder and plumbing the brakes!
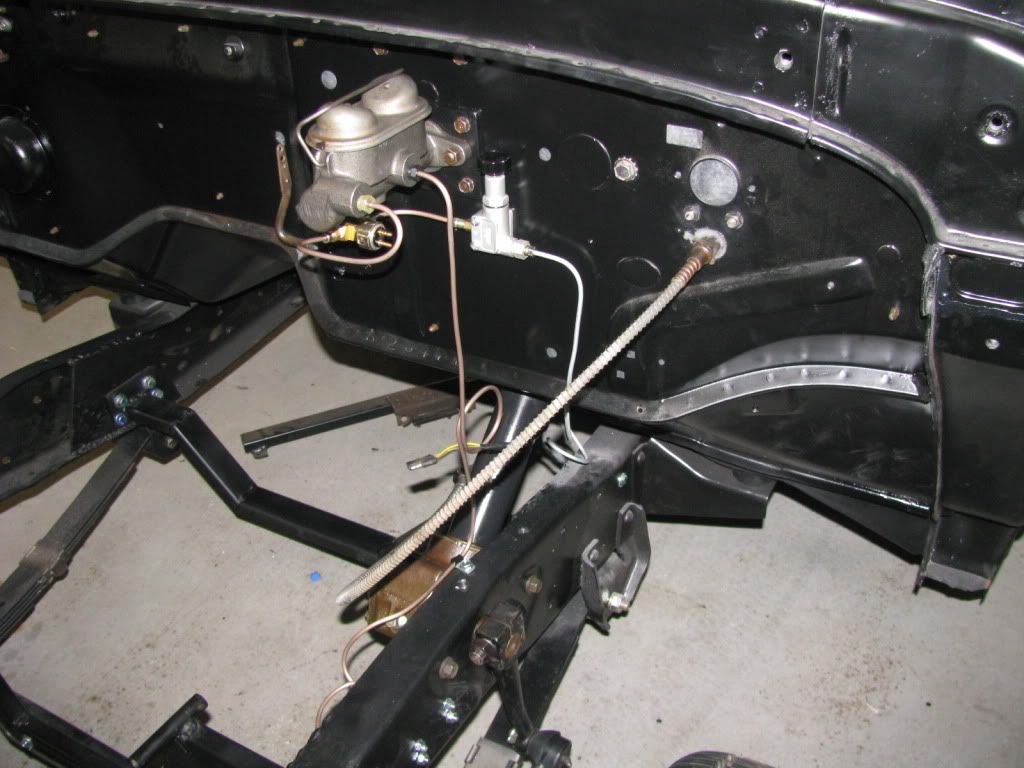
I used FedHill brake line. It's some sort of alloy (if I try to spell it I'll flub it up, but I it's something like Cun... oh, forget it!). Iit's got copper in it and it wont rust, and it's easy to bend and form flares on (provided you use the correct side of the double-flare tool..... ).
You can see I put in the line lock strictly for fun.
Here's where I put the light to tell me the line lock is on. I will put the switch on the other side when I find a switch I like. The one that came with the kit is not what I want to use. It looks like a switch for a bad lamp.
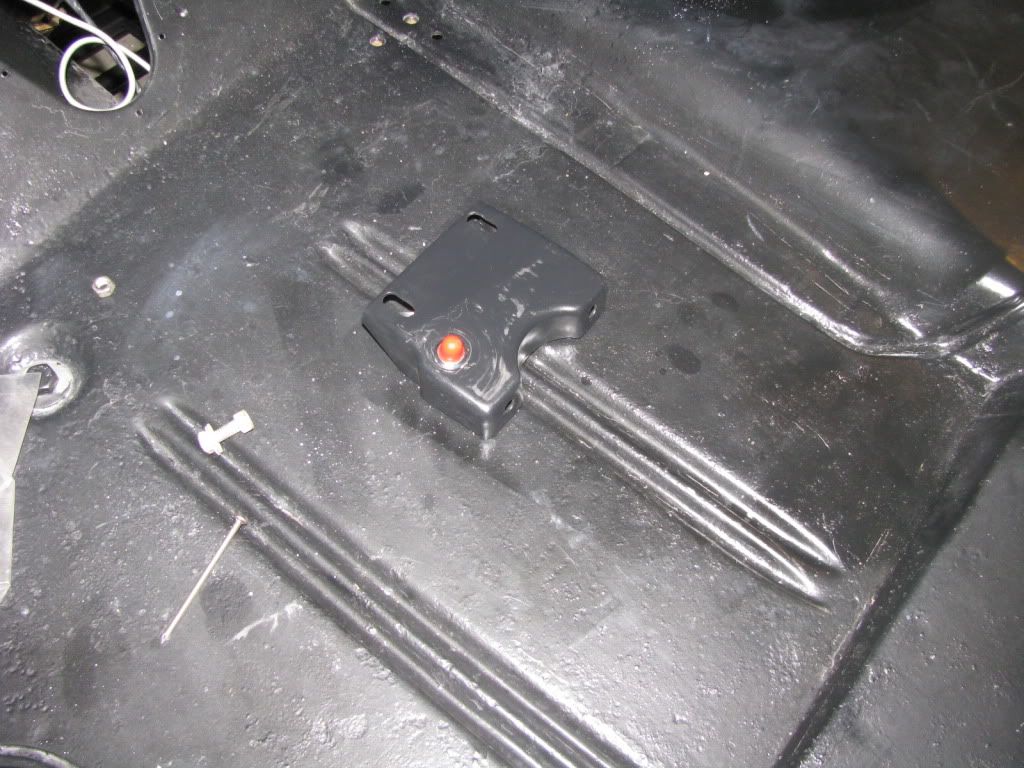
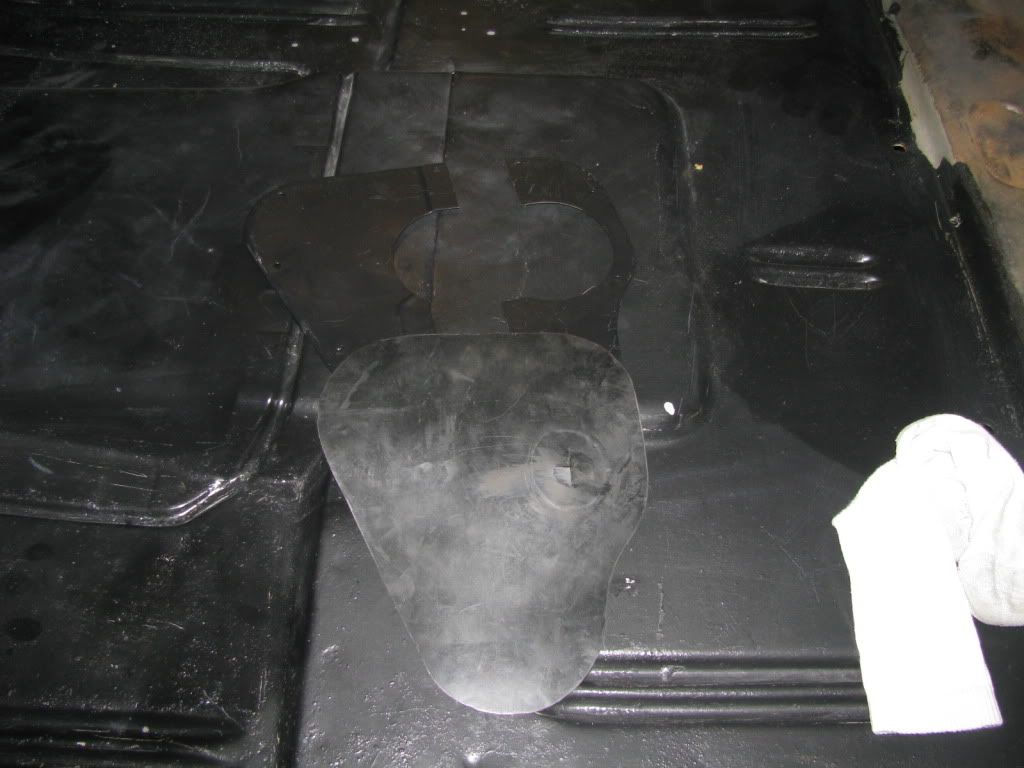
I welded up the slot in the floor plate where the clutch rod went through, and made this new seal from 1/8" thick rubber.
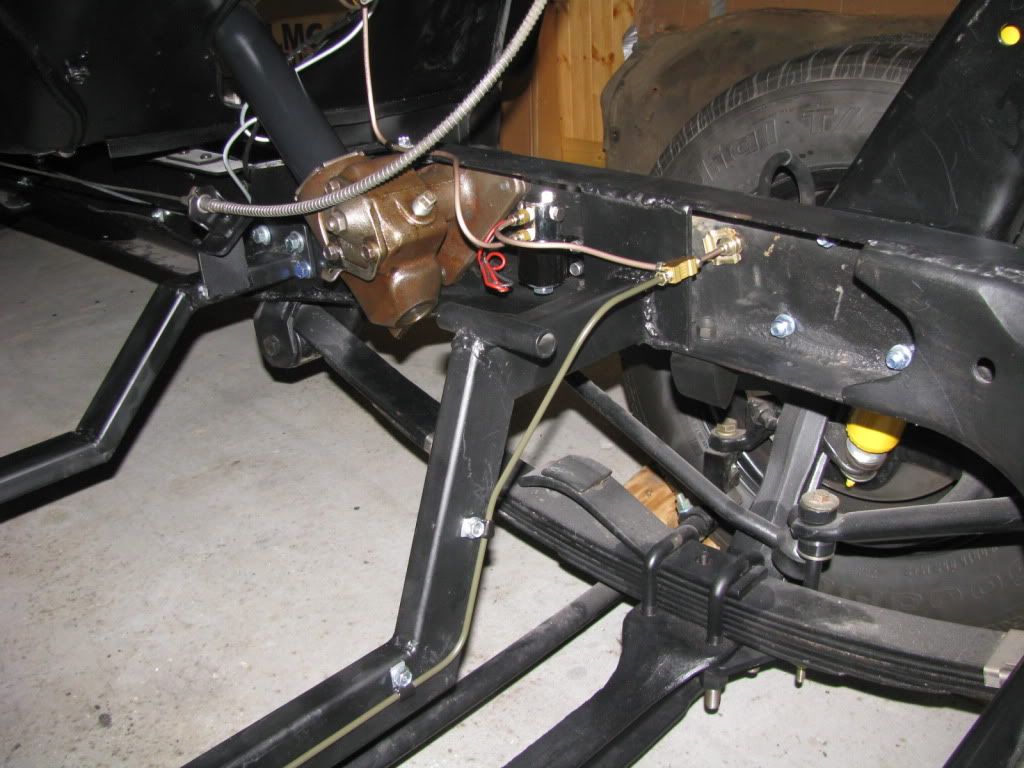
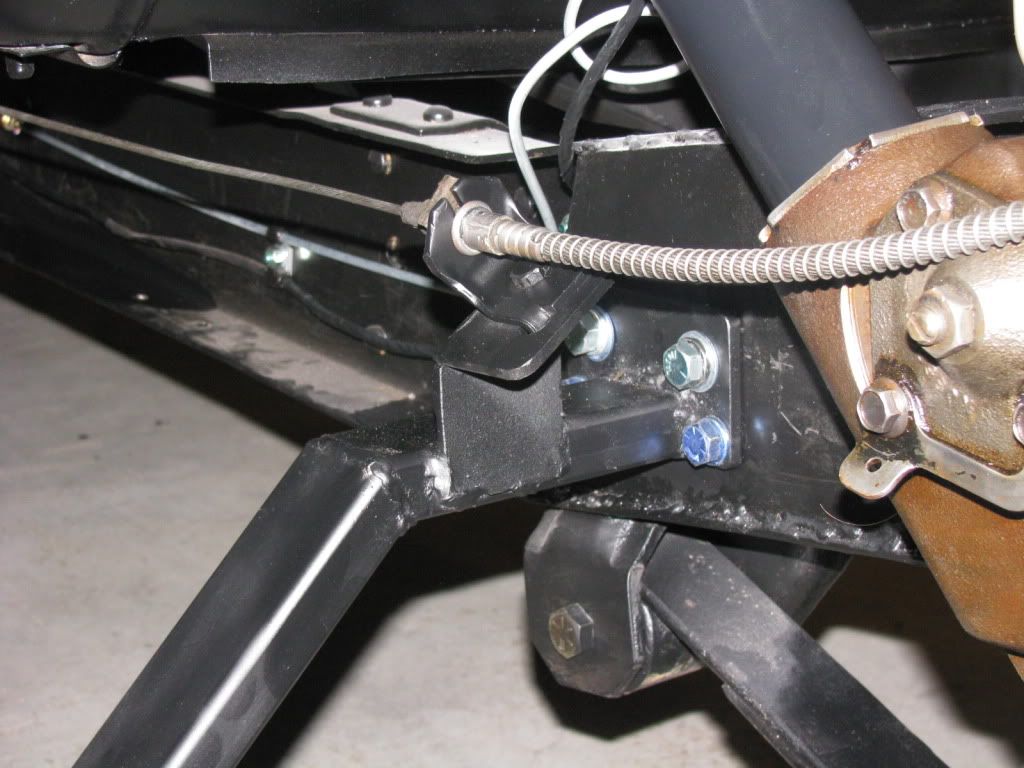
I added this bracket (plus the two extra mounting holes) to the removeable crossmember for the parking brake cable. It is just about exactly where it was originally - even the marks in the steering box line up with the cable again!
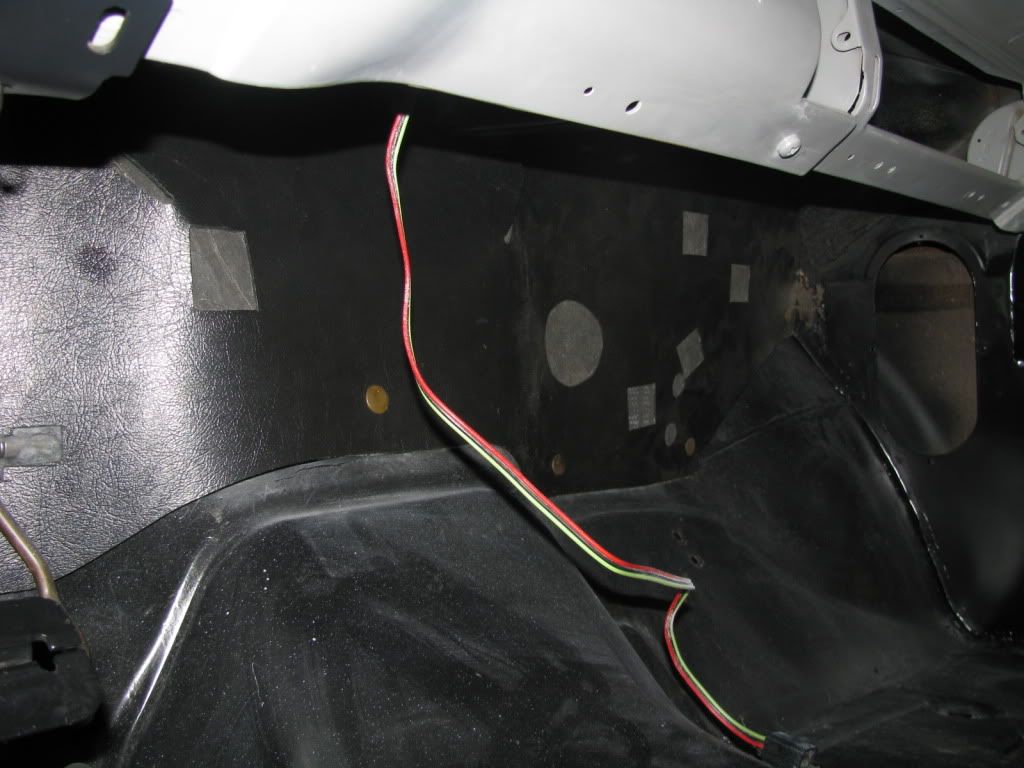
And now I move on to the wiring! I got a great start, don't you think?
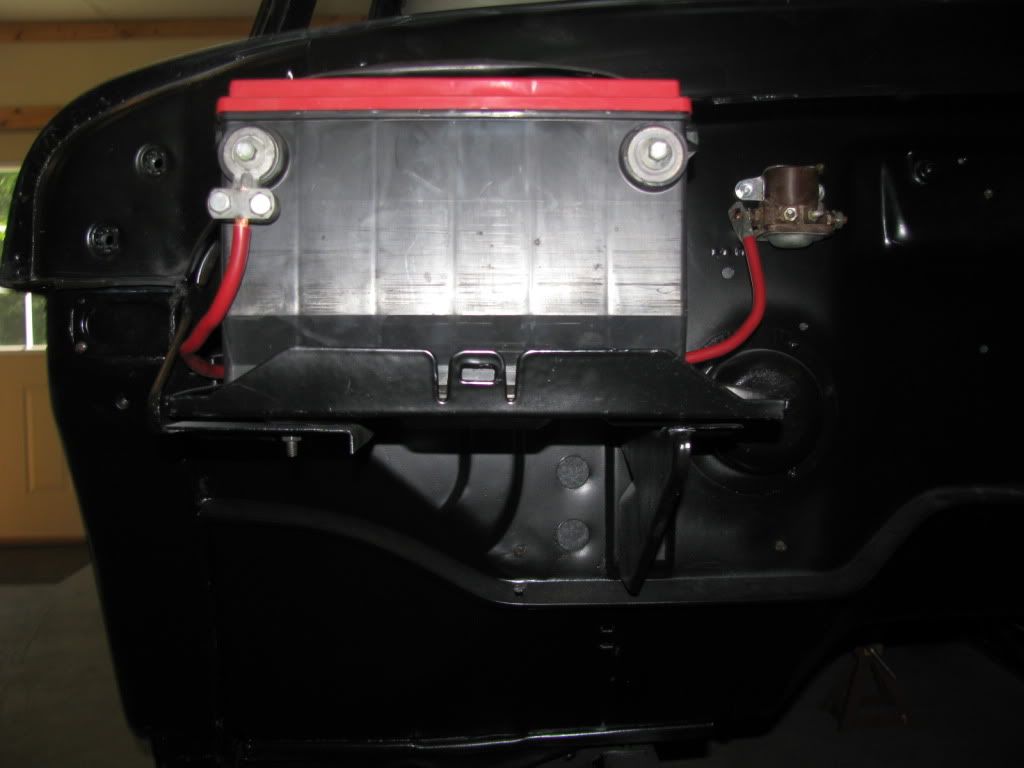
You might be able to see my battery tray "mods". The tray was rusted out in the middle. I cut it all back, made a new piece to go onto the bracket on the left (of the picture), and welded it together. The bend on the bottom is for stiffness. Then I used part of an aftermarket tray and screwed it to the rest of the factory tray. I can use a clamp/j-bolt now.
That's about it. I want to begin putting the wiring back in now, and checking it all out.
Then I want to start engine assembly. I need to order a set of engine cleaning brushes. I HAD some but.......they are not to be found(?).
I might bolt the trans on the block, set it in the chassis and make my driveshaft first.
Do you think that would be a good idea?
Thanks for watching.
So I could then move on to a step I'd been looking forward to. Mounting the master cylinder and plumbing the brakes!
I used FedHill brake line. It's some sort of alloy (if I try to spell it I'll flub it up, but I it's something like Cun... oh, forget it!). Iit's got copper in it and it wont rust, and it's easy to bend and form flares on (provided you use the correct side of the double-flare tool.....
You can see I put in the line lock strictly for fun.
Here's where I put the light to tell me the line lock is on. I will put the switch on the other side when I find a switch I like. The one that came with the kit is not what I want to use. It looks like a switch for a bad lamp.
I welded up the slot in the floor plate where the clutch rod went through, and made this new seal from 1/8" thick rubber.
I added this bracket (plus the two extra mounting holes) to the removeable crossmember for the parking brake cable. It is just about exactly where it was originally - even the marks in the steering box line up with the cable again!
And now I move on to the wiring! I got a great start, don't you think?
You might be able to see my battery tray "mods". The tray was rusted out in the middle. I cut it all back, made a new piece to go onto the bracket on the left (of the picture), and welded it together. The bend on the bottom is for stiffness. Then I used part of an aftermarket tray and screwed it to the rest of the factory tray. I can use a clamp/j-bolt now.
That's about it. I want to begin putting the wiring back in now, and checking it all out.
Then I want to start engine assembly. I need to order a set of engine cleaning brushes. I HAD some but.......they are not to be found(?).
I might bolt the trans on the block, set it in the chassis and make my driveshaft first.
Do you think that would be a good idea?
Thanks for watching.
-
Gary Seymour
- Posts: 1192
- Joined: September 15, 2006, 5:17 am
- Location: Brown County, Indiana
I forgot to mention another step I took. I took apart the rear brakes and cleaned out all the DOT 3 fluid because I decided I wanted to go with Silcone brake fluid. I even blew air through the rear lines until none came out on a piece of paper towel before putting the rear brakes back together. I'll also mention that I had the primary shoes on wrong on BOTH sides. Sheesh. Did I have the truck backed into the garage when I put those together??? Wha?? How??? I don't know....
Also. Anyone can feel free to make fun of my welds. Hey I'm getting better at it. Plus, if it breaks, I'll fix it! Believe me, I'll put this truck to the test.
Also. Anyone can feel free to make fun of my welds. Hey I'm getting better at it. Plus, if it breaks, I'll fix it!
-
Brian Taylor
- Posts: 1469
- Joined: August 18, 2009, 3:52 pm
- Location: Dallas , Texas
- Contact:
-
Gary Seymour
- Posts: 1192
- Joined: September 15, 2006, 5:17 am
- Location: Brown County, Indiana
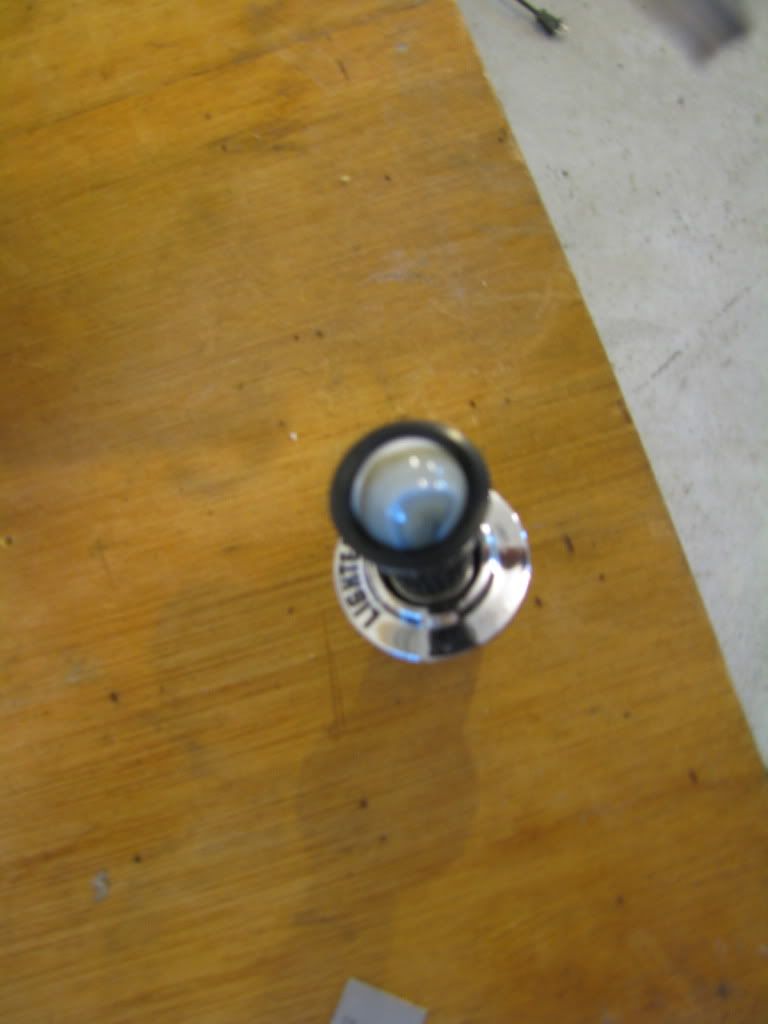
I also found some marbles to put in my dash knobs. I wanted some mottled grey ones on the site that Ezer provided above, but I had to order A TON of marbles to get them. There's no one in my neighborhood to trade marbles with, so I found some others on ebay, and could buy a bag of (16) for $5. These are gray/white/blue, and are pretty cool.
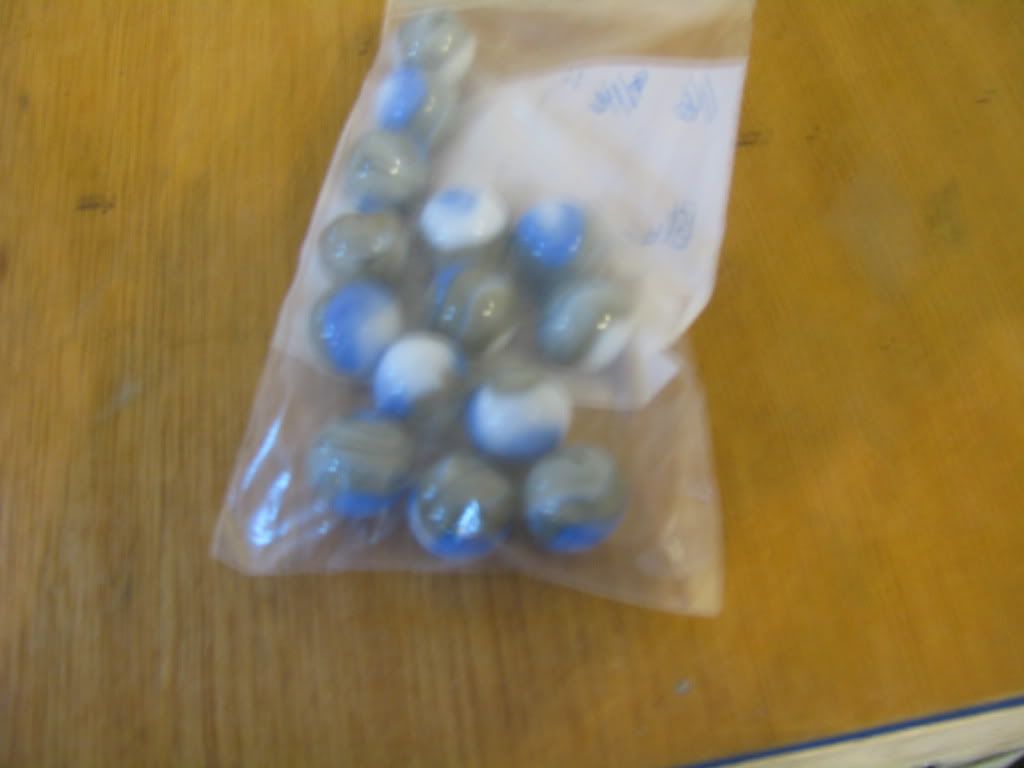
They are 14mm or 9/16", I believe, and fit pretty snugly into the knobs. The guy advertised them as some sort of classic marble, no longer made, blah blah blah. When I got them I noticed they are not perfectly round! Who ever heard of an egg-shaped marble? Good thing I wasn't planning on playing with them! Sheesh.
I want to work on putting the block and trans into the chassis to figure out the length of the driveshaft today.
I need to do belt replacement on my lawn mower first.....got to drive into town to GET the belt first.......might have to have breakfast in town......
-
Gary Seymour
- Posts: 1192
- Joined: September 15, 2006, 5:17 am
- Location: Brown County, Indiana
Re: '62 Unibody Build (back) Up
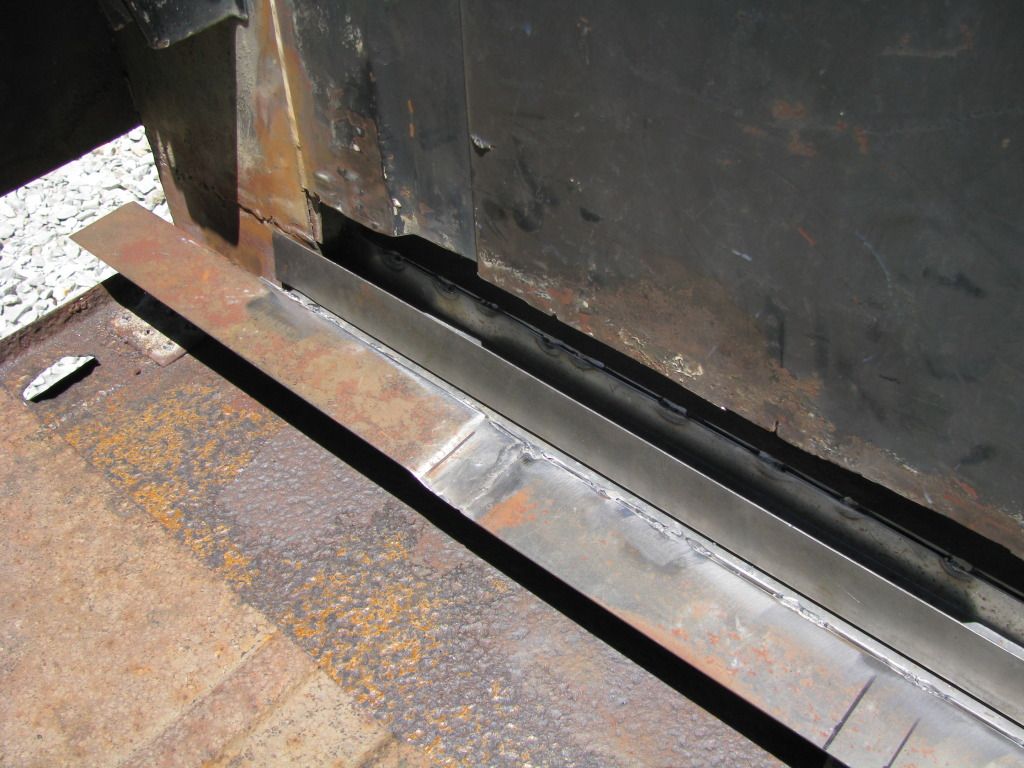
Been a hot and lazy summer and I've neglected the truck for most of it. What progress I've made is attacking the rust problem I had in the area behind the cab at the bed floor / torque box.
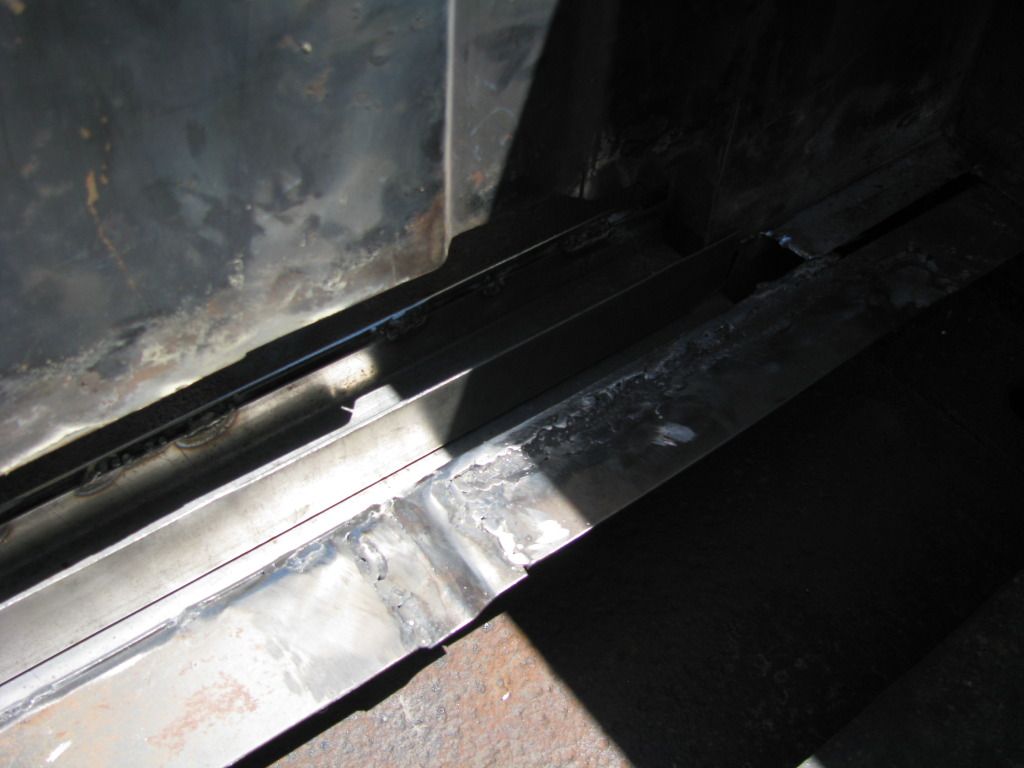
I had some pieces made at a shop (Central Sheet Metal) out of 16ga. One was a "U" shaped channel and one was "Z" shaped. Allong with a scrap piece of small angle (left over from a buddies Chinese motorcycle shipping crate), I made these repairs:
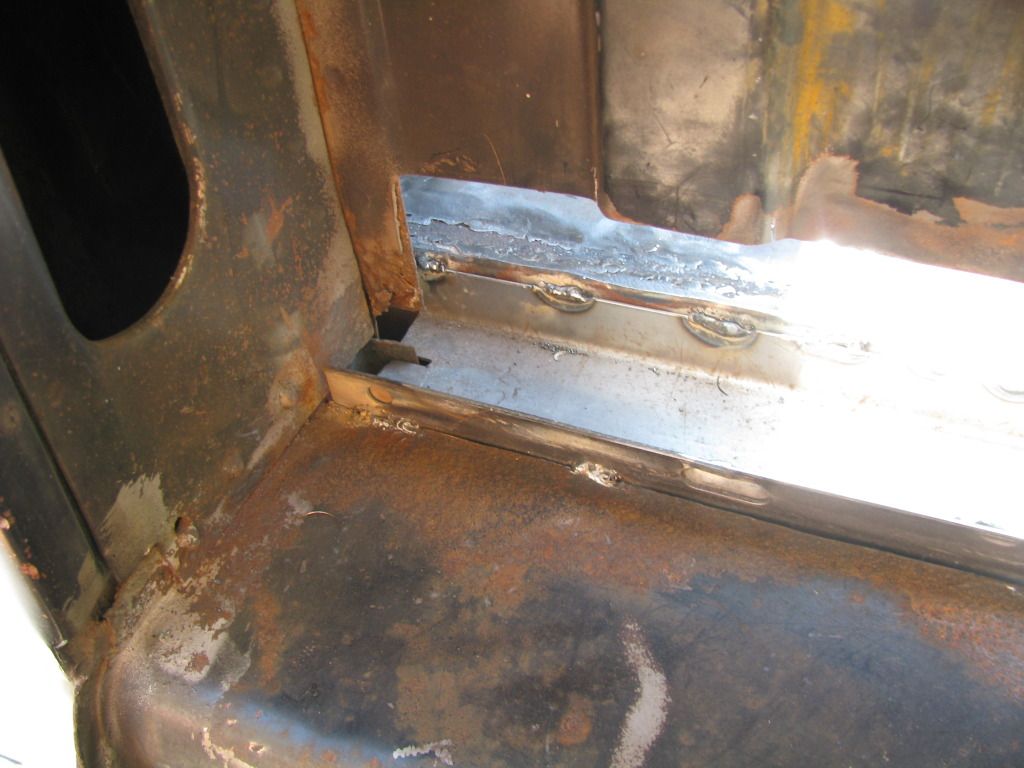
I had some pieces made at a shop (Central Sheet Metal) out of 16ga. One was a "U" shaped channel and one was "Z" shaped. Allong with a scrap piece of small angle (left over from a buddies Chinese motorcycle shipping crate), I made these repairs:
-
Gary Seymour
- Posts: 1192
- Joined: September 15, 2006, 5:17 am
- Location: Brown County, Indiana
Re: '62 Unibody Build (back) Up
From the bedside using pieces from Central Sheet Metal, I re-made the bed floor support that is up near the back of the cab:
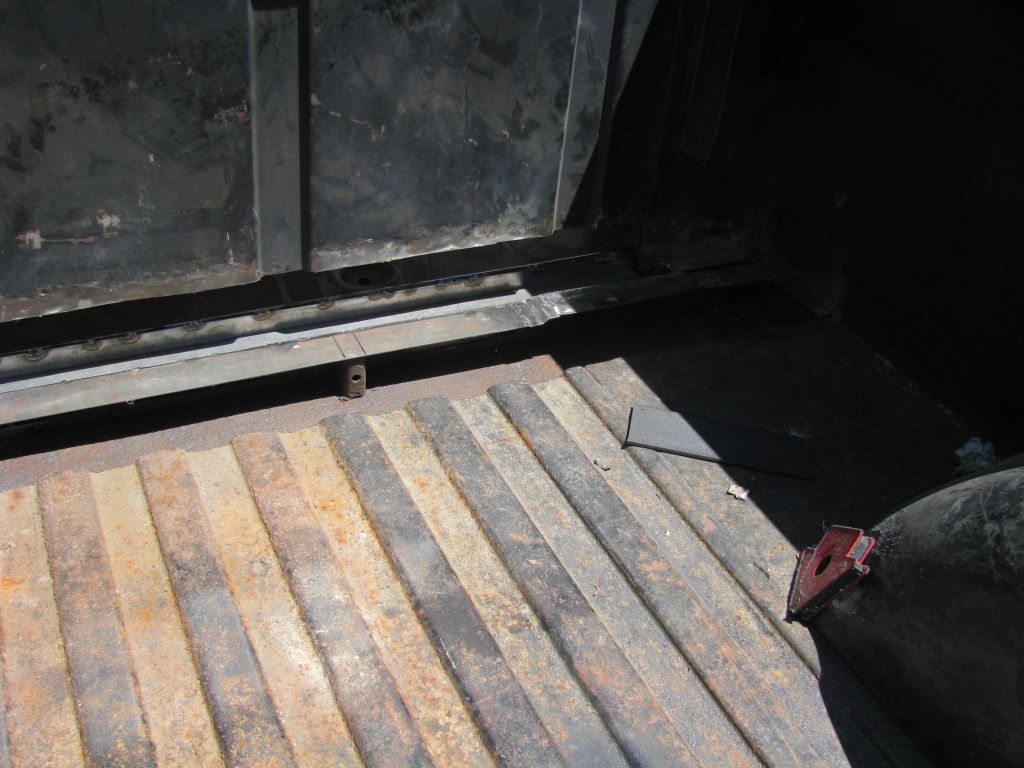
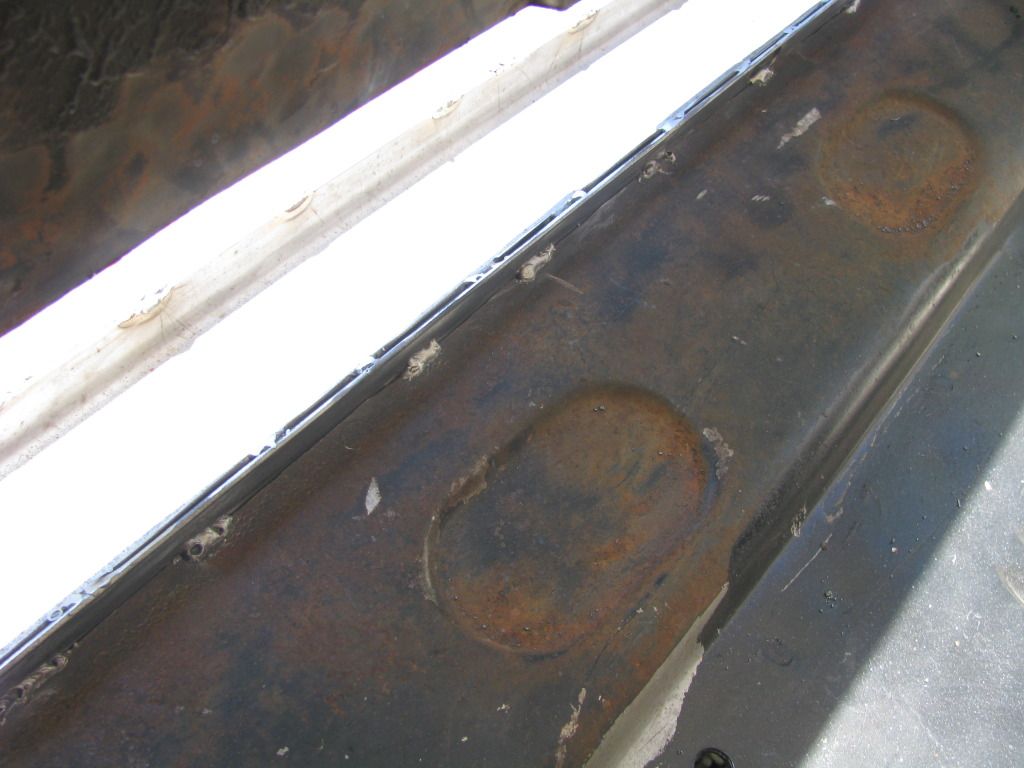
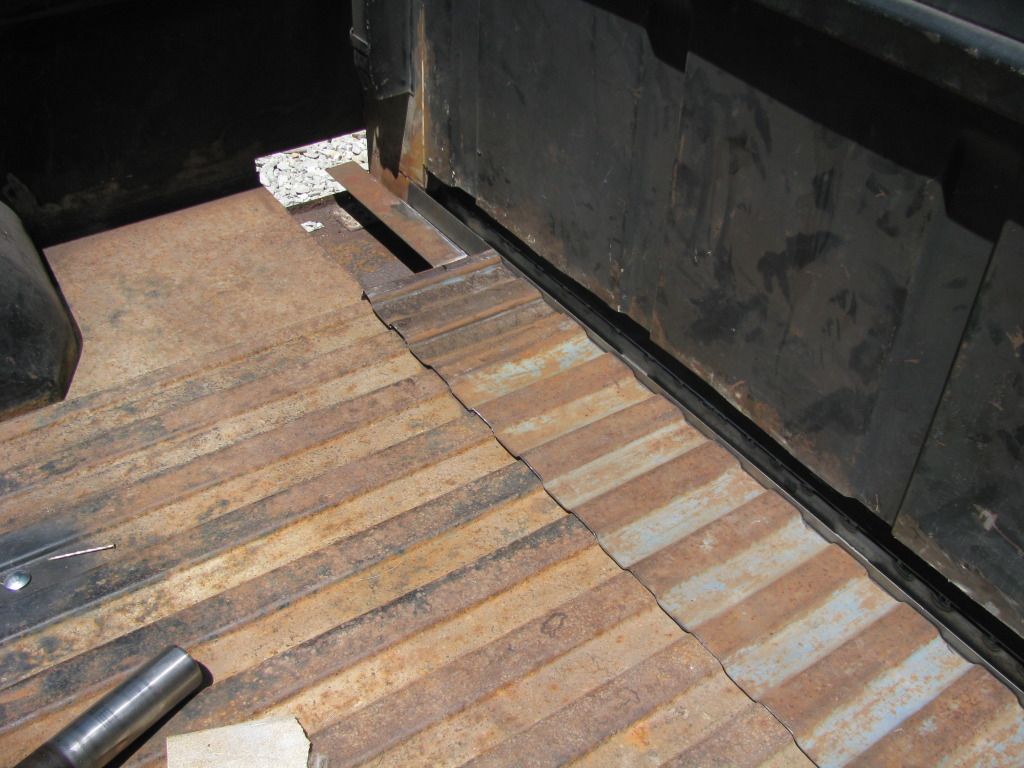
At this point I have (4) more patch pieces that need to go on. The picture below is two of the four.
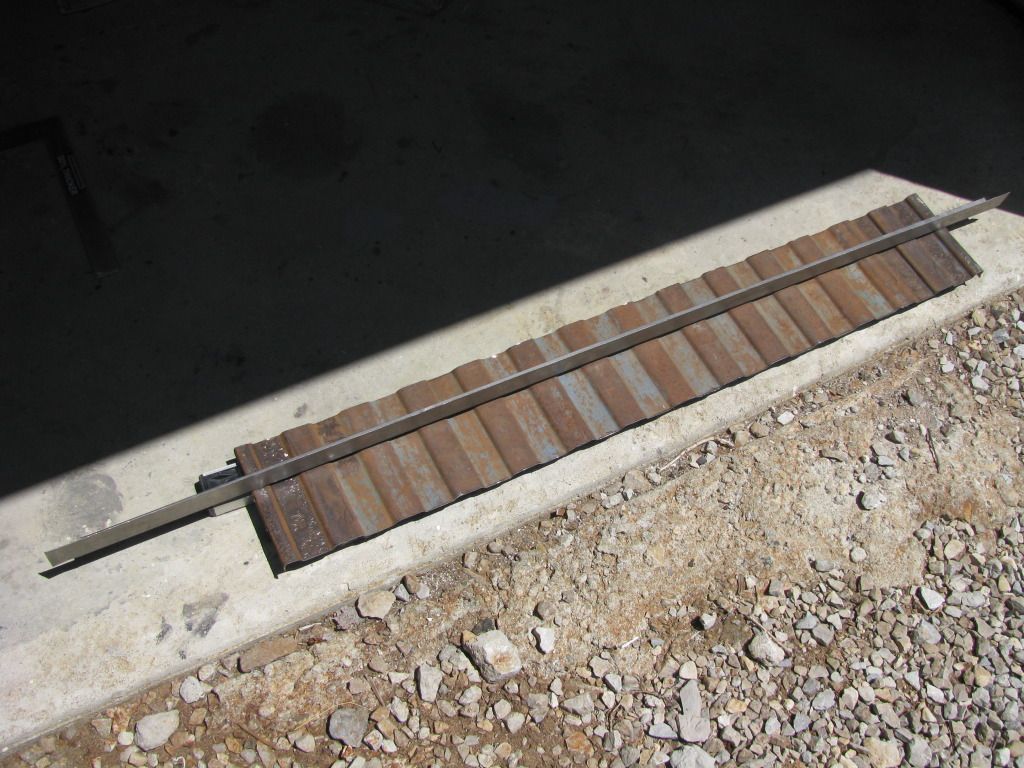
The "L" bracket will go in the "U" channel and the bed floor piece I got from Iceman.
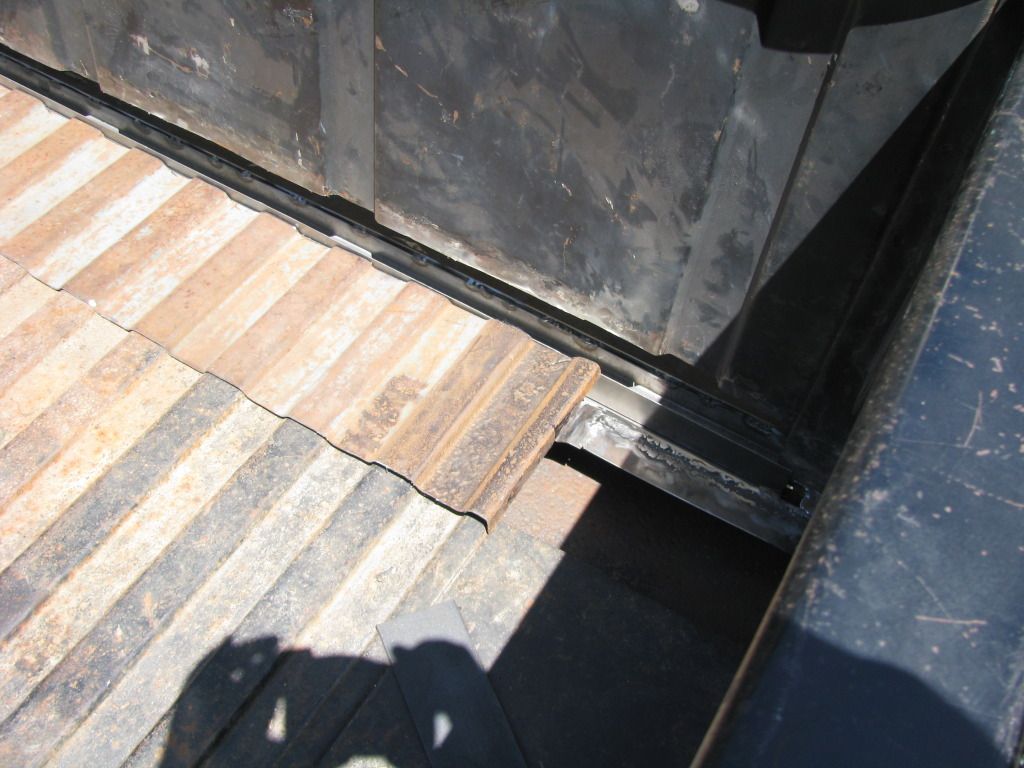
Here's where I'll weld the "L" bracket:
The last two patch pieces will be a sheet of 16ga steel to cover the whole rear of the cab/front of the bed. It will be welded (plug) to the original bed front/cab back and to the "L" bracket it the bottom.
Then the bed floor patch can be trimmed to fit and I hope to butt-weld this to the original floor.
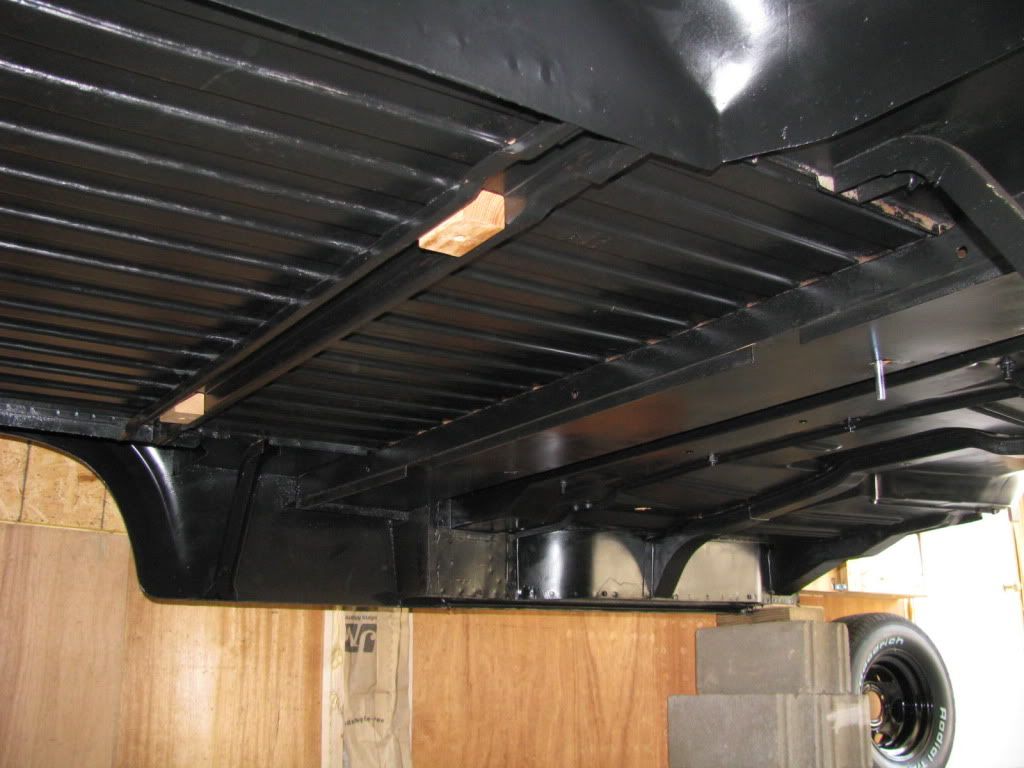
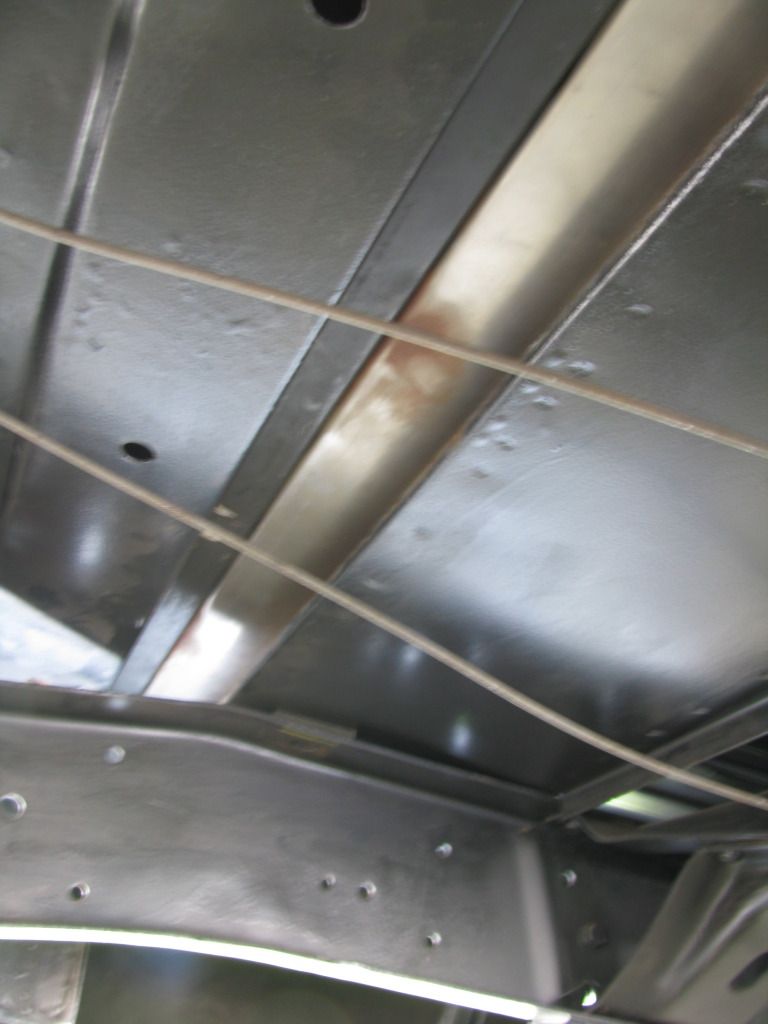
Here's a look at the repairs from underneath:
The last patch panel is the bed side outer sheet metal piece. I think I can make that with some careful bending.
At this point I have (4) more patch pieces that need to go on. The picture below is two of the four.
The "L" bracket will go in the "U" channel and the bed floor piece I got from Iceman.
Here's where I'll weld the "L" bracket:
The last two patch pieces will be a sheet of 16ga steel to cover the whole rear of the cab/front of the bed. It will be welded (plug) to the original bed front/cab back and to the "L" bracket it the bottom.
Then the bed floor patch can be trimmed to fit and I hope to butt-weld this to the original floor.
Here's a look at the repairs from underneath:
The last patch panel is the bed side outer sheet metal piece. I think I can make that with some careful bending.
-
jkimbrel65

- Posts: 965
- Joined: July 11, 2006, 8:53 pm
- Location: Athens Al
Re: '62 Unibody Build (back) Up
Nice work 
Mike
Mike
I tried being normal once...
was the worst 10 minutes of my life
was the worst 10 minutes of my life