Here's where we start. Short block needs to stay for checking pan clearance, and eventual steering box clearance (I will be moving the box upward and forward to match new axle location). As a notch for axle clearance is more than likely, boxing plates will be required to maintain strength. I decided that tying them into the existing bracing would be the cleanest approach. Here you can see where I marked to trim some of the existing bracing for a straight butt joint. Then checked the fit, and also marked for the slight cureved cut at the bottom of the frame. I used 3/16" plate: Cut and tacked: Welded and ground: Same on the other side:
As we I go to work on the axle, here are the plates that I had made for the saddles that will be located underneath the I-beam. I only need 2 for the finished install, but I needed 4 for the mock-up process (you'll see): Started with the axle upside down, level and sitting squarely on stands: Cleaned the areas that will be welded: I used long bolts to locate the aforementioned plates, and threaded nuts underneath the plate to build in some additional caster angle for high-speed stability. You'll note that there's some space between the plate and the I-beam. With the 10 degrees of additional caster built in, the tie rod to leaf spring clearance was a concern, and it was an opportunity to safe guard against interference. Maintaining stock caster angle would make this a non-issue. Here's the plate located on the screws, before tacking it in place:
Here's a shot of what was involved with boxing the plates in. Not a simple box...the caster and plate location did complicate things a bit. You can also see the added distance between the plate and the I-beam in this shot. A street truck would be more straighforward:
Both front plates tacked in place: I mounted the axle one last time to verify the axle centerline location, particularly since the added caster moves the centerline to the rear. Then, it was time to drop the leaf springs, and set up the axle on top. Note that I used the other 2 plates, and the 1/2" bolts to mock it up. The custom u-bolts have not yet arrived from the spring shop:
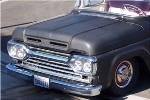
Anyone who has lowered a slick, or a '57-60 is probably familiar with this site. I will be moving the axle c/l forward 2 1/2". This will help with stability, weight distribution, etc. If it were no benefit, I'd still do it simply because it will look much better than this:
This is about where I finished off the weekend. There will be more to come as I have to finish welding the axle perch/mount, determine the final location and depth of the notches and install them, as well as move the steering box up approximately 6", and forward 2 1/2". This will cure any potential issues with bump steer, as the stock geometry will be maintained. If you've made it this far without posting a response already, that's probably what you were wondering about, right?
Here are a couple of shots of clearances as they stand right now. Keep in mind the weight of the front clip and a complete wet engine will drop the front another 1 1/4". I'll be fabricating new shock mounts (upper & lower to utilize shorty gas shocks): May not look like it, but there's about 3" to the pan. This will increse when the axle moves forward, as the pan is sloped to the rear:
Greg D wrote:Question; Why not just run Mono leafs Todd? I got down about the same distance with only a spring change.
Main reason was the cost involved with bolting on this much drop (6-7").
In short, I have about $200 into all the steel for the project thus far, and that includes front & rear end drop, steering box relocation, frame boxing plates, roll cage mounts, etc.
The longer version is, if those springs are the same ones I found on my searches, a set of reversed-eye mono's (4-4 1/2" drop)runs north of $400 + shipping, right?
Then you still need a 2-3" dropped axle and tie rod spacers, which is another $360 respectively from Sid's.
Also, with the amount of caster desired I felt it was safer to build it into the mounting flange than use shims.
BIGREDTODD wrote:The longer version is, if those springs are the same ones I found on my searches, a set of reversed-eye mono's (4-4 1/2" drop)runs north of $400 + shipping, right?
Yep - those be the ones, lol. I see where you are coming from. I got my monos used from a guy on here for about 1/2 price. By the time I did the disc brake swap, put the monos on and a couple rebuild parts + paint etc. I have about $1000 in my front axle. Add another $700 - 800 for the tires & wheels (and I still haven't bought the $75 a piece center caps ). Still debating the drop axle. Stacks up pretty quick huh.
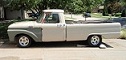
1964 F 100 - I am going to do "something" with it.......
soooop wrote:When you move the axle forward will you have to drill the springs for new locating pins ?
Only the main leaf will be re-drilled. The rest will simply be moved forward to align with the new hole in the main leaf. Slow drill speed and lots of coolant! The 2nd spring will have the end trimmed of so it doesn't hang past the main leaf in front.
What your doing is exactly what I am planning to do over the winter.My axle is already flipped and I have a couple hundred miles on the setup but I need to lessen my bump steer.Also ready to get that steering column up and out of the way! Thought about replacing the front suspension with a clip but I kinda like the straight axle and modifing whats already there. Really looking forward to your build, its looking great so far.
Just a few pictures from yesterday...was hoping to get this done, drill the springs and remount the axle in the new location, but I broke my last good drill bit after the first side was drilled...oh well...
At least I got the perches and boxing plates welded in...
Back:
That should do it:
Just going to round the sharp corners of the mounting plate, and call it good. Gonna get a couple more bits tomorrow so I can finish moving the axle c/l forward, and then move on the relocating the steering column.
Greg D wrote:You are using a MIG to weld that then? Regular steel wire CO2/argon gas?
Yep...
I use normal .030 wire, with 75/25 gas...it's on the big side for sheet metal, and the small side for heavier chassis work. If I did much with material over 1/4" thick I'd switch spools out to .035 but haven't really had need for that yet. I use a Lincoln Power Mig 200...I've had it for about 10 years or so, bought it right after they came out. I think today's version is a Power Mig 210, or 235...essentially an updated version of what I have.
[quote="BIGREDTODD"]Here's a shot of what was involved with boxing the plates in. Not a simple box...the caster and plate location did complicate things a bit. You can also see the added distance between the plate and the I-beam in this shot. A street truck would be more straighforward:
Great thread,
my question would be how would a street truck be more straight forward? How would you build a street truck different?
Please keep in mind there are those of us that do not have your skills and expertise but aspire to be able to.
unibody madness wrote:Great thread, my question would be how would a street truck be more straight forward? How would you build a street truck different? Please keep in mind there are those of us that do not have your skills and expertise but aspire to be able to.
First of all, thanks for the kind words. I do have some background & instruction in fabrication, but I sit behind a desk during the day...I do things like this to feed that part of my brain & forget about sitting behind a desk all day.
To answer your question, the axle mounts/boxing hardware would be easier to fabricate (on a "street" truck) because I would not build in any more caster. That would make the boxing plates square cut, rather than incline/decline angled in this case. Each one of these boxing plates took about 30 minutes to measure, fab, test fit, and tack in place. I'd expect creating square items would take half as long, and the symmetry would be dictated by a measuring tape rather than building from a level plane with angle finders and levels.