
my 4x4 simply known as ..............Eventually............

Re: my 4x4 simply known as ..............Eventually.........
Worked this evening on getting the wires where they belong and put into wire loom. My son and I went to Garlands (the local yard for vintage parts) Saturday and got a wal-mart bag full of wire loom and a bag full of plug ends, alot of plug ends. 2 FULL bags of plugs and wire loom. This was what I needed to get wireing... 

Re: my 4x4 simply known as ..............Eventually.........
I really need to get onto the important stuff but this at least helps me see the project in my garage as a truck. here is the trans tunnel cover I made. Eventually I will cut holes for cup holders. And a look at the column with a seat in it. And last but not least, My cluster. I really really need to get the wiring complete. Anthony


Re: my 4x4 simply known as ..............Eventually.........
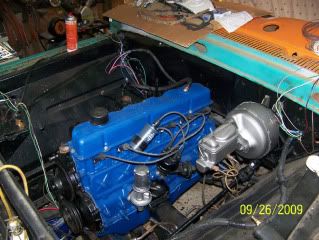
No pics but I thought I would update anyway.. I have been working on terminating the EZWire harness that I am installing, pretty straight forward and simple but time consuming and tedious. Not much to take pics of. I am also working on reassembling the motor. I did no kind of work to it since it ran good before I started but did disassemble anything that had a gasket, paint it up and install new gaskets. Still need to lift motor (300 I6) to get oil pan off. hopefully I can have the wires terminated by the middle of October and get the bed back on and get the outside in primer on a warm day this winter. I still need to get fuel lines, which by the way, should I run metal lines from the tank to the engine compartment? I still need the rubber brake hoses, hook up E brake, Shocks, install new front dual calipers and brakes, have front rotors turned, get rear drums turned and install new rear shoes, new longer studs for the aluminum wheels and lug nuts , Install new universals in the drive shafts, and I am sure there is more. Still working on inside of cab as a break from the wiring. I am working on headliner with radio box and speakers in it. Just a quick little update..........
Anthony
I AM BELOW 350 DAYS TO SLICKSTOCK.....

 can I get it all done?????????
Anthony
I AM BELOW 350 DAYS TO SLICKSTOCK.....
Re: my 4x4 simply known as ..............Eventually.........
Well, besides the wiring I am doing I am taking breaks to get a little of the "other" stuff done. I have installed the Gas tank, neck, and new rubber gasket;


the brake booster and master cylinder is on the fire wall now;

I have decided to go with White over Orange so I have painted around the rear window and gas neck along with the glove box door and ash tray;


I have made door sills for my Slick and I think I really like them.


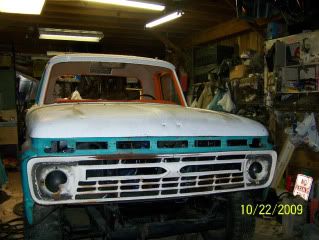
and finally, I have loosened the front clip and got it aligned so that the fenders line up with the cowl, just need to finish bolting them on. Other than cleaning on the garage, which is never ending, this is what I have been up to......
Anthony
the brake booster and master cylinder is on the fire wall now;
I have decided to go with White over Orange so I have painted around the rear window and gas neck along with the glove box door and ash tray;
I have made door sills for my Slick and I think I really like them.
and finally, I have loosened the front clip and got it aligned so that the fenders line up with the cowl, just need to finish bolting them on. Other than cleaning on the garage, which is never ending, this is what I have been up to......
Anthony
Re: my 4x4 simply known as ..............Eventually.........
pictures of my mock-up on my headliner. I am going to take it back apart and make new panels (6 of them) and have them covered in a White vinyl. The center diamond plate was a decision I made so that I would have a good support for my radio box. I had trouble finding a small 'J' channel to run along the edge of the diamond plate to set my headliner in. I ended up at the local ACE and in their metal roof area talking to the guy that bends up all their tin roof panels. He bent me up a peice of White the size I wanted and told me the only thing was, I had to buy 10 feet. I asked the price, he told me $5 so I told him to bend it up. Any way, here are the pics....
Anthony


Anthony
-
slickmainer
- Posts: 2555
- Joined: October 8, 2007, 6:41 pm
- Location: Auburn Maine
- Contact:

Re: my 4x4 simply known as ..............Eventually.........
Nice work. Looking good
--Gregg--
you can't get there from here
you can't get there from here
Re: my 4x4 simply known as ..............Eventually.........
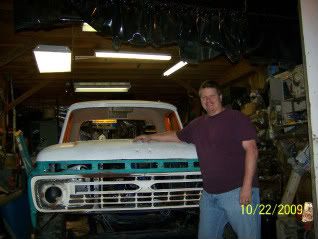
Front end is on and this should be my last fitting. I am ready to pull it apart for the last time, put on the clips and bolt her down tight. I am working on finishing out the inside of the cab along with the wiring..  the bed will probably sit outside all winter until spring before I put it back on. (more room in the garage..
  ) I can work on break lines and universals easier also..
  hoping to get the wiring and breaks done before spring and the inside of the cab when I need a break.
Re: my 4x4 simply known as ..............Eventually.........
Well not alot has happened in the past couple weeks except working on my daughters Passport (brakes, shocks and power steering leak) getting it ready to go back to college in Elkins. Helping Zak out with another trade... He traded his Monza for a 87 S-10 (4 cyl 5 spd). I moved my Slick out in the weather to get theirs in to work on them. Mine should make it back in this weekend though. I did manage to buy the stuff to finish my headliner so I will get pics when finished.
Anthony
Anthony
Re: my 4x4 simply known as ..............Eventually.........
(quote johnzmu)Looking great anthony! Love those classic 4x4's. I dont know if you covered this in your build thread, but I was wonderin if you are usin the origianal powertrain(engine,tranny,transfer case) or did you upgrade?
I apolagize if this has been covered. (quote)
John, this is no problem, this is why we are here.... When I purchased my truck I was lead to believe it was original. when I started tearing it down and found the front discs, well, I knew better. My title states my f-250 as being 2 wheel drive, and with the help of this great site I have figured out my chassis to be a '76-ish f-250 high boy chassis. this gives me all the upgrades of power steering, power brakes with front discs and the rear overload springs to be able to tow with. The only drawback so far has been the steering column. (had to get a dentside column) Upon cleaning and disassembly I have noticed that the motor mounts don't look to be in the original spot which leads me to believe it started life as a v-8. It now has a 300 I-6 in it which I like. (I am a big inline six fan...any make, any model)Figured since my 2wd f-250 had the six, they used it so I ordered my gasket set and when I went to put it on, found out the oil pans are different on newer models. So, what I have is a 1966 body sitting on a 1976 chassis with a 1988 engine in it with a 4 speed granny and divorced transfer case in it. Oh yeah, my aluminum wheels are off a 1994 f-250.
So what I have is a little like Johnny Cash's song, One piece at a time...
http://www.youtube.com/watch?v=t1-zzJnKtDg
Hope this answers some of the questions. I should have it on the road this spring to start working bugs out to drive to Slickstock in August. Along with the PS, PB the upgraded chassis gives me I will also be adding Air for my Beautiful Wife, Kim.
Anthony
Re: my 4x4 simply known as ..............Eventually.........
Just a little at a time...... stayed over at work today and did some of the headliner.... turned out OK for the first time... .... Just remember that the whole headliner is split with a diamond plate center and radio box....
Re: my 4x4 simply known as ..............Eventually.........
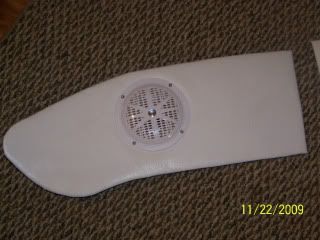
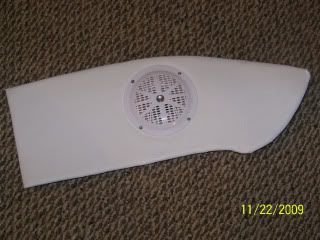
OT is over at work and I was home with enough time to get some work in on the Slick... Found the perfect dome light for my truck.. a 1965 Ford Galaxy 500 LTD back-up light  got it installed and also got the passenger side headliner with speaker installed...


Enjoy the pics and hopefully I'll get more done...
Enjoy the pics and hopefully I'll get more done...
Re: my 4x4 simply known as ..............Eventually.........
well I got alittle wiring done tonight inside the headliner... I have the dome light up and working then went to the radio and guess what....IT DON'T WORK!!!!!!!! no surprise.. just my kind of luck...  guess I need a new CD player now. I can still get the headliner put in though and work the radio through the installation hole. (wal-mart has one with a 2" dvd player in it for $100
  ) Still have a tranny to put in daughters Passport before buying anything for me... might be a while ... Thats just the way Dad does things... family first, toys later... anyway, enough rambling, and now to the pics.............................


Re: my 4x4 simply known as ..............Eventually.........
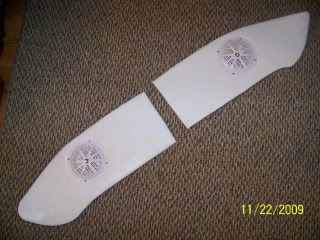
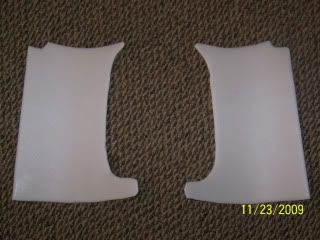
O.K. I have a request for headliner pics/install.... here we go ...
I cut the original ratty headliner to fit what I needed around my diamond plate center, notice the duct tape..
I then cut the luan (Thin plywood type material) out using these for patterns. Sorry no pics of the luan. I then wet the wood and put it in place and let it dry for several days. this let it take shape.

I bought a piece of metal from the local hardware that does metal roofing and had them bend it into a "j" channel. only cost me $5. I mounted this to the edges of my center piece. you can also see the factory tabs in these pics...


next I covered the panels with 1/4 inch foam and white boat vinyl by using cabinet glue. the professional stuff, spray on. Ed let me use his shop to do this.

 (no pic of the top)
After all this I started to put it all together. used original front clips..


you can see where I used the tabs and how I tucked all 3 pieces behind the door trim to lhold it.


and finally we have a finished side. if only I could get the drivers side done....... waiting to finish up radio and antenna before I can do this

And that is how I did my headliner..... hope maybe someone can get something out of this...
I cut the original ratty headliner to fit what I needed around my diamond plate center, notice the duct tape..
I then cut the luan (Thin plywood type material) out using these for patterns. Sorry no pics of the luan. I then wet the wood and put it in place and let it dry for several days. this let it take shape.
I bought a piece of metal from the local hardware that does metal roofing and had them bend it into a "j" channel. only cost me $5. I mounted this to the edges of my center piece. you can also see the factory tabs in these pics...
next I covered the panels with 1/4 inch foam and white boat vinyl by using cabinet glue. the professional stuff, spray on. Ed let me use his shop to do this.
After all this I started to put it all together. used original front clips..
you can see where I used the tabs and how I tucked all 3 pieces behind the door trim to lhold it.
and finally we have a finished side.
And that is how I did my headliner..... hope maybe someone can get something out of this...
Re: my 4x4 simply known as ..............Eventually.........
quote from Iceman...
a short explanation of lauan for those interested:
it is a 1/4" layered hardwood commonly used as an underlayment for vinyl flooring because of its smoothness.
it is easy to work with and after being wetted and formed holds its shape very well.
thanks Ice
a short explanation of lauan for those interested:
it is a 1/4" layered hardwood commonly used as an underlayment for vinyl flooring because of its smoothness.
it is easy to work with and after being wetted and formed holds its shape very well.
thanks Ice
Re: my 4x4 simply known as ..............Eventually.........
Well Guys, weather is cold and wet and money is low so I decided to do something just to make a little progress. I pulled both front rotors and bearings to check them out and here is what I found.... drivers side....


passenger side...


I found that the drivers side is missing the dust cap and the outside bearing is seized up..... not to big of a deal... and the passenger side, which didnt have a caliper or hardware on it when I drove it home, the rotor is rough from rust and the bearings unlike the drivers side seems to be free.
Here is the plan....
1 have both rotors turned
2 buy new bearings for both sides
3 clean and paint the dust covers and hardware (I already acquired passenger side hardware from the local yard)
4 Install new calipers (I already purchased these also)
5 install new brake pads
Looks like pads run from silver series..... $20 to Wagner semi metallic...$60
does anybody have a preference on brake pads??? just getting opinions.
bearings look like they will run me around $30+ a side.
(I'll add after pics when I get there...)
Just trying to plug along and get to slick stock... .. Don't know if I'll make it.... it is getting tight around here.
Keep moving forward guys, don't let me beat you done with a truck...
passenger side...
I found that the drivers side is missing the dust cap and the outside bearing is seized up..... not to big of a deal... and the passenger side, which didnt have a caliper or hardware on it when I drove it home, the rotor is rough from rust and the bearings unlike the drivers side seems to be free.
Here is the plan....
1 have both rotors turned
2 buy new bearings for both sides
3 clean and paint the dust covers and hardware (I already acquired passenger side hardware from the local yard)
4 Install new calipers (I already purchased these also)
5 install new brake pads
Looks like pads run from silver series..... $20 to Wagner semi metallic...$60
does anybody have a preference on brake pads??? just getting opinions.
bearings look like they will run me around $30+ a side.
(I'll add after pics when I get there...)
Just trying to plug along and get to slick stock...
Keep moving forward guys, don't let me beat you done with a truck...
Re: my 4x4 simply known as ..............Eventually.........
Getting a little done. Hopefully I will have all 4 brakes done this weekend. Here is what I have so far...
before


after


still need to bolt it back up but am waiting to get new E-brake cables, mine were toast. As far as the brakes, I went with semi metallic raybestos brand. A little pricey but I think worth it.
here is where I start tomorrow..

before
after
still need to bolt it back up but am waiting to get new E-brake cables, mine were toast. As far as the brakes, I went with semi metallic raybestos brand. A little pricey but I think worth it.
here is where I start tomorrow..
Re: my 4x4 simply known as ..............Eventually.........
Well I just got in and showered and got my belly full. spent 3 hours in the garage with the other lady and feel as if I got absolutely nothing done. Wiring is not for me on a vehicle... give me a house to do any day, so much simpler. I have everything under the hood hooked up except battery cables which I need to buy and the electric choke. If I go that route. Still need to get underneath and hook up the reverse light switch. I will be using 68-72 tail lights so that the back up lights are in them. Hopefully I will finish up with this this week and I can move back into the dash and finish up all the switches this weekend. I would have pictures but it looks the same now as when I started it this evening... ... Hope everyone else is haveing good weather to work in. Started pouring the rain here about 8:30, suppose to be setting in for a while.
Have a Slick week and lets get in there and get these projects done....
Have a Slick week and lets get in there and get these projects done....
Re: my 4x4 simply known as ..............Eventually.........
I am using an EZ-2-Wire Harness. It is a nice harness for the money. all the wires are labeled the full length. You just have to put your own ends on the wires. I gave $175 I think for this one about 2 1/2 years ago when I started on the Slick. something similar to this Gregg,
http://stores.ez2wire.com/-strse-37762/ ... Detail.bok
Like I said, I bought mine well over 2 years ago and I can't seem to find the exact kit now... Don't need no Extras but this kit has them anyway... (power windows, tach, and such)
http://stores.ez2wire.com/-strse-37762/ ... Detail.bok
Like I said, I bought mine well over 2 years ago and I can't seem to find the exact kit now...
Re: my 4x4 simply known as ..............Eventually.........
Post subject:
PostPosted: April 7, 2010, 7:18 pm
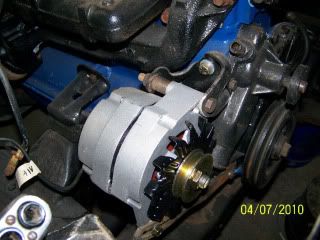
more hair pulling done... took some pics to show that I am doing something. Have I told you all that I hate wiring??? almost 3 hours more in the garage tonight... I keep telling my self that a little at a time will get me to Slickstock...
new Alt set up
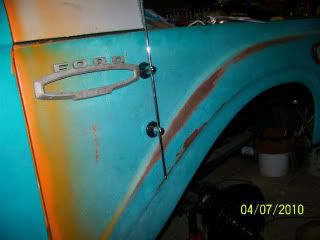
Wire Loom neatly tucked away...
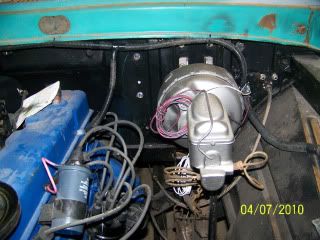

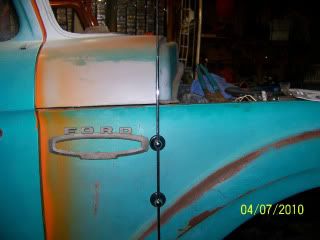
And finally the Antenna install. Went on ahead and did this, It is pretty easy to take off to paint, if I get that far...
I just got to keep trudging along.....
Report this post
PostPosted: April 7, 2010, 7:18 pm
more hair pulling done... took some pics to show that I am doing something. Have I told you all that I hate wiring???
new Alt set up
Wire Loom neatly tucked away...
And finally the Antenna install. Went on ahead and did this, It is pretty easy to take off to paint, if I get that far...
I just got to keep trudging along.....
Report this post
Re: my 4x4 simply known as ..............Eventually.........
Post subject:
PostPosted: April 10, 2010, 5:52 pm
Little more done...got the underside of the hood cleaned up. Sandblasted the rusty spots and like everything else, It had some rust. Focusing on getting it on the road and driving so I can get her to Slickstock. Body problems can be fixed later. also got it coated with the bedliner that went on the underside of everything else. looks pretty good...
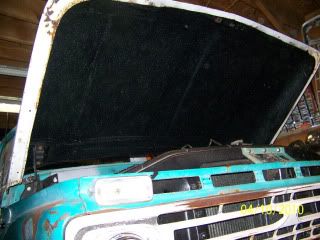
Underside dried out good so I decided to button her up with the install of the hood... with Zak helping me.
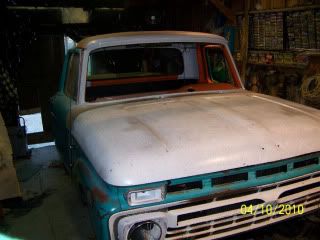
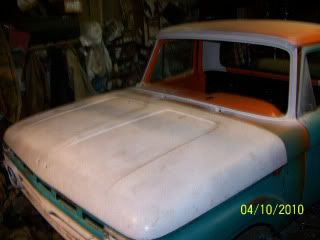
So now that the under hood is mostly done...(still need oil, filter, carb,starter, hoses????I think thats it.. ) I can move back to this mess....
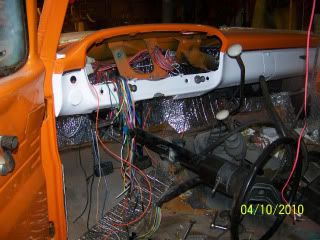
I will be buying the rest of the stuff needed under the hood a little at a time so as to when I get it done I should be finished with the wiring mess.... So when I get this mess all terminated and plugged in I should be able to crank her up and listen to sweet Six music!! Boy I can't wait.... come on motivation!!!!!
PostPosted: April 10, 2010, 5:52 pm
Little more done...got the underside of the hood cleaned up. Sandblasted the rusty spots and like everything else, It had some rust. Focusing on getting it on the road and driving so I can get her to Slickstock. Body problems can be fixed later. also got it coated with the bedliner that went on the underside of everything else. looks pretty good...
Underside dried out good so I decided to button her up with the install of the hood...
So now that the under hood is mostly done...(still need oil, filter, carb,starter, hoses????I think thats it..
I will be buying the rest of the stuff needed under the hood a little at a time so as to when I get it done I should be finished with the wiring mess.... So when I get this mess all terminated and plugged in I should be able to crank her up and listen to sweet Six music!! Boy I can't wait.... come on motivation!!!!!