Final Assembly (part 9)
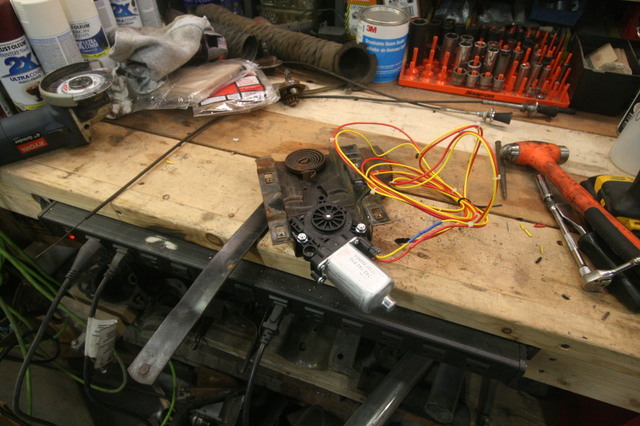
On to more wiring.....
One of the things I wanted to reuse was the Roadmaster headlight switch, since we are reusing so much of the Roadmaster in this build it just makes sense to adapt it to the slicks dash.
The problem is that when it was mounted in the RM it used a hollow plastic nut to mount it to the RMs plastic dash, while removing it from the RM the nut of course broke leaving the threaded part in the light switch, it was easy enough to get that backed out of the switch but I was going to need a nut similar to what holds the slick headlight switch in the dash for the RM switch.
Luckily GM uses a common thread for lots of years (over 20 it appears) on all its headlight switches that use a pull to activate them, but no auto part store sold the nut, in fact no one but restoration companies like OER even reproduce the part, yes I could have made a trip to the local salvage yard and got one, but it was a $6 part to order and we had other things to order anyway.

So I have a nut and it fits the headlight switch, but the round slotted part is too big a diameter to fit the slicks headlight switch chrome trim, so I grind the chrome trim ring flat to get rid of the raised portion that the nut is suppose to fit in without removing the "lights" text on the trim and assemble it in the dash...it works. The pull is kinda' large and long but isn't that bad looking sticking out of the slicks dash, no way you will confuse it for any other switch on the dash in the dark...lol
With that complete it was a waiting game for UPS on Monday to deliver the rear tail light buckets, we used tail lights from a '67 truck since they have the backup light in the same housing (thank you Ryanjay11 for the info), we already had the correct lenses that came on the truck. UPS shows up around 10AM and I get started making pigtails for the rear lights that I can feed through opening in the bed on each side.


With the pigtails made I could drop the lights in their openings in the bed and start wiring them up....

I had a problem with one of the sockets in the new lights, it had one of the brass terminals that is soldered to the wire (bulb contact) that popped off and I had to re-solder it to the wire, it took me awhile to figure out why the bulb didn't work, nothing like having to trouble shoot brand new parts.
I like to make all my wire connections under the truck instead of inside the opening for the tail light buckets, it's one of those preference things, it could be done either way and there is more than enough room inside the openings, it might even be easier later if you had to trouble shoot a problem if the connections were in the tail light openings but since I solder all my connections it's doubtful that it'll every be a problem.
The RM had 3 rear tail lights on each side and one back up light per side, so I removed the extra sockets and terminated the wire ends with heat shrink, I can at a later date tap these connections to add a harness for trailer lighting, there was a trailer wiring connection on the RM that I removed because they had used the Scotch-Lok taps to add the harness, those things work for a very limited amount of time and I didn't want electrical issues cropping up from the harness, if we buy a trailer I'll add a lighting harness at that point and solder all the connections.
-------
I'm going to change the subject (go off topic) for a minute (I'll tie it back to the build..lol)
You folks ever do side work for extra money?
I have done a lot of different things over the years as a side job to earn extra money for things, being a mechanic I could have easily just done work on neighbors vehicles but didn't really want all the hassle that goes along with doing that type of work at home, any of you who have, know exactly what I mean.
One of the things I use to do which will seem really odd to you folks was that I built custom computer systems for businesses and individuals, this was in the early nineties when everyone wanted a computer, they were high priced, and not a lot of people knew much about them.
I'm a old fart and had been messing with computers since their inception and have been on the internet since the BBS days when you used a phone modem to connect to bulletin boards, it might be hard to imagine but there was no WWW back then, it hadn't been invented yet... lol
https://en.wikipedia.org/wiki/Bulletin_board_system
When computers got common and everyone had a family expert (mostly kids) I gave that up, the cost of a new computer had fallen to well below $500 and building custom PCs became a market that lots of people were doing which equals slim profits.
So another thing I use to do was rebuild arcade equipment, specifically up-right video games like Pac-Man or Donkey Kong , but also pinball machines, and pinball machines was another untapped market for the home-gamer, lots of people wanted them but no one knew how to fix them....so I've always been a pinball addict and there is nothing better than owning your own machine. I would up just focusing on pinball's, got hooked up with a couple auction houses that sold only arcade equipment, bought a box truck and started going to auctions.... without giving you a boring history of pinballs I'll just say that there are 3 classes of pins based on when they were made, the early traditional pins are called EMs for electrical/mechanical, the second class is the early solid state kinda' semi-computerized, and the 3rd class is full on computerized which would be your modern pinball machine.
(I'm getting to the point....gotta' have the ground work though..lol)
So I totally by-passed the old EM machines, I've worked on them but they are a royal pain in the ass to get running if anyone who hasn't a clue has been there before you, I jumped right into the solid state machines, they were cheap to buy (a couple hundred dollars) almost never worked, but all had common problems that were fixable and you could flip the machine into the home market for $500-$750 depending on the title, but where it really got interesting was the computerized pins, these if popular machines like the Adams Family or Indiana Jones were used until they broke then either sold at auction or repaired and returned out on the route to make more money. I did these as a side job until that market dried up about 7 years ago after Bally got bought by Williams and then Williams went bankrupt. Today pins like the Adams Family sell for almost double or more then what they cost brand new. ($4k vs $8-10K for a really nice machine)
https://www.ebay.com/itm/ADDAMS-FAMILY- ... 2584955455
-------
Ok I'm there now....... it's on these machines that to sell them in a lot of cases they had to have the playfield rebuilt, new rubbers, a good cleaning, replace lots of lights, the playfield was always a full color graphic that was coated with a layer of Mylar to protect the graphic from the pin ball rolling around on top of it. In cleaning this Mylar coating I came across a company named Novus that makes polish for plastics....
https://www.novuspolish.com/
Best plastic polish on the market.....
A example....

This is one application of the polish on the tail light lenses.....


That was using the #3 polish for heavy scratches, I have the #2 and #1 polish also the #1 can be used on plastic windshields to remove scratches or just about any polycarbonate clear material, works like a charm.
The pictures don't really do it justice, they look way better.
-------
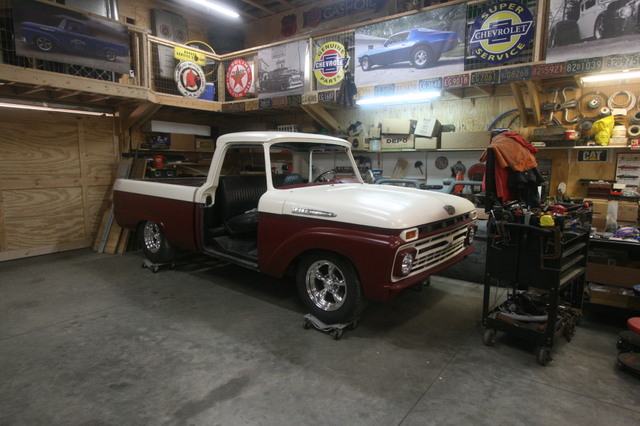
At the end of the day Monday we had to put the truck back on the dollys and move it over into a corner of the shop so the wife can do a couple jobs this week in the shop.
-------
Sorry for the long story but I thought some of you might enjoy it...and I've done other things to make side money like selling on eBay also, I was at one time a power seller...lol
Jon