'62 F100 SWB Step Side - yes another Crown Vic swap

A place just for our project & build threads.

Moderators: Kid, Casey 65

Blanger
Posts: 404
Joined: August 17, 2017, 7:55 am
Location: Indiana
United States of America

Re: '62 F100 SWB Step Side - yes another Crown Vic swap

Post by Blanger »

Update #2

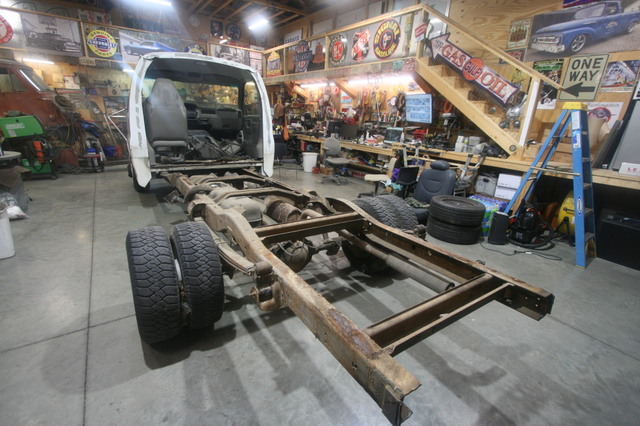
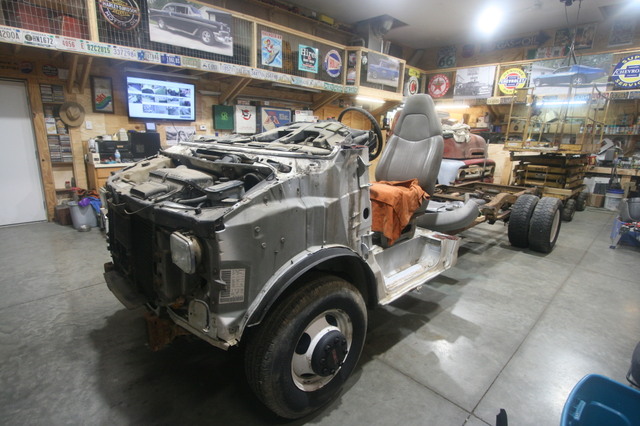
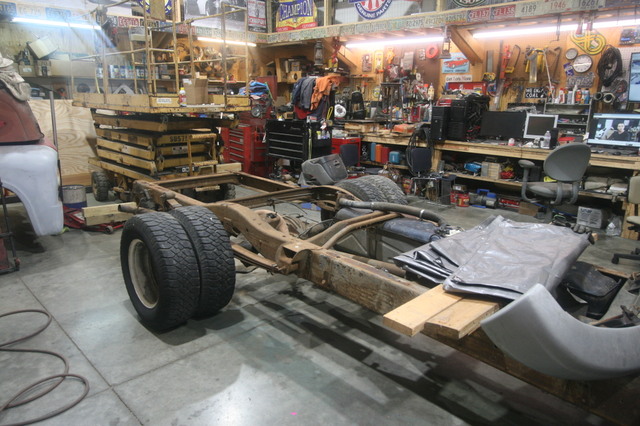
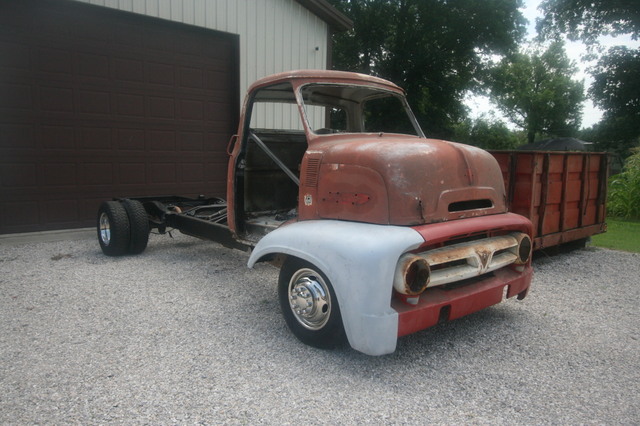
So some of you may remember that to put the flairside bed on the '09 CV chassis the wheelbase width was a lot wider than the original slick bed would accommodate, the width is really around 8"- 9" wider than the slick bed, to make the wheels fit under the fenders we cut the fenders lengthwise and widened the fender by 4" on each side.

Having never done this type of work before I made plenty of mistakes, welding the fenders back together they warped, they twisted, and they sunk towards the floor. I took what should have been a pretty straightforward process and royally screwed it up, but not being daunted I beat, cut, welded, and porta-powered the fenders until they fit as good as they were going to..... ground down all the welds, and applied a coat of "long hair" fiberglass followed by a coat of normal filler after leveling out the fiberglass.

If this was a shiny paint build the fender would have been either cut up again or scrapped for new ones, but for our purposes they work well enough and most people are none the wiser as to what we did. I don't purposely do bad work because it's a "Rust-o-mod" but being the type of build it is makes things very forgiving in the big picture.

Anyway during the process the flange that bolts to the bed had to be reinforced not just because of widening the fenders but the flanges were getting pretty thin from years of rust, all the bolt holes were reinforced and new struts were made to support the front and rear edges of the fenderwell opening.

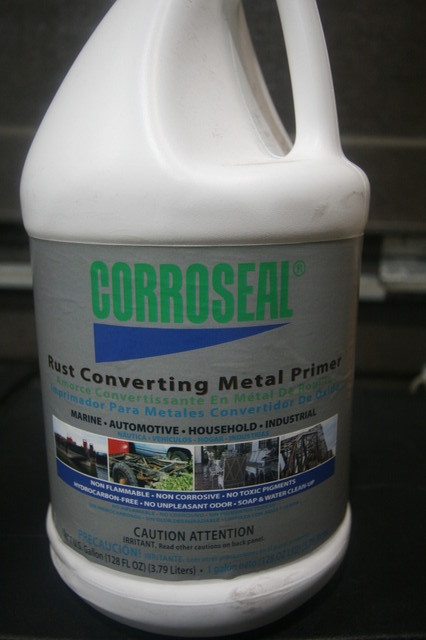
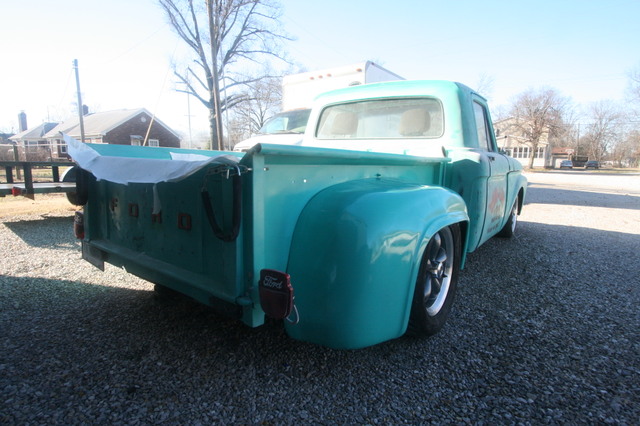
After the fenders were fitted again all the paint was removed, etch primed, coat of black primer, and more minty green paint applied. The tires have pretty good clearance and driving the truck there isn't any tire contact but I haven't pulled the trailer with the fenders on yet so I may need to do a little more work once I see how that goes.

Image
Image
Image
Image

-----

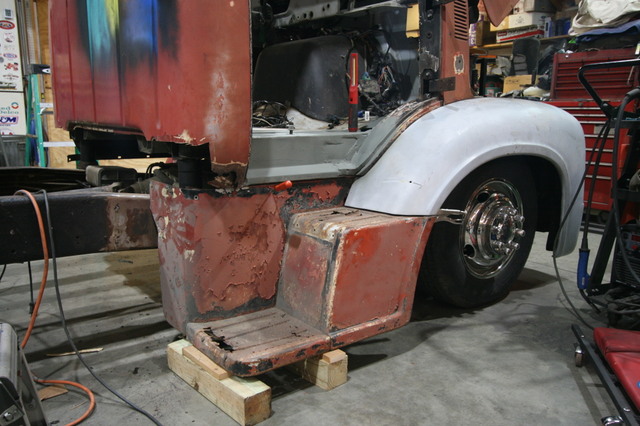
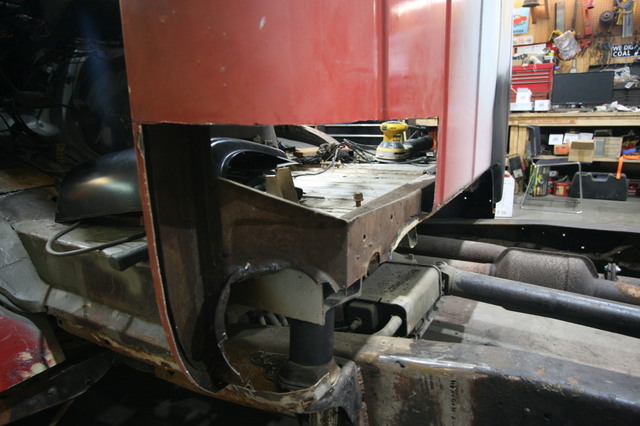
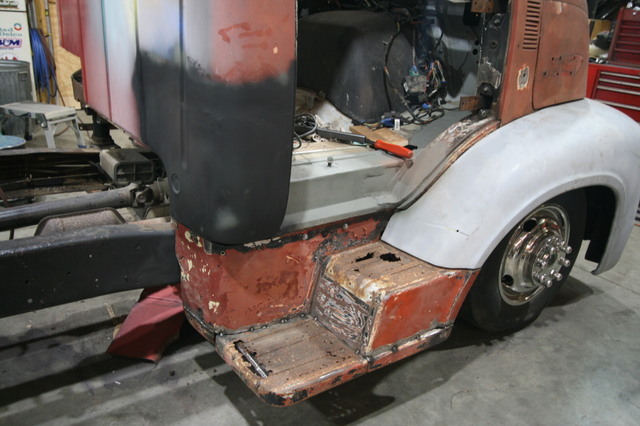
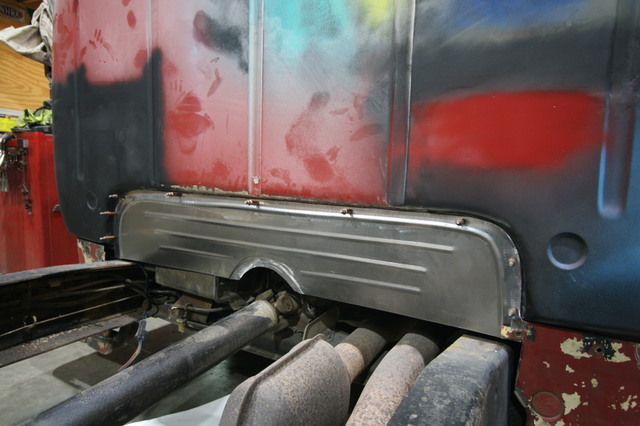
Originally the bed steps I thought would have to be cut down because when I test fitted (mock-up) them they stuck out way too far for my liking, but a little trimming and cutting I got them to fit right up against the CV frame then welded the original support bracket (cut down) to the CV frame, the end result moved the step in so they only stick out less than 2" from the cab corner and look very well, we did have to drill new mounting holes in the fender to mount that side of the step but they are strong enough to jump up and down on....lol

Image
Image
Image

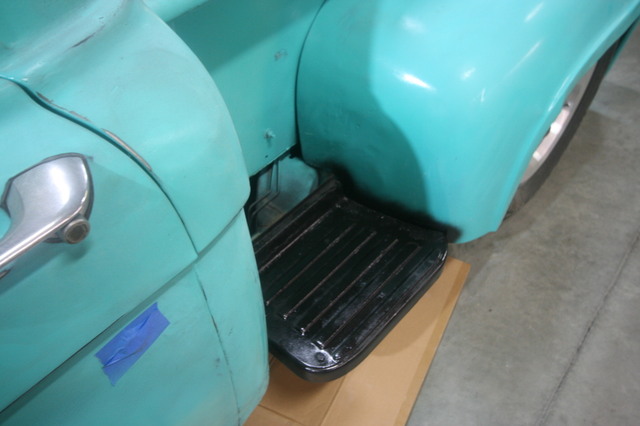
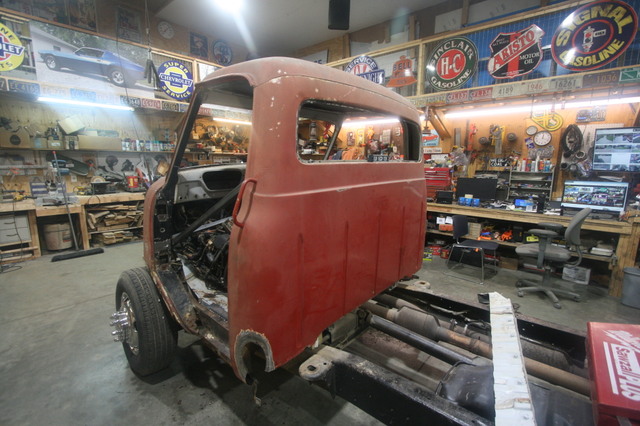
And again the steps were removed, stripped down to bare metal, etched, primed, and painted, then reinstalled. The front of the fenders where the steps originally mounted was rotted away when the bed was disassembled, I cut the rotted area away and saved the wheel opening portion, I had intended to weld that portion back to give the wheel opening a finished look but decided against it in the end, if you go back to the beginning of this thread you'll see that this truck was build from a bunch of mismatched sheet metal that was heading for the scrapyard before we saved it and gave it a new life on this '09 CV P71.

Image
Image
Image

It's really came a long way hasn't it...lol

-------

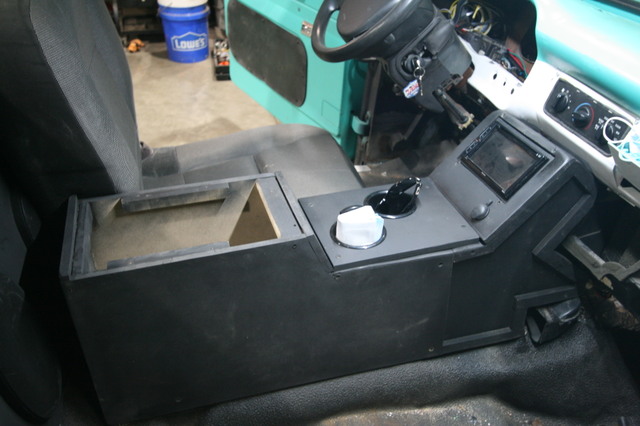
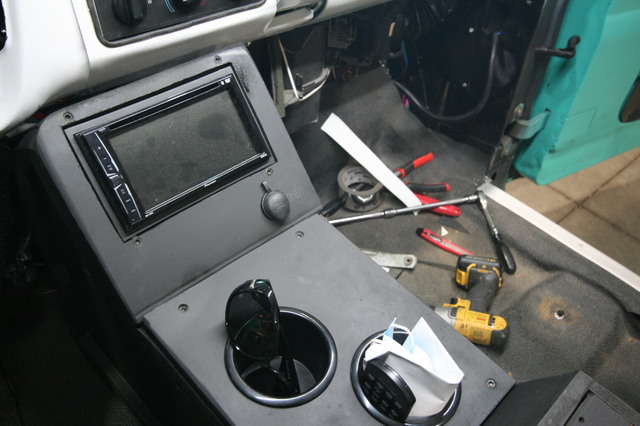
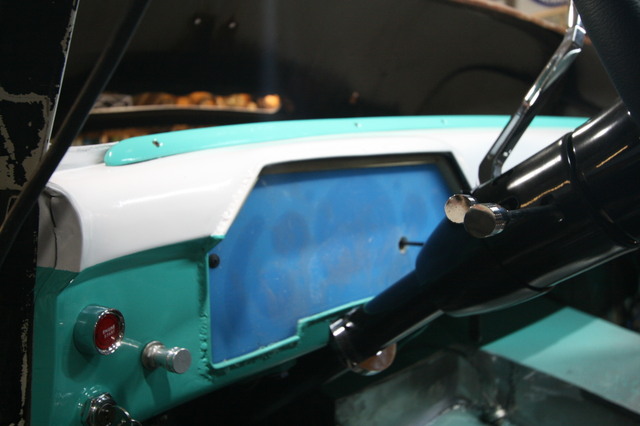
This is a really cheap digital volt meter we found on Amazon for less than $10 that fits the old ignition switch hole in the dash, looks great and is nothing special to wire up, it is the best solution I have found to add a bit of functionality to the dash while pluggin the hole left from the body swap on this build since we are using the original CV column.

Image
Image
Image

------

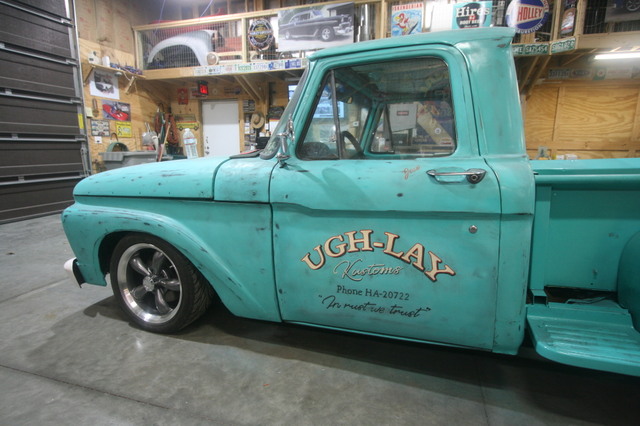
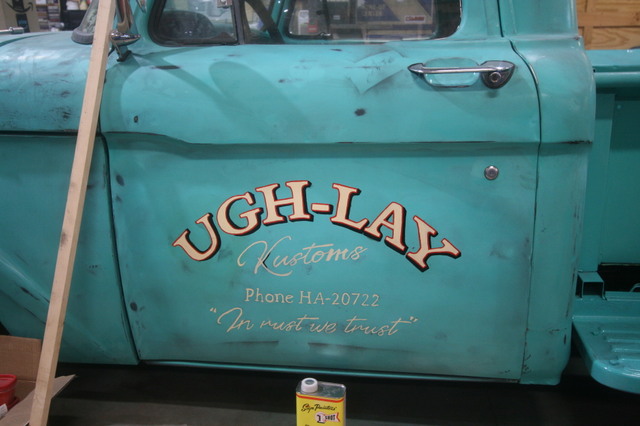
The doors have been lettered with a new design twice only to be sanded back off (we just didn't like the look) the truck now has the exact same logo that was applied to the other two trucks being painted.

Image
Image

------

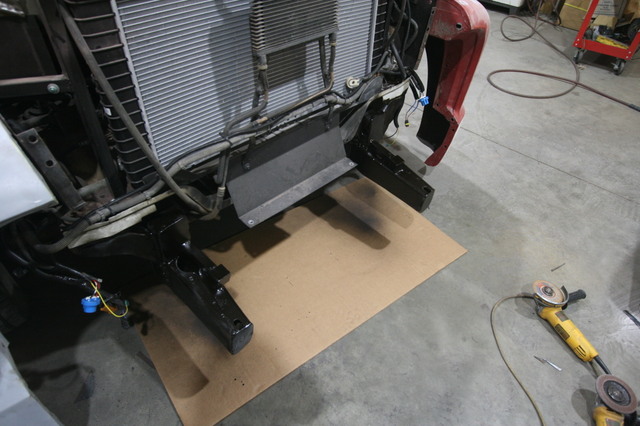
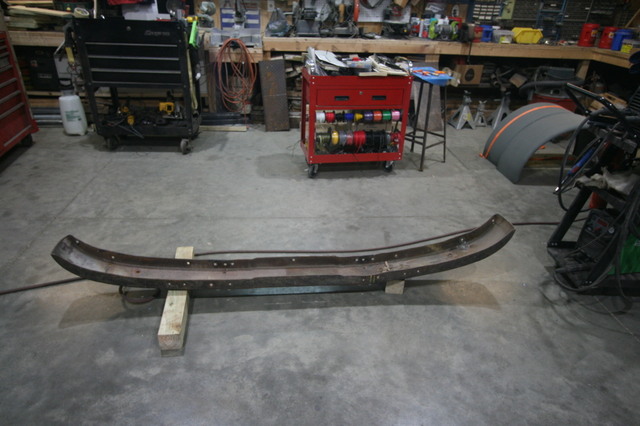
The current project is making frame to bumper mounts and get the front bumper mounted that should be finished in a day or so, the wife has work scheduled for the next couple weeks so the truck can go outside and sit in the weather to age the paint...lol

Image
Image
Image

-----

Jon
SteveCanup
Posts: 1096
Joined: November 7, 2014, 11:08 pm
Location: Wytheville, Virginia
United States of America

Re: '62 F100 SWB Step Side - yes another Crown Vic swap

Post by SteveCanup »

Jon...that looks great! That's a FAT fender Ford for sure...lol. Just a thought...did you consider widening the bed itself? Rebuild the header panel and make a custom tailgate and use the standard size fenders? I had a '55 Dodge 1/2 ton before my '64 F-100 and it had a "high-side" bed. I never liked the looks of the bed so I cut the bedsides down (shorter) by 6 inches. It also didn't have a tailgate and I made one out of some square 1 inch tubing covered with a sheet of metal. It was just a thought though...about the bed....
1964 F-100
Image
Blanger
Posts: 404
Joined: August 17, 2017, 7:55 am
Location: Indiana
United States of America

Re: '62 F100 SWB Step Side - yes another Crown Vic swap

Post by Blanger »

SteveCanup wrote: Just a thought...did you consider widening the bed itself? Rebuild the header panel and make a custom tailgate and use the standard size fenders?
Steve,

Yup, you may have watched some of Fred's videos on Youtube (Rudy's Resurrection) that's how he did his on a '10 CV P71, man I watched the video of him widening the bed several times and no offense intended to Fred but I didn't like it, to me it solves one problem but creates a couple unintended problems that effect the look or appearance of the bed and the back half of the truck as a whole. Again I mean no offense to Fred it just wasn't the look we were going for.

If you haven't watched any of his vids here's a link to his channel.

https://www.youtube.com/channel/UCmjiK4 ... rBw/videos

Here's his vid on widening his bed.


Jon
SteveCanup
Posts: 1096
Joined: November 7, 2014, 11:08 pm
Location: Wytheville, Virginia
United States of America

Re: '62 F100 SWB Step Side - yes another Crown Vic swap

Post by SteveCanup »

Jon...I get you on the bed widening. I'll have to watch the video. Btw, the truck looks fantastic, I think that your fenders turned out great...
1964 F-100
Image
Blanger
Posts: 404
Joined: August 17, 2017, 7:55 am
Location: Indiana
United States of America

Re: '62 F100 SWB Step Side - yes another Crown Vic swap

Post by Blanger »

More progress.....

So bumper is mounted after making brackets to tie to the CV frame, it's sucked in to the lower valance and looks pretty nice.

Image
Image

After 4-5 attempts my wife as the door art painted, we in the end went back to the logo that is on the other two trucks, it looks good and just works, we had wanted to change the artwork but couldn't really improve on what we were using.

Image
Image
Image
Image

Both doors have the windows tinted now, we still have the back glass to do, but will wait till we are doing the interior work and the seats are out of the truck to tint it.

Image

With the '62 in a position where it can sit outside and age the paint, we decided to pull the donor for the '53 COE in and prep it to remove the box off the back. We had thought that we might tear the box apart down to the floor and use it as a basis for building a flat bed... but it wasn't configured in a way structurally that it would work without really adding a lot of steel to it, in the end we just decided to look for another bed that is more suited for what we want to build.

Image

We spent about a day and a half cutting everything so the box could be lifted off, then a friend of ours used a crane to pluck it off the frame and load it on a trailer, in just a few minuets its was going out the driveway...lol

Image
Image
Image

With the box gone I brought the truck back in the shop, replaced the front brakes, pads, calipers, and brake hoses, fixed two exhaust leaks it had that were up stream of the O2 sensors making it run a little rich at idle, then started the evaluation process of what has to be done "frame-wise" to make it work for our needs of building the '53.

Image
Image
Image
Image

Then it went back outside and covered with a tarp to keep the weather out. We then started a little mock up on the cab-front end of the '53 so we can get some measurements and develop a plan or "road map" for the build.

Image
Image
Image

Anyway, that's the progress report! :D

Jon
SteveCanup
Posts: 1096
Joined: November 7, 2014, 11:08 pm
Location: Wytheville, Virginia
United States of America

Re: '62 F100 SWB Step Side - yes another Crown Vic swap

Post by SteveCanup »

...and excellent progress it is! The '62 looks great!
1964 F-100
Image
Blanger
Posts: 404
Joined: August 17, 2017, 7:55 am
Location: Indiana
United States of America

Re: '62 F100 SWB Step Side - yes another Crown Vic swap

Post by Blanger »

Hope everyone is safe and doing well, just wanted to let you all know I'll be back posting soon with updates on the '62 flair side and the '53 COE projects.

Take care,

Jon
SteveCanup
Posts: 1096
Joined: November 7, 2014, 11:08 pm
Location: Wytheville, Virginia
United States of America

Re: '62 F100 SWB Step Side - yes another Crown Vic swap

Post by SteveCanup »

Jon....looking forward to your updates. Glad to hear that you are doing well.
1964 F-100
Image
Blanger
Posts: 404
Joined: August 17, 2017, 7:55 am
Location: Indiana
United States of America

Re: '62 F100 SWB Step Side - yes another Crown Vic swap

Post by Blanger »

So...it's been awhile hasn't it?

First let me say I hope everyone is safe and doing well in all this craziness going on.

I think where I left off on the flair side build we had mounted the bumper and lettered the doors, about the only other things we have finished is to get the instrument cluster adapted to the slicks bezel and mounted it in the dash. We have been driving the truck (which has been trouble free, no issues at all) and it needs to go to the exhaust shop soon so it can sound like it looks...lol, after that we'll start on the interior as time permits. I'll have to build a speaker box (like the other trucks) for behind the seats and a console to fit between the seats as well as figuring out a valance for the lower dash on the passenger side to hide the CV HVAC.

Image
Image

Most of the progress around the shop has been on the '53 COE build, after the box left we spend a day or so cutting the cab off and trimming everything down to real rough openings for the '53 cab. This was over the course of a few weeks a day here and there as my wifes work alowed me shop space and time.

Image
Image
Image
Image

During this time frame the rear of the frame got lowered by removing the spacer blocks the rear end leafspring perch was sitting on and replacing the u-bolts that tie the rear end to the leaf springs, this lowered the rear of the frame around 3" which makes the frame more flat instead of jacked up in the back.

Image
Image

We also coated the frame with some brush-on rust converter which worked very well with very miminal prep, after that cured a couple days we painted the frame black.

Image
Image

Last week we had a window of 3-4 days I could use the shop and I decided it was time to try to fit the cab to the donor chassis floor and firewall, I'm not going to lie it was more work than I thought it would be, it was a lot like the flair side was but lot more on and off of the cab to trim and cut both the cab and the donor, in the end it worked but there was no hope of keeping the donor HVAC system as over a third of the firewall had to be removed from the donor.

Image

The good thing is that the brake/hydro-boost unit got to stay in its factory location which means the brake pedal isn't a issue at all, in fact neither of the pedals are a issue and the footwell on both sides will wind-up being about the same size as they were when it was a GMC van.

It's probably worth mentioning that from start to this point the donor has been kept in a running state, we could drive it in and out of the shop and at one point it was just a floor, firewall, steering column and a seat...lol

Anyway the cab is now tacked to the donor floor and firewall, I mocked up one fender to confirm that we'll have to raise the cab up around 3", the lowest portion of the front fender is about 4" off the ground and while that looks really cool it would never live without being knocked off going in and out of driveways. There is so much sheetmetal that hangs below this cab since it is a COE that while I want it to look low or lowered it has to be able to be functional as the truck will be used to haul lumber from time to time so it needs to have good ground clearance first and good looks second.

Image
Image
Image

The steering column is another issue that will have to be addressed, not real sure if I'll cut it down, or relocate it in the firewall (or both), or just replace the whole column, until the floor is raised I can't make that decision. At this point it's just bolted to the bottom of the dash with a bracket I made so it can be moved around while sitting on a 5gal bucket. :)

It's at this point I'll say that my gut told me from the start that this was the right donor for the '53 COE and I don't think we could have made a better choice, there are a whole lot of simularities to the two floors not to mention the engine access from inside the cab, yeah maybe a Ford E series van might have been ok also but the engine combo's in those vechicles made me look for a GM chassis with a small block, the Ford E series if it had a injected 5.0L would have been a great choice but they are pretty hard to find around here that are not just totally wasted.

Image

---------

I really felt that when I retired at the end of last year I'd have much more time to work on projects, it hasn't turned out that way, while I have lots of days that are not Saturdays or Sundays I have a lot more projects also. It's really nice to not have to go to work but that doesn't always equal free time, we have been blessed with lots of work for my wife this year and I have lots of projects besides building trucks to do but we are making progress just not at the pace I thought it would be.

Next thing on the list is to move the rear cab mounts, I'll have to cut them off the donor frame and move them to the new location to support the back of the cab, then I can raise the floor up with the spacers we bought and mock up the front end again to see where we are at, this should also give us a better clue about what will happen to the steering column.

Image

Take care,

Jon
Blanger
Posts: 404
Joined: August 17, 2017, 7:55 am
Location: Indiana
United States of America

Re: '62 F100 SWB Step Side - yes another Crown Vic swap

Post by Blanger »

Another build update....

No progress on the '62 flair side other than ordering the radio, the wife has been running the wheels off of it driving it every chance she gets...lol

The '53 COE on the other hand has made some progress, after the first mock-up of the sheet metal (fenders) we raised the cab/donor floor 4.5" and now gives us the much needed height so the front fender lip doesn't drag the ground..

To do that we had to relocate the rear cab mounts (cut off the frame and repositioned forward) and fab something to bolt through on the bottom of the donor floor, worked out well. We then assembled the rest of the front end sheet metal (dog house) to check for fitment and that the hood would latch...it does!

Then it was on to the job of patching in the floor mateing the cab to the donor floor, I have about 20% of that completed when it had to go back outside so the wife could use the shop, she has a pretty big back log of work that needs to come through the shop to pay the bills.

Here's a few pics.

Image
Image
Image
Image
Image
Image

More to come in a few weeks, we are really excited about how this truck is going together, there are still a few hills to climb but we think it's going to turn out to be a really cool looking truck when it's finished.

Jon
Blanger
Posts: 404
Joined: August 17, 2017, 7:55 am
Location: Indiana
United States of America

Re: '62 F100 SWB Step Side - yes another Crown Vic swap

Post by Blanger »

Another update....

So it's been a few weeks since my last post and things are moving along nicely on the '53 COE build, a lot of progress has been made and here is the update.

But before I tell you about the progress I wanted to mention a couple things, firstly we bought a few items to add to our tool arsenal, while I'm not a seasoned sheet metal worker I do have a working knowledge of doing that type of work. One of the things that has always been lacking in our builds in the ability to make panels, in fact all three of the F-100s we have built have things left unfinished because of the lack of the proper tools to mold and shape sheet metal.

The first thing we bought is a 36" pan and box brake, then a shrinker - stretcher, and lastly a 36" bead roller (we are looking at a slip roll also), these three machines will allow us to take our builds to a higher level by making custom sheet metal panels which would include everything from door panels, kick panels, filler panels, and so much more. Yes we bought Baileigh equipment, and yes we could have bought much cheaper equipment that would probably have done the job but we don't intend to build trucks forever and looked at the resale of the equipment after we no longer have the need for it.

Image
Image
Image

The biggest asset is the bead roller which my wife has already figured out she can create "Art" with it, if your not sure what I'm talking about check out this video below.


Here's a pic of her first try, not bad for no training or idea other than watching a few videos.

Image

Then lastly for our health we bought a air filter for the shop which will help clearing the air/fumes from welding, plasma cutting, and painting, works really well for very little money.

Image

-------

So on with the update....


From where I left off last time our next project was to build a radiator support out of 1" x 1" square tube, this servers two purposes one of course to keep the cooling package in place and the other is to support the front end by holding the fenders (and inner fenders) in place, in the end it also hold the coolant recovery tank and primary fuse box which you should notice in the pictures.

Image
Image
Image
Image
Image

After that we turned our attention to the cab steps, during the first mock up the steps sat right on the ground with no clearance at all, way too low. So we cut 4" out of the step which raised them enough to gain ground clearance, since part of the wheel well opening is made up by these steps it was important to keep that so the fenders and step all flowed together, it worked out great.

Image
Image
Image

Then it was just a simple task to level the steps, cut down the original mounts from the '53, make a couple plates to weld to the frame and now we have supported cab steps, they are just tacked together at the moment but we will finish welding them and make new tread sections when the front end comes apart to have the paint stripped and primed.

Then it was on to the cab corners, we bought replacement panels for a '53-'56 F-100 which are the same panels that the COE uses, the only difference was the fuel filler wasn't cut out (we didn't want it anyway) and the holes in the panels that let you access the cab mount bolts were pressed in the panel but not opened up, we didn't want them either so they worked out great.

Image
Image
Image
Image
Image
Image

Then we reworked the inner fenders, they went from this.....

Image

To this.... :)

Image

Yeah about 2/3rds of the inner fender had to be cut away to clear the new chassis suspension but it left enough of the inner fender to mount the horns and ECM on the drivers side which worked out great, originally I was going to try to move the ECM inside the cab under the dash but without a lot of chopping and rewiring the wiring harness just wasn't going to allow it to happen so it wound up pretty much back in the location it was on the donor. It'll be fine I hope! lol

Image

We needed a front bumper so we contacted the guy we bought the '53 from and as luck would have it he still had the bumper which he gave to us, it is a fortress to say the least, the basic original bumper is thick and heavy, has a slight bend in it on the passenger side that will require it to be cut at the top and bottom lips and the heated with a torch then nudged back straight with a sledge hammer...lol

Image
Image

The metal guard/framework (fortress) weighs about twice what the bumper does the entire thing mounted to the bumper is all two grown men would want to lift, not 100% sure if the fortress with be used, we want to but that is a ton of weight to support, it's a safe bet not even a grown deer would make it through to the grill/fenders if they tangled, it's just really massive and very heavy duty made to push things out of your way.

With all of that finished we started filling in the floor areas where the donor floor and cab meet, when we finally tied the floor/firewall from the donor to the '53 cab a few months ago we had to move the cab forward about 7" so the front fenders and upper valance would sit in their proper location, in doing so the firewall from the donor was moved back into the cab too far on the passenger side and too far in the center of the cab where the cowl air vent is. So we decided to just cut the donor firewall mostly away leaving only the far driver side where the brake pedal/booster sat which was pretty well in the correct location.

Image

We built a 1x1 tube frame to use as a support and made new firewall panels out of 18g steel, this moved the firewall back out to the original location on the '53 cab and of course if I had known this beforehand I would have left the original firewall in place, but never having done this type of body swap before there are a few steps back to go forward...lol

Image
Image
Image
Image
Image

I'm pretty sure I mentioned in another post that we raised the floor/cab 4-5" in doing so that lowered the motor/transmission making it easy now to make a much lower engine cover gaining more interior room, this too was a deciding factor on making a new firewall so a new engine cover will be in the works later in the project.

Image

When you guys look at the firewall you might ask since you have a bead roller why didn't you roll a few beads in the firewall panels? truth is this was made in 18g steel which the bead roller will bend but it is at it's max capacity, the tests we did on scrap 18g showed it would bend it be we are to much of novices to waste metal, since the firewall was made in 3 panels to look right the pattern would have to go across all the panels and we just decided to make it plain. If we had chosen 20 or 22g to make the panels out of it wouldn't have been a big deal to roll a few beads in it across panels and make it look good but since we wanted the firewall to actually be strong we opted to build it out of the thicker sheet.

But we did make a filler panel for the back of the cab.....

Image
Image

Anyway that's about where we are at the moment, truck is back outside covered while the wife gets caught up on her work.

Image

More later.


Jon
User avatar
04sd
Posts: 228
Joined: February 24, 2016, 7:55 pm
Location: Lehigh Valley, Pennsylvania
United States of America

Re: '62 F100 SWB Step Side - yes another Crown Vic swap

Post by 04sd »

Looks like the 53 is really working out well. Some nice work for sure.
Bill
1966 F100 Camper Special, now a short bed 4x4.
https://www.ford-trucks.com/forums/1644 ... build.html
Blanger
Posts: 404
Joined: August 17, 2017, 7:55 am
Location: Indiana
United States of America

Re: '62 F100 SWB Step Side - yes another Crown Vic swap

Post by Blanger »

04sd wrote:Looks like the 53 is really working out well. Some nice work for sure.
Thanks Bill

I have to say it is a challenge but as I've stated before I don't think we could have chosen a better donor chassis to use, it's almost like it was made for the COE.

Jon
Blanger
Posts: 404
Joined: August 17, 2017, 7:55 am
Location: Indiana
United States of America

Re: '62 F100 SWB Step Side - yes another Crown Vic swap

Post by Blanger »

So….. It’s been awhile since I had a post about project progress, first let me say I hope everyone is doing fine in these crazy time we are living in at the moment, on with the update.

Looking at my last post we were working on the ’53 COE building a new firewall, lots has happen with that project but I want to cover a couple other items before I talk about the COE.

Firstly the ’62 flair side has gotten a little love over the last few months, we had a small intake manifold coolant leak that I pulled the intake and replaced the gaskets.

Image

Then we built a console and speaker box, the console is pretty well finished in its first stage, it will eventually get a storage compartment (hinged lid) under the arm rest and covered in some vinyl or cloth.

Image
Image
Image

The backup camera we used on the ‘62 is interesting in that it has proximity sensors (like new vehicles have) built in it and a speaker that beeps with increasing intensity the closer you are to an object along with displaying an approximate distance on the screen from that object…pretty cool to have that level of tech in an old looking truck.

Lastly we made filler panels to span the void between the CV frame and the ‘62s bed/step, after being primed and painted they finish off the exterior of the truck, we still need to do the exhaust (it’s still the CV exhaust which is too quiet), and finish the interior. We do drive the truck a lot and it like the other two is a reliable vehicle that has been basically trouble free.

Image
Image

--------


Then some of you might remember that my brother was building a truck, it’s not finished totally but is now being driven, it went from this….

Image
Image
Image

To this….

Image
Image

It is built on a 2010 CV P71, and the bed came from the old green ’65 we bought to rob some parts from once we had the parts we wanted we donated the rest of the truck to him for his build, the truck to me looks great for his first attempt at doing a body swap. The door handles were in really bad shape so he sand blasted them and painted them a gunmetal color which looks pretty good. I’m really surprised at how good the 1 ton front fenders look, the increased wheel opening actually looks natural and very good in my opinion.

Image

We sold him the bed cover that was on the wifes ’65 she wanted to replace it on her truck with one from CrafTec that tilts up from the tailgate like the ’62 uni has.

Image

------

The ’53 COE has gotten the most attention in the last few months; it still has a long way to go and is still really in the mock up stages of the build, but is getting really close to being blown apart for body work and paint.

The first thing we did was strip and cut down the old flatbed to make a bed for the truck, cutting almost 2’ out of the length and almost 18” in width then welding it back together and mounting it on the frame. The bed sits a lot lower on the frame at 36” off the ground to the bed floor since we cut the mounting rails so it didn’t have to be raised to account for the frame where the rear end is, we also used 2” thick white oak as the spacer between the rails and truck frame. The truck frame had almost 2’ removed from the rear behind the rear end to shorten it up a little, basically it went from a 14’ bed to a 12’ bed, the rear frame brace (between the rails) had the rivets gowned off, slid back and welded back in place to help the frame not twist. We have yet to install a trailer hitch which will be bolted/welded to the truck frame. The fuel filler also got frenched into the side of the bed rail instead of being mounted under the bed. The bed is also set back 10” from the back of the cab this space will be used for big truck exhaust stacks and maybe other storage…lol

Image
Image
Image
Image
Image
Image

The bed will have steel fenders that cover the outside dual, it will also have skirting on the sides closing in the sides of the bed, we have a tool box that will be under the bed on the passenger side and be enclosed in the skirting, it may be hard to visualize what this will look like but the look has its roots in other COE builds that use a modified flair side bed we are kinda’ doing that type of thing but using a flat bed.

Image

Once the bed was mounted we built a rear step for the bed, this is the rear bumper/step from the box truck that has been cut down in width and height to fit our needs, it makes a nice strong bumper while giving easy safe access to the top of the deck.

Image
Image
Image

The bed has been outfitted with all new LED lights with new wiring, built in back up camera; and backup alarm was also added since this truck will be used sometimes on work sites.

Image

We also have replaced the GM 3500s plastic engine cover with a stepped sheet metal engine cover, I have the rough cover made and fitted, it gives the driver more leg room and will make driving more comfortable, the cab is really small and after trying several different seat combos we have settled on the original bench seat out of the ’53 it offers the best comfort level and driver position in relation to the controls.

Image
Image
Image

We still will have to replace the steering column with a tilt column so the truck will be comfortable to different size drivers. We have a new column and I’ll cover installing it in the next post.

All of the lighting on the front end has been reworked adding LED lights on the cowl, and turn signals, halogen headlamps with amber LED halos. There will also be LED cab marker lights on the roof, it should be lit up like a Christmas tree at night…lol

Image
Image
Image

Anyway that's about it for now..

Jon
SteveCanup
Posts: 1096
Joined: November 7, 2014, 11:08 pm
Location: Wytheville, Virginia
United States of America

Re: '62 F100 SWB Step Side - yes another Crown Vic swap

Post by SteveCanup »

Great update...love that '65 of your brother's...
1964 F-100
Image
Blanger
Posts: 404
Joined: August 17, 2017, 7:55 am
Location: Indiana
United States of America

Re: '62 F100 SWB Step Side - yes another Crown Vic swap

Post by Blanger »

SteveCanup wrote:Great update...love that '65 of your brother's...
Thanks Steve, it's funny he just started driving it in the last couple weeks and is at the stage of worry that it will leave him stranded, no reason for that feeling other than he built it, I tried to tell him it's really no different then when it was a CV bodied vehicle but since he doesn't have a lot of confidence in his wiring he is gonna' worry for awhile...lol

Take care

Jon
My wife's nightmare
Posts: 342
Joined: October 3, 2009, 8:22 am
Location: Mooresville, NC
United States of America

Re: '62 F100 SWB Step Side - yes another Crown Vic swap

Post by My wife's nightmare »

I have to agree with Steve, your brother has a sharp truck! I like the door handle treatment too. I had blasted and sanded all of the exterior bits for the 63 and powder coated them a dark silver almost two years ago now! They're all still laying on the shelf waiting to be installed whenever the time comes.
The COE is looking great as well. I have driven by one almost every day since I was in high school (MANY YEARS AGO) and have always dreamed of how cool it would be to make a car hauler out of it. It is still sitting there today, a retired fuel oil truck.
Anyways, thank you for the updates and glad you're still making progress!
Blanger
Posts: 404
Joined: August 17, 2017, 7:55 am
Location: Indiana
United States of America

Re: '62 F100 SWB Step Side - yes another Crown Vic swap

Post by Blanger »

My wife's nightmare wrote:I have to agree with Steve, your brother has a sharp truck!
Thank you!
My wife's nightmare wrote:The COE is looking great as well.
Thanks again, the COE is taking me out of my comfort zone a little, lots of unknowns going into this build but we just tackle one problem at a time moving forward, we are really over the hump getting closer to taking it apart one last time for exterior paint.

Jon
Blanger
Posts: 404
Joined: August 17, 2017, 7:55 am
Location: Indiana
United States of America

Re: '62 F100 SWB Step Side - yes another Crown Vic swap

Post by Blanger »

While I'm here might as well make another update...

First item is a under bed tool box, we found a nice tool box from a salvage yard, it was the correct height and width but was about 3" too deep to fit flush with the bed rail, so I cut the back off of it, then removed a section, and welded it back together, turned out nice and now fits flush with the outside bed rail side.

Image
Image
Image
Image

Father-in-law made a over head console for the truck.....

Image

We are replacing the steering column with a after market tilt column, so the cable for the shifter had to be relocated from the old factory column (inside the cab) to out on the firewall, I cut the cable mounting bracket from the old column and mounted it to the firewall, worked out well and shifts smoothly.

Image

We welded up all the holes in the dash only to make new ones, cut a new opening for the instrument cluster which we are planning on a wood bezel we'll see how that works out, then striped, etch primed, and painted the dash so I can start on wiring.

Image
Image
Image
Image

More coming soon!

Image

Jon
Blanger
Posts: 404
Joined: August 17, 2017, 7:55 am
Location: Indiana
United States of America

Re: '62 F100 SWB Step Side - yes another Crown Vic swap

Post by Blanger »

Another update....

So it's been awhile and the C-600 is coming along, we got the instrument cluster bezel made and mounted....

Image
Image
Image

The overhead console has been fitted and mounts made....

Image
Image
Image

The front frame extensions have been fabricated which the bumper will mount to, along with the bumper going through it's first effort at straightening, it'll need a few little tweaks to work out but it is going to be doable.

Image
Image
Image

Most of the rest of the time has been spent disassembling all the front sheet-metal, then removing as much as 5 layers of paint, our goal was to get the paint removed either down to bear metal or at least down to the original paint and primer which required days and hours of labor to do. Then it was all etch primed, a coat of Tuscan (color) primer, a coat of white paint, then minty green.

Image
Image
Image
Image

Image
Image
Image
Image

While the steps were off we fully welded them together after they were cut down months ago during mock up.

Image
Image

At this point we will pull the doors off and do them next, I wanted to get the cab painted so I can get the windshield and back glass installed soon.

More to come...

Jon
Post Reply