Page 1 of 8
Hexenschuss
Posted: January 13, 2019, 3:48 pm
by My wife's nightmare
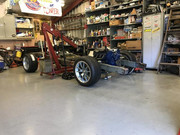
Ok this is long overdue. Picked this up at a local scrapyard in 2017. Had been looking for something to make a daily driver out of and a friend found this one. It's a 63 wrong bed (or what was left of one!) 223/3 speed that someone brush painted with some unbelievably tough orange paint. The drivetrain was removed along with the front suspension and sold. A Mustang II front suspension has been installed, the frame boxed, and a truck-arm rear suspension fabricated. A 351W/T-5 have been rebuilt and set in the frame. The rust repair on the cab is completed and it is in epoxy primer. I picked up a pair of bucket seats at a swap meet years ago and finished up the brackets for them this weekend. Waiting for seat belts to arrive so any extra plates/etc. that need to be installed can be completed then I'll shoot the cab bottom with undercoating and get it on the frame. I don't have too many photos and the frame is in a buddy's barn so after it gets back home I'll get some.
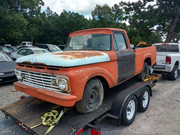
The day I bought her:
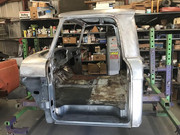
The passenger side was in better shape than the driver's side. This is prior to putting new metal back in:
The driver's side finally back to a solid state:
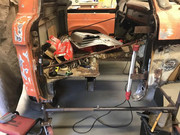
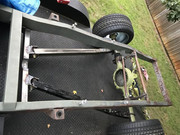
The frame before the rear suspension was changed:
The only pic I took of the rear setup before it went to "storage":
Re: Hexenschuss
Posted: January 13, 2019, 5:58 pm
by sgettin
Nice, I wish i had your mechanical skills. From looking at the last pic of the frame/rear end looks like it's going to be a bit more than the daily driver you mentioned?
Re: Hexenschuss
Posted: January 13, 2019, 7:12 pm
by JeffinMooresville
Haul ass daily driver . I havent seen the frame, nice.
Re: Hexenschuss
Posted: January 14, 2019, 5:48 am
by My wife's nightmare
I did have a lot of help from a friend doing the rearend installation. I was a mechanic for a few years and this project has allowed me to practice alot of skills! Patience being primary!!
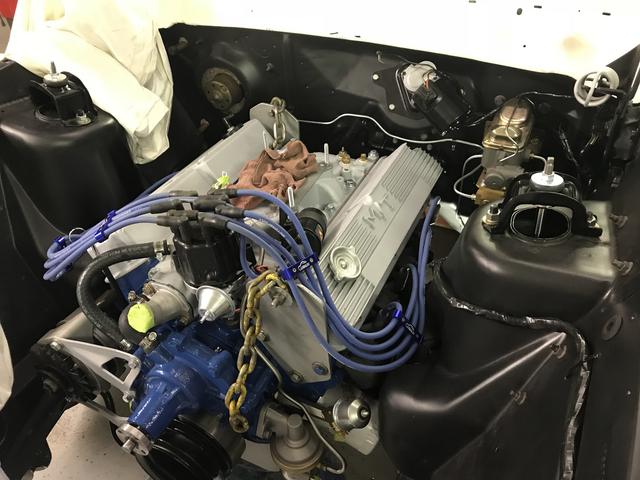
Hopefully it will “keep up” with traffic, but have really tried to control myself with the engine. It’s not too wild but haven’t fired it up yet.
Still getting lots of motivation from everybody’s builds on here.
Re: Hexenschuss
Posted: January 14, 2019, 5:53 pm
by JeffinMooresville
Hey, i sent you a pm earler. Where did hexenschuss come from?
Re: Hexenschuss
Posted: January 14, 2019, 9:00 pm
by My wife's nightmare
Sorry I missed the PM and I forgot to explain the name in the beginning.
During a safety meeting at work our instructor, who is German, was talking about back injuries and struggling for English to explain an injury. He called it hexenschuss, loosely translated “witch’s lightning” and it just struck me as a name for this truck. I bought a 95 Lightning new and loved that truck so the 63 was going to be a loose interpretation of a Slick Lightning. It makes sense in my screwed up thinking!!!
Re: Hexenschuss
Posted: January 19, 2019, 11:51 am
by oldsmiley
Whatever you call it, it's looking great. Can't wait to see more picture of it's progress. Every time I see trucks turning out this nice, makes me want to stop mine long enough to at least start heading in that direction.
It truly is nice craftsmanship......
Re: Hexenschuss
Posted: January 19, 2019, 7:48 pm
by My wife's nightmare
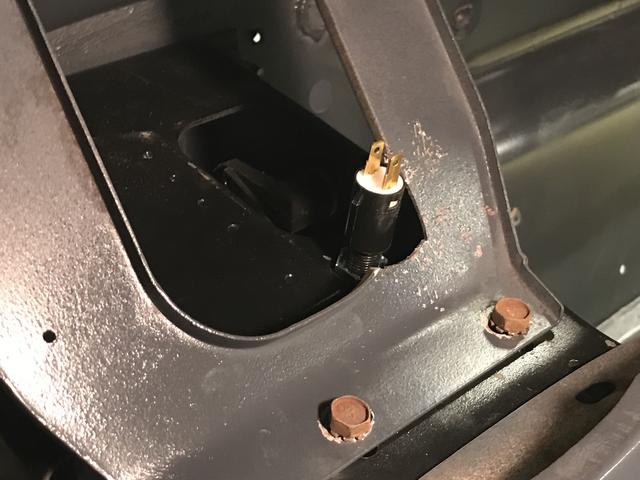
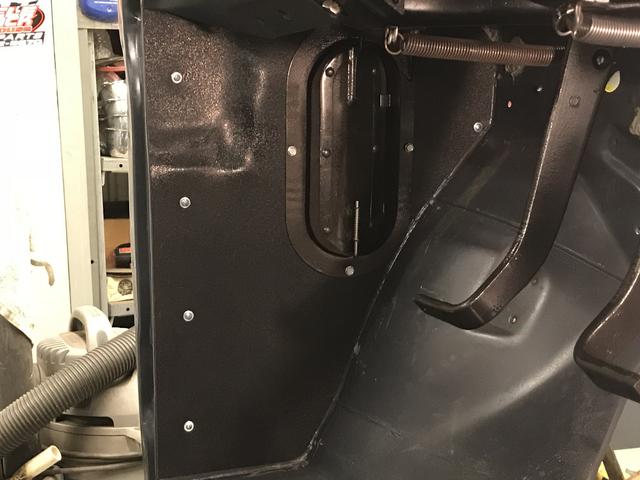
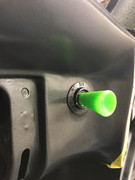
Thank you for the all the kind words! It’s still a 10 footer and that was the original plan although the bottom side I did/do want to be nicely finished. All the cab work has been necessary because it was missing most everything from the seat risers down! Completed a few little projects yesterday and today. Installed a plunger-style brake light switch (still need to dress up the area that was cut out of the brace:
<a href="
https://postimages.org/" target="_blank"><img src="
https://i.postimg.cc/7hmGmdSm/764-FBB1- ... 36-DE4.jpg" alt="764-FBB1-A-2549-4-D82-A2-DD-19-BF34-F36-DE4"/></a>
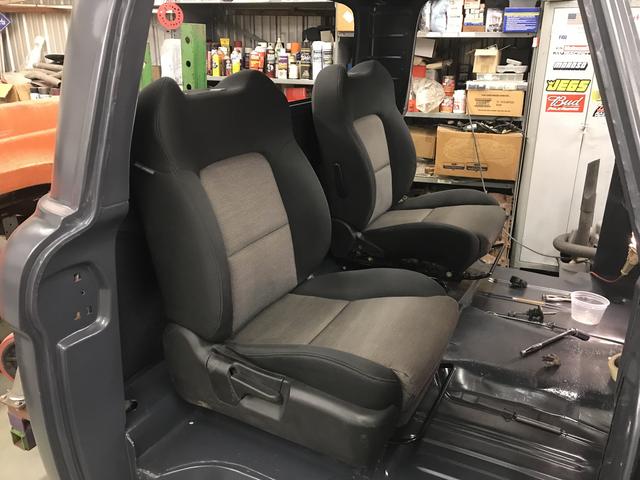
Finished the seat brackets:
<a href="
https://postimages.org/" target="_blank"><img src="
https://i.postimg.cc/pdbTYRgP/AD4-D34-C ... 6871-F.jpg" alt="AD4-D34-CE-5108-48-D1-AD0-E-8-FAABA76871-F"/></a>
Had some scrap pieces of ABS and wanted to make kick panels so got them cut out and fitted. Still have to cut the hole for the “floor-level air conditioner unit” on the passenger side, but they turned out better than I was expecting:
<a href="
https://postimages.org/" target="_blank"><img src="
https://i.postimg.cc/gktLR9z0/E688-D4-E ... 476-D7.jpg" alt="E688-D4-EC-381-B-4-D15-B85-A-6319-BAF476-D7"/></a>
Started blasting, repainting, and installing new seals in the vent units. Maybe I’ll get those finished tomorrow.
Re: Hexenschuss
Posted: January 20, 2019, 7:59 am
by My wife's nightmare
My apologies!! Shouldn't try posting on my phone

Here are the photos for the previous post:
Brake light switch
Seat brackets completed
Kick panels

I'll get the hang of this one of these days!!
Re: Hexenschuss
Posted: January 20, 2019, 3:33 pm
by JeffinMooresville
Looking good, i have to come over and see how you did the brakelight switch. I have to do something similar. I assume the brake pedal hits the front of that switch the way it is mounted? Previous owner has a switch mounted with some god-awful bracket that was screwed to the firewall.
Re: Hexenschuss
Posted: January 22, 2019, 8:03 pm
by My wife's nightmare
Still piddling around with small projects, waiting for a warm dry day to "undercoat" the cab so it can go back on the frame for some mock-ups. Cleaned up and replaced the seal on the driver's side fresh air vent and finished up the kick panel on that side. I'm pleased with how it turned out, hopefully the passenger side will look the same. Started cleaning out the heater box and the heater core looks pretty good but want to have it tested before putting it all back together. I was very surprised that there are no replacement heater cores available for 61-64's. IF I am mistaken, please let me know of a source!
Here's the kick panel and vent installed. The bolt place only had plated screws so these will be blasted and black phosphate coated at final assembly.
Re: Hexenschuss
Posted: January 23, 2019, 7:22 am
by Blanger
My wife's nightmare wrote:I was very surprised that there are no replacement heater cores available for 61-64's. IF I am mistaken, please let me know of a source!
If you have a local radiator shop they can re-core the heater making it new again, it's about the only option short of finding a good used unit or replacing the heater box with something else.
BTW... your doing a very nice job on your truck, beautiful work!
Jon
Re: Hexenschuss
Posted: February 1, 2019, 5:48 am
by My wife's nightmare
Thank you John for the info and kind words.
Not a lot of progress to post lately, this work thing been getting in the way, but thankful for my job. Started putting sound deadner in the cab. Using Rattletrap, made by Fat Mat. It appears to be very good at getting rid of the “tin can” sound inside the cab. It is easy to work with and I’d recommend it if you are wanting a queit interior.
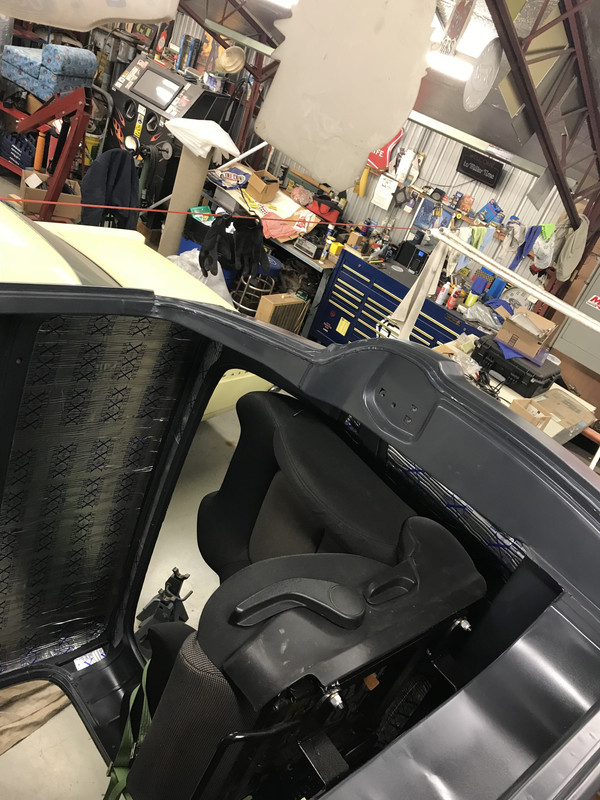
Still have about half left to do but you can barely see it behind the seats and on the roof.
This was going to be a seatbelt test but I couldn’t find a volunteer.
Re: Hexenschuss
Posted: February 3, 2019, 8:16 am
by My wife's nightmare
Helped a long time friend put the engine and transmission back in his 64 Fairlane yesterday morning. He got the car when we were in high school and has done a top notch restoration over the last few years. Its a 289 with a T-10. This is going to be a beautiful car. Makes me miss my 64 that I traded for my 65 F100, but can’t keep all of them!

Re: Hexenschuss
Posted: February 3, 2019, 7:12 pm
by My wife's nightmare
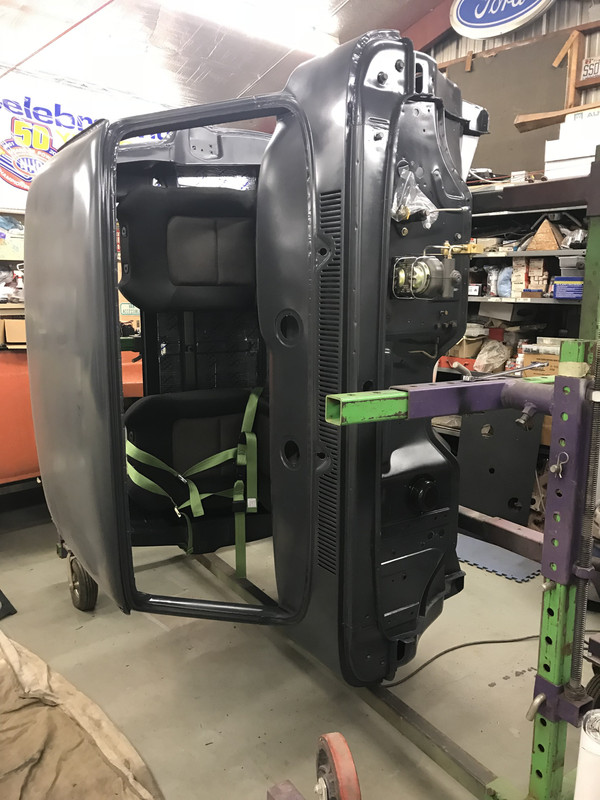
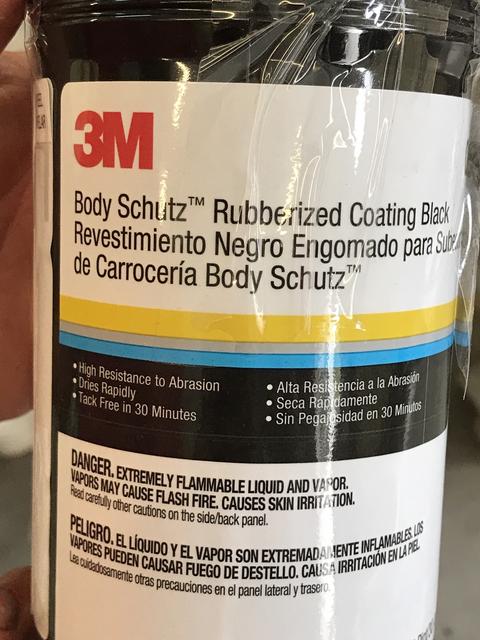
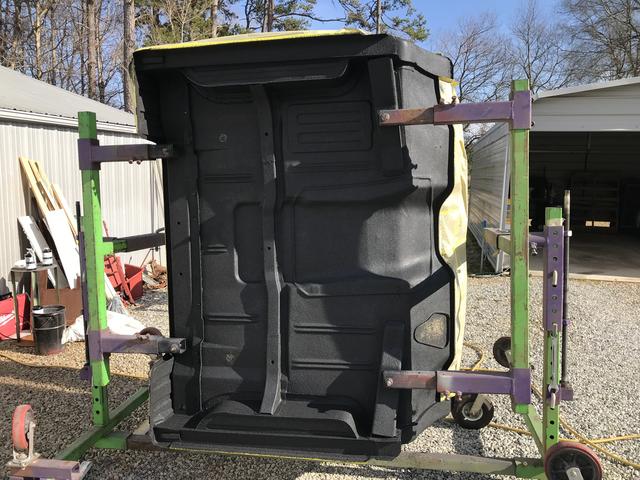
Blessed with a beautiful day here. Taped the cab up last night hoping for decent weather today to spray a rubberized coating on the bottom side. Pulled the rotisserie outside after church and applied two quarts of coating. Very pleased with the texture and coverage. Hopefully it’ll be tough.
Bought a cheap schutz gun and sprayed this
Here’s the underside
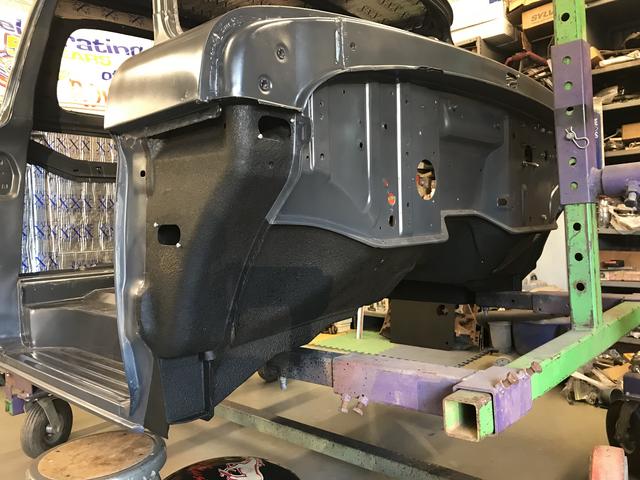
A corner shot
Re: Hexenschuss
Posted: March 4, 2019, 8:17 pm
by My wife's nightmare
Haven't made much visible progress, been cleaning, repairing, refinishing, etc. small parts and pieces. I did pick up paint a couple weeks ago for the outside of the truck and the frame. The man that painted my 65 rode with me to the paint store and on the way there he said that he wanted to paint this one. I almost ran off the road because when he finished my 65 he said he was retiring and basically did! That has kinda put me in a holding pattern waiting for the weather to cooperate so we can do some musical chairs and get him squirting paint. Spring is on its way though!! Here are a couple shots of some pieces that are completed. Hopefully more to come on a regular basis.
Passenger side fresh air control:
Glove box door:
Re: Hexenschuss
Posted: March 6, 2019, 8:55 pm
by JeffinMooresville
Looking good, undercoating done , ready to roll that chassis in. Did you say you have the motor ready? Like the green.
Jeff
Re: Hexenschuss
Posted: March 7, 2019, 11:01 am
by My wife's nightmare
The engine needs the front drive installed and still have to buy a clutch and pressure plate. Then take it all apart to paint the frame but have to get it back in my shop first

Re: Hexenschuss
Posted: March 7, 2019, 11:03 am
by My wife's nightmare
I’m happy with the green too. Its my wife’s favorite color so yeah I’m playing the game somewhat but I like green too!
Re: Hexenschuss
Posted: May 19, 2019, 1:37 pm
by My wife's nightmare
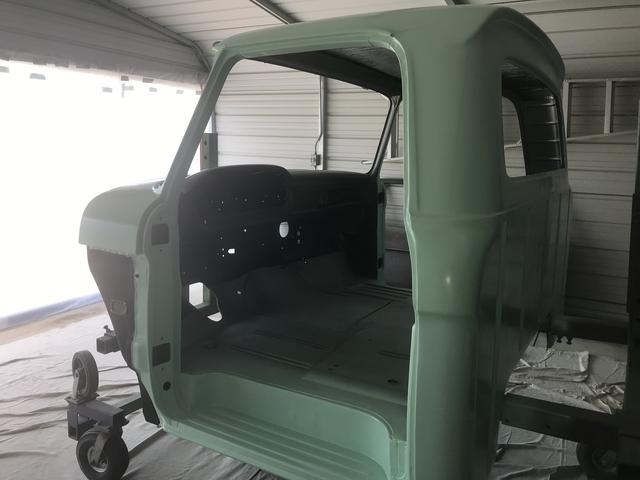
Well the stars finally aligned the end of last week and made a little progress Friday and Saturday.
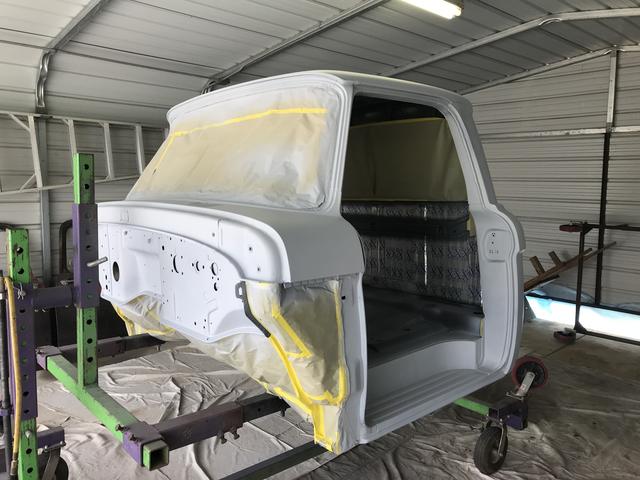
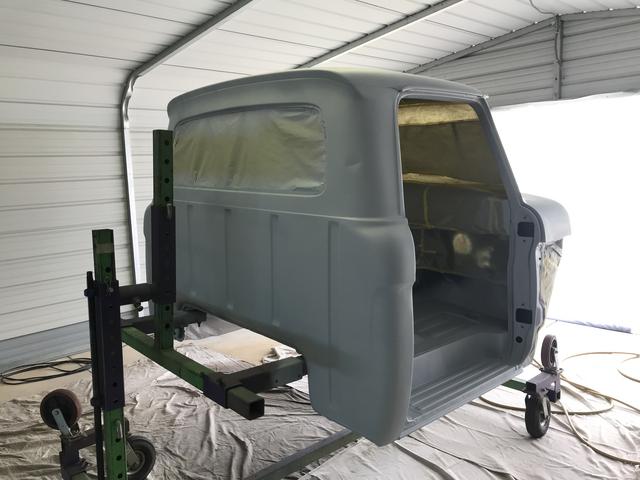
Put a coat of light colored sealer on it early Friday morning:
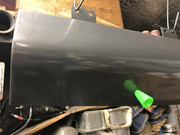
Saturday morning the color went on. It is a fleet color from Delfleet just called "green". I really liked to sample chip but looking in the can I had some doubts!
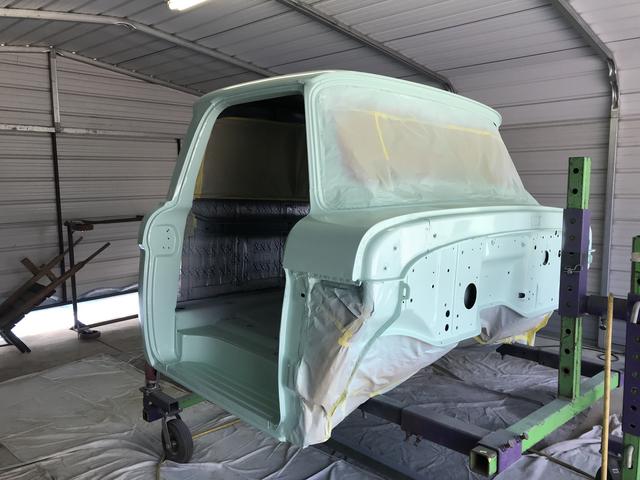
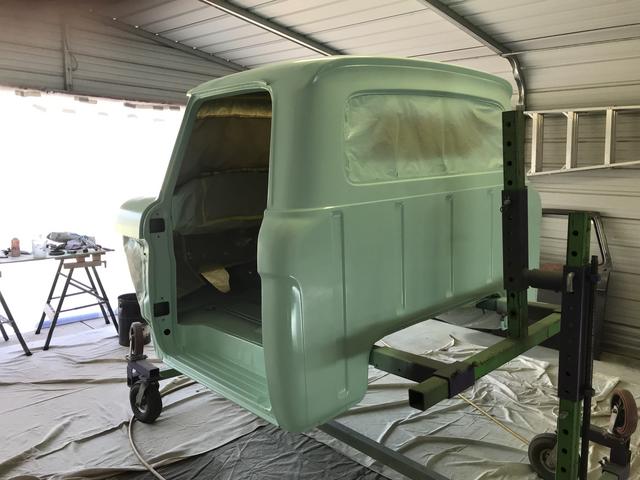
After it started going on, it was exactly what I had seen in my dreams
The bad part at that time was the dream had it as "suede" so flat clear was purchased with the paint and I was torn about grabbing that can of leftover gloss sitting in the garage! There wasn't any real bodywork done on this cab so I knew the flat would have to be used but dang it looked good wet!!!
After the flat and unmasking. The flat isn't real flat so it still came out with a little gloss.