BlackTruck Build 65

A place just for our project & build threads.

Moderators: Kid, Casey 65

JeffinMooresville
Posts: 242
Joined: January 23, 2018, 8:12 pm
Location: Mooresville, NC
United States of America

Re: BlackTruck Build 65

Post by JeffinMooresville »

Got a little bit more done today between football games. Installed tank bracket and gas tank after getting frame touched up and my bracket painted. My painter has some buddies on nascar teams nearby and he got them to extend the tank filler tube and tig it all up. So this is my custom nascar filler neck :-)

Image

Allowed me to put a custom bend and extend outside of the hole I put in the frame. I have a gas door that will be installed on outside of bed.

Image

Image

Ready to run fuel lines, I have in tank pump and a fuel return regulator, so will have to figure out where to mount all that stuff. Will probably wait until the inner fenders come back from sandblast so I can mock up.
Jeff in Mooresville
63 Flareside and 65 Styleside projects underway
SteveCanup
Posts: 1096
Joined: November 7, 2014, 11:08 pm
Location: Wytheville, Virginia
United States of America

Re: BlackTruck Build 65

Post by SteveCanup »

Nice! I wished that I had done the same with mine. I have the filler in the middle rear of the bed. I had a bed full of lumber a few years ago and was running low on gas.....(not good, lol.)
1964 F-100
Image
JeffinMooresville
Posts: 242
Joined: January 23, 2018, 8:12 pm
Location: Mooresville, NC
United States of America

Re: BlackTruck Build 65

Post by JeffinMooresville »

Hi Steve, yea, I wanted to have side door… it was more of a pain, but I think I will be happy.

Pulled all the mock up installs off the firewall and ready for the final install. Had enough fat-mat left over from the blue truck to do the firewall and dash while I had best access. I can do rest of the cab when it is time for interior.

Image

Image

Now if I can figure out how to get the spring back on the clutch pedal?

Image
Jeff in Mooresville
63 Flareside and 65 Styleside projects underway
SteveCanup
Posts: 1096
Joined: November 7, 2014, 11:08 pm
Location: Wytheville, Virginia
United States of America

Re: BlackTruck Build 65

Post by SteveCanup »

Big springs can be removed and installed with a piece of "swing-set" chain. Just take a length and hook the spring to one end and take a large screwdriver through the other end to pull the spring onto whatever place that you need it....
1964 F-100
Image
JeffinMooresville
Posts: 242
Joined: January 23, 2018, 8:12 pm
Location: Mooresville, NC
United States of America

Re: BlackTruck Build 65

Post by JeffinMooresville »

Thanks Steve, that did it !
Jeff in Mooresville
63 Flareside and 65 Styleside projects underway
My wife's nightmare
Posts: 341
Joined: October 3, 2009, 8:22 am
Location: Mooresville, NC
United States of America

Re: BlackTruck Build 65

Post by My wife's nightmare »

That Rattle-trap is a great product. Really wish I'd put some in the 65
JeffinMooresville
Posts: 242
Joined: January 23, 2018, 8:12 pm
Location: Mooresville, NC
United States of America

Re: BlackTruck Build 65

Post by JeffinMooresville »

Making some progress on truck assembly. It is slow and a lot of trial and error.

I got the steering linkage mocked up and ready for final install after column gets painted in next batch. I used original steering column, just chopped off the end.

Image

Put inner fenders and radiator support on to check clearance for brake, fuel lines.

Image

Image

Then pulled those back off and with Doug’s help got the engine and trans installed (at least initial install)

Image

Engine was really tight on drivers side firewall (1/4”)… going to see if I can shift forward a little.
Jeff in Mooresville
63 Flareside and 65 Styleside projects underway
SteveCanup
Posts: 1096
Joined: November 7, 2014, 11:08 pm
Location: Wytheville, Virginia
United States of America

Re: BlackTruck Build 65

Post by SteveCanup »

Nice! That looks great, Jeff!
1964 F-100
Image
JeffinMooresville
Posts: 242
Joined: January 23, 2018, 8:12 pm
Location: Mooresville, NC
United States of America

Re: BlackTruck Build 65

Post by JeffinMooresville »

Progress has been slow, got a little sidetracked on some other projects, but determined to get back to work and get the truck ready for Gatlinburg show in May.

I got the bed back from painter, working on getting all of the brake lines, fuel lines, wiring in before putting on… so now just taking up space in the shop.

Image

Put fuel door on the side.

Image

Haven’t determined how to finish the tailgate hardware, hinges etc.

Image

Still in mock up mode, put the inner fenders and rad support in and put in this cold case radiator, I have heard that 65 and 66 are unique, but this is same radiator I put in 63 and bolted right up. It will have shroud and electric fans, but looks like plenty of clearance.

Image

Image

Also getting everything ready to install on firewall under the dash, heater, windshield wipers etc.

Image

Still planning the layout / routing of fuel regulator, wiring etc. and want to make sure everything works.
Jeff in Mooresville
63 Flareside and 65 Styleside projects underway
SteveCanup
Posts: 1096
Joined: November 7, 2014, 11:08 pm
Location: Wytheville, Virginia
United States of America

Re: BlackTruck Build 65

Post by SteveCanup »

That paint is gorgeous! That is a great color...
1964 F-100
Image
grump
Posts: 959
Joined: September 14, 2006, 6:47 pm
Location: ohio

Re: BlackTruck Build 65

Post by grump »

Dang, that's looking good. The green looks really nice. Keep up the good work.
JeffinMooresville
Posts: 242
Joined: January 23, 2018, 8:12 pm
Location: Mooresville, NC
United States of America

Re: BlackTruck Build 65

Post by JeffinMooresville »

Finally got fuel lines installed, still have to mount regulator on firewall and terminate the soft lines. My Fuel pump is in tank, so I ran 3/8” fuel and a return line to regulator. Jeez, I feel like I have $500 in friggin fuel line, flex line, AN fittings and such. I swear if it leaks one drop when I start it up, I am going to rip it out and run rubber hose , like old school.

Image

Image

Image

Disregard my temporary trans cross member spacer block, I still have to pull motor and trans for final placement.

Some people make running these lines look like art…. Mine turns out to look like plumbing… oh well, stop stressing out over stuff that nobody is going to see. As long as it works as expected, I will be happy.
Jeff in Mooresville
63 Flareside and 65 Styleside projects underway
My wife's nightmare
Posts: 341
Joined: October 3, 2009, 8:22 am
Location: Mooresville, NC
United States of America

Re: BlackTruck Build 65

Post by My wife's nightmare »

Looks like artwork to me!
I'm ready to hear this one run
shipwrecked
Posts: 1464
Joined: December 29, 2012, 10:06 pm
Location: Yorktown VA
Contact:
United States of America

Re: BlackTruck Build 65

Post by shipwrecked »

Man this looks so good! :D :clap:
The months may change, but I am always APRIL
'63 F100 Custom Cab 223inline 6, 3speed manual- mostly stock
https://www.youtube.com/coastiereid
Truck has been home in CA,OR,WA,NJ,VA since it's birth in San Jose Jan63
JeffinMooresville
Posts: 242
Joined: January 23, 2018, 8:12 pm
Location: Mooresville, NC
United States of America

Re: BlackTruck Build 65

Post by JeffinMooresville »

Thanks all for encouragement, slow going and hard to get motivated when the weather is cold (shop heat is old woodstove that struggles to get it to 50 on a good day)… but , gotta keep working it , a little at a time.

Working on wrapping up fuel and brake plumbing… almost there, next wiring while engine is out and front clip is off.
Jeff in Mooresville
63 Flareside and 65 Styleside projects underway
JeffinMooresville
Posts: 242
Joined: January 23, 2018, 8:12 pm
Location: Mooresville, NC
United States of America

Re: BlackTruck Build 65

Post by JeffinMooresville »

Made a little progress over last few days. I got fuel regulator installed and completed the braided flex lines, so except for the flex line run to the carb, fuel plumbing is complete. Still have to put bed on and run the filler hose and vents.

Image

Also finished the brake lines to rear brakes. Decided to keep hardlines on the frame and use flex lines to the rear calipers.

Image

Image

Image

Have to order correct caliper inlet fittings, of course Wilwood uses a Wilwood specific thread.

Do you guys use any type of thread sealant on the brake fittings? They are combination on 3/16” inverted flare and 3AN. The new brake tool is awesome and makes perfect flares every time, 100x better than the old manual one I used for the 63.
Jeff in Mooresville
63 Flareside and 65 Styleside projects underway
aarons428
Posts: 483
Joined: July 21, 2009, 9:18 pm
Location: norfolk NE
Germany

Re: BlackTruck Build 65

Post by aarons428 »

There should be no need to put thread sealant on those fittings as they both seal on the taper NOT on the threads. Is there a leakage issue?
2010 Ford Edge
99 Ford Expedition
65 Ford f-100 swb
460 stock other than a double roller timing chain and a s475 TURBO pushing 6psi of boost (now 12lbs)
351 W Pulled and on garage floor in storage
428 4v (R.I.P)
c-6 wide ratio modified
torino front stub
home made ladder bar rear with air bags
11.96 sec @ 110mph 1\4mile (best with the 428)
JeffinMooresville
Posts: 242
Joined: January 23, 2018, 8:12 pm
Location: Mooresville, NC
United States of America

Re: BlackTruck Build 65

Post by JeffinMooresville »

OK, didn’t think so… just checking while I am finishing up plumbing. Have not put fluid in or bled master/brake lines yet.
Jeff in Mooresville
63 Flareside and 65 Styleside projects underway
JeffinMooresville
Posts: 242
Joined: January 23, 2018, 8:12 pm
Location: Mooresville, NC
United States of America

Re: BlackTruck Build 65

Post by JeffinMooresville »

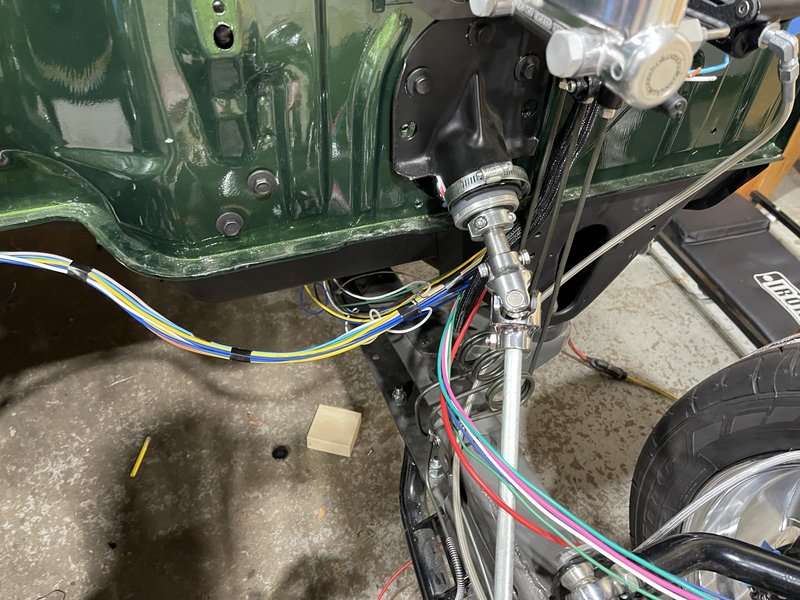
Ok, started on Wiring this weekend. I went with the Speedway 22 circuit kit. Started by just unrolling the wires, and selecting the wires that are going to be run outside of the cab. I mounted the fuse box on kick panel.

Image

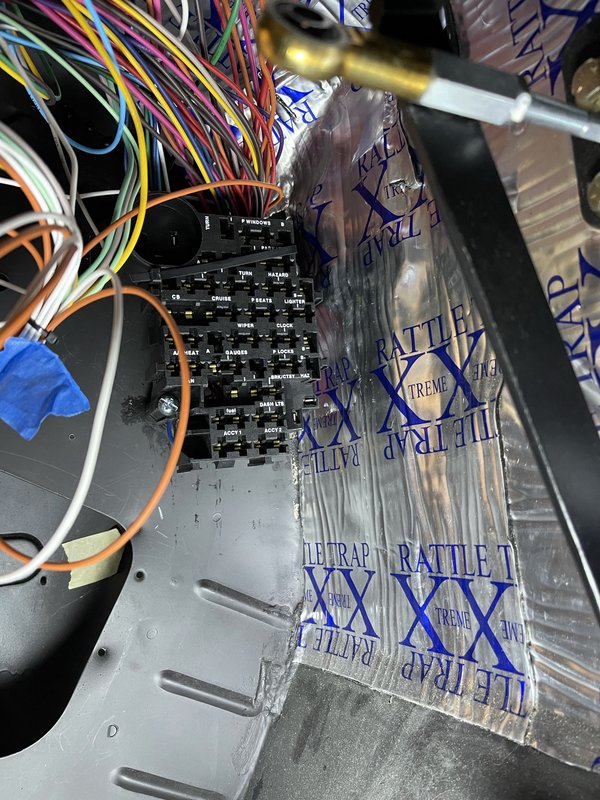
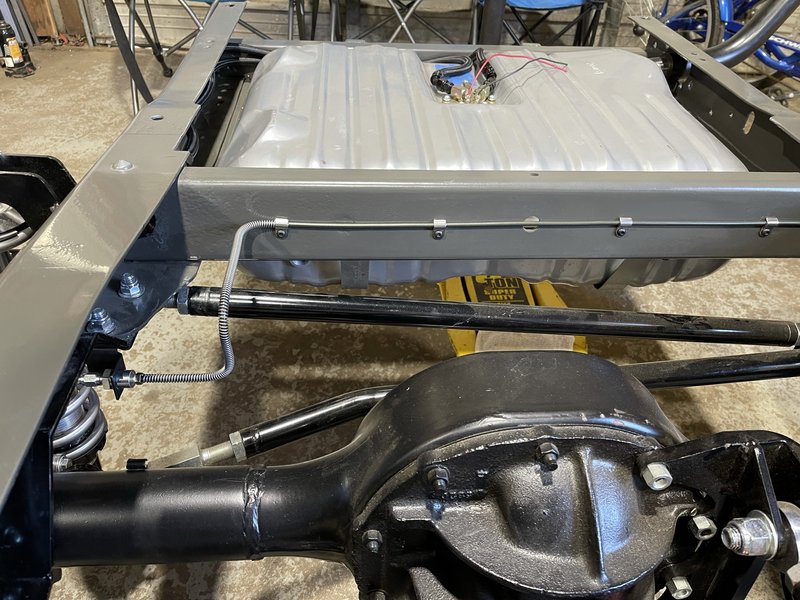
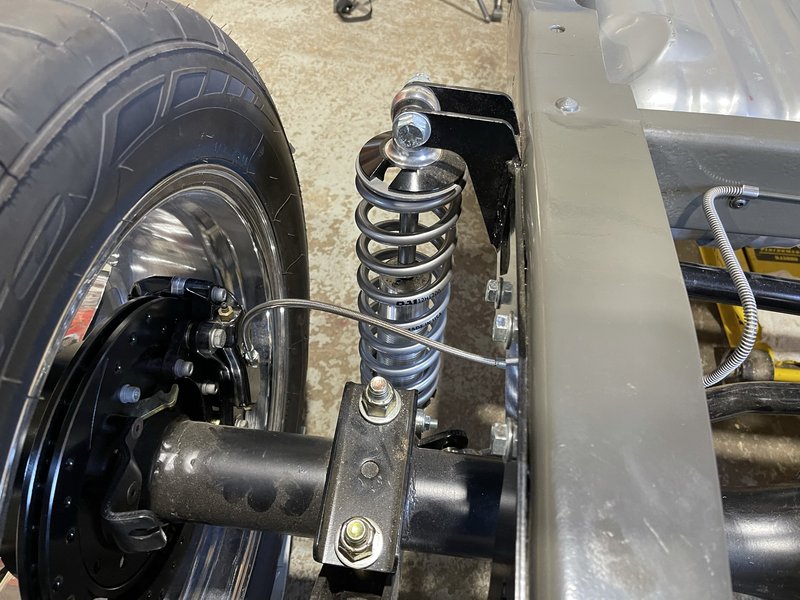
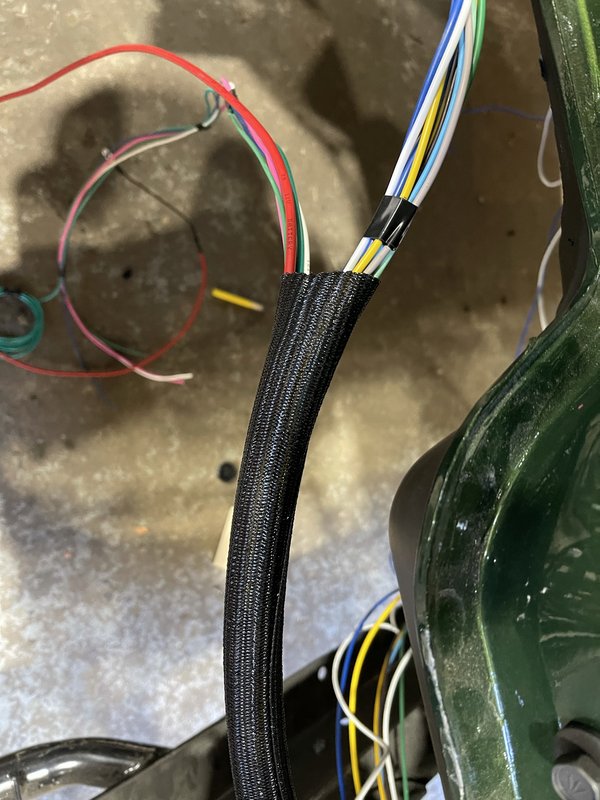
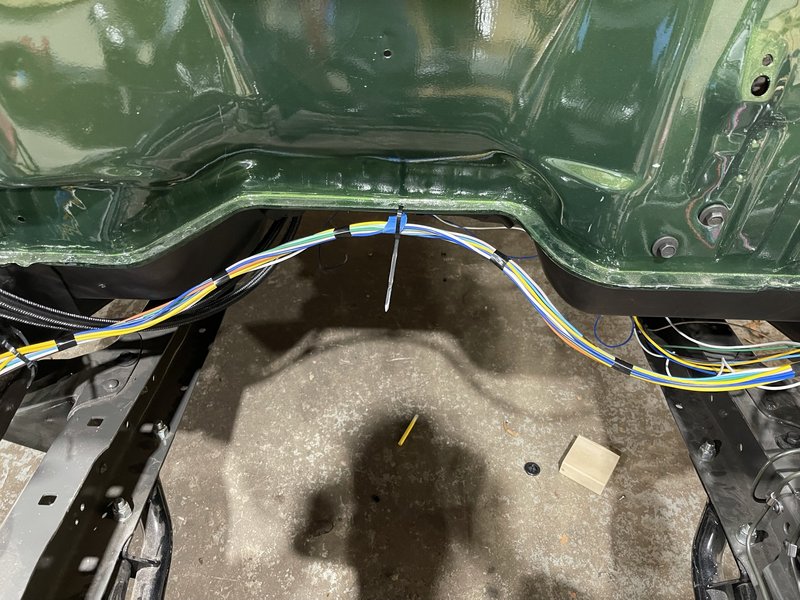
I am using the speedometer cable hole thru firewall, cuz I will be using electronic speedometer on Tremec trans. Got the all out and started to group together in 3 basic runs. engine wires (coil, temp, oil pressure), rear wires, brake lights, turn signals, gas gauge) and front wire runs ( front lights, turn signals, fan etc.) and started to think about where to route. I think I will follow bottom lip of firewall where paint ends and then along bottom of fender for engine and front runs. Rear run is basically straight down to frame rail and to back in rail.

Image

Image

Image

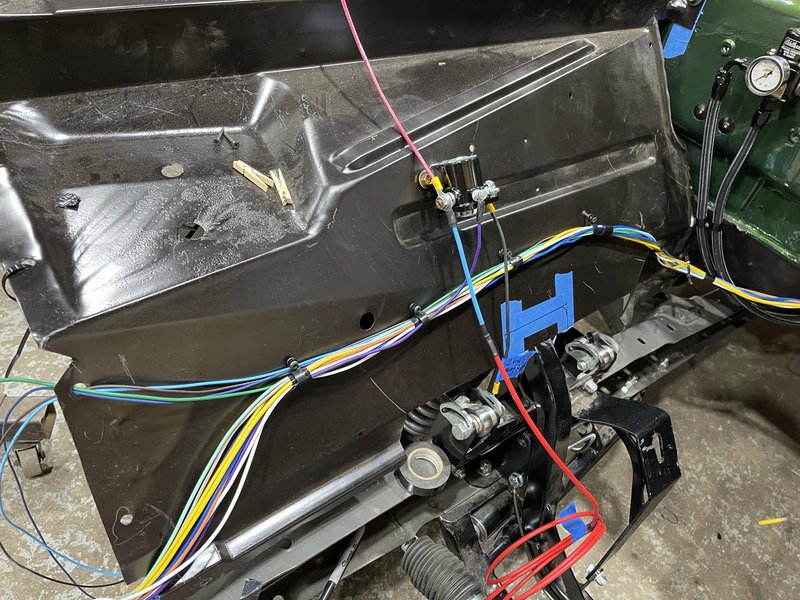
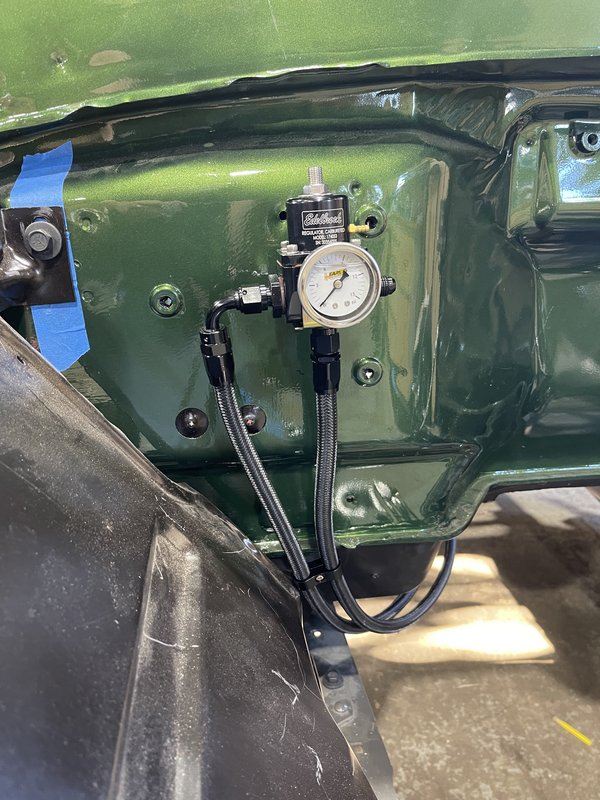
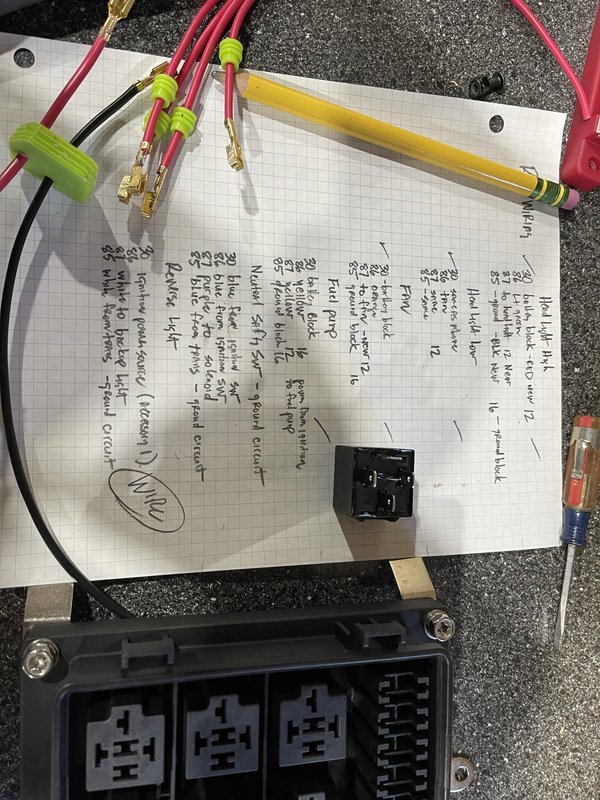
This allowed me to get the basic runs from the firewall and then I was able to add some runs that were not included in the kit. Fuel Pump, Neutral Safety Switch (to transmission), reverse light (from transmission) and electric Choke.

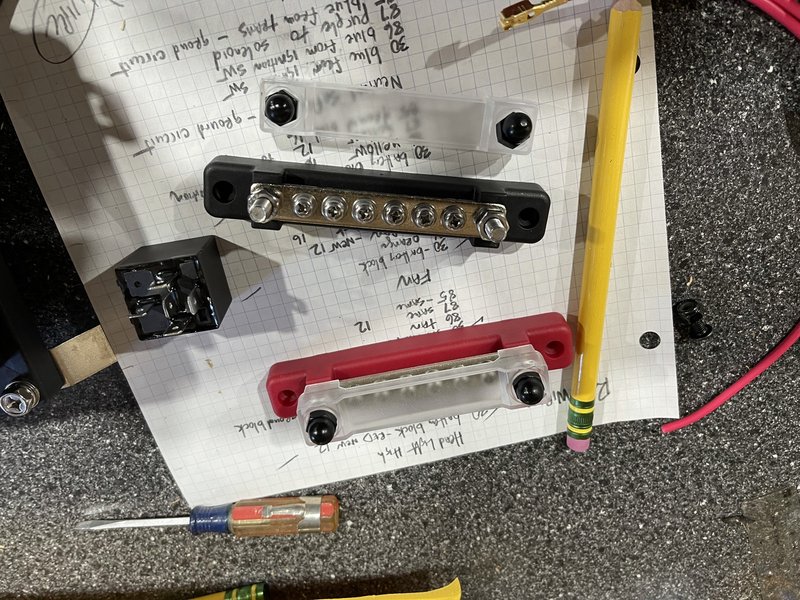
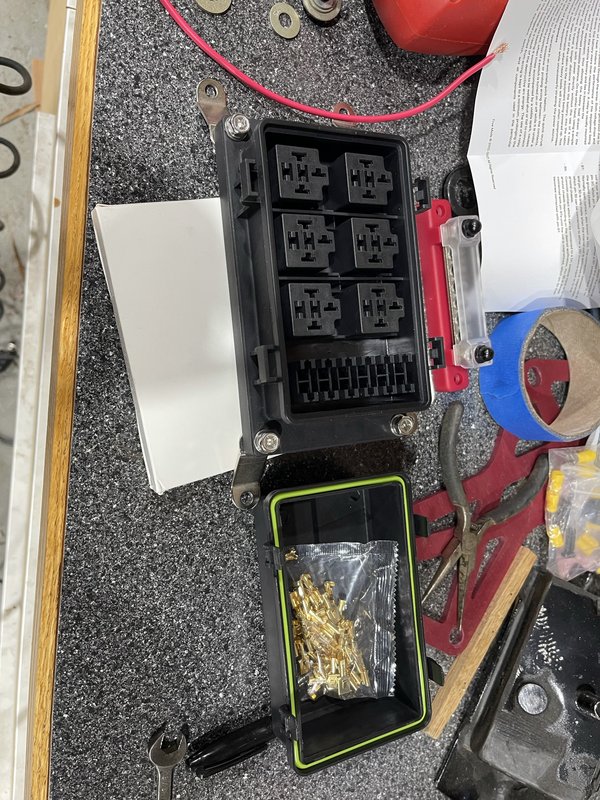
I am using relays for a number of the circuits and decided to group them together up from for serviceability under the battery tray. I found this relay enclosure that will hold 6 relays and hopefully will hide a lot of the wiring for clean install.

Image

I was able to go over and check Doug’s install for some tips and advice. Appreciate that !

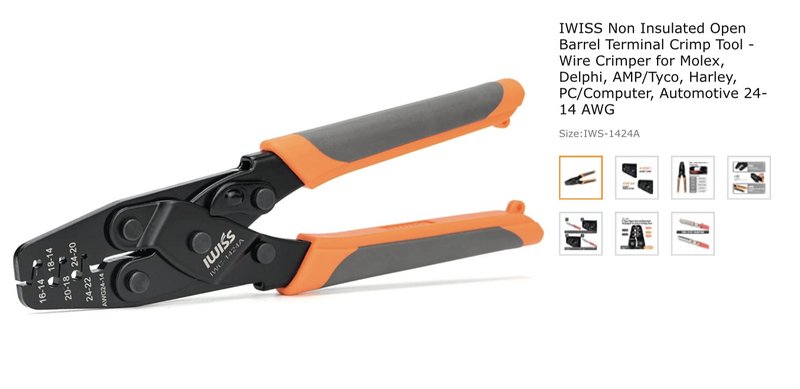
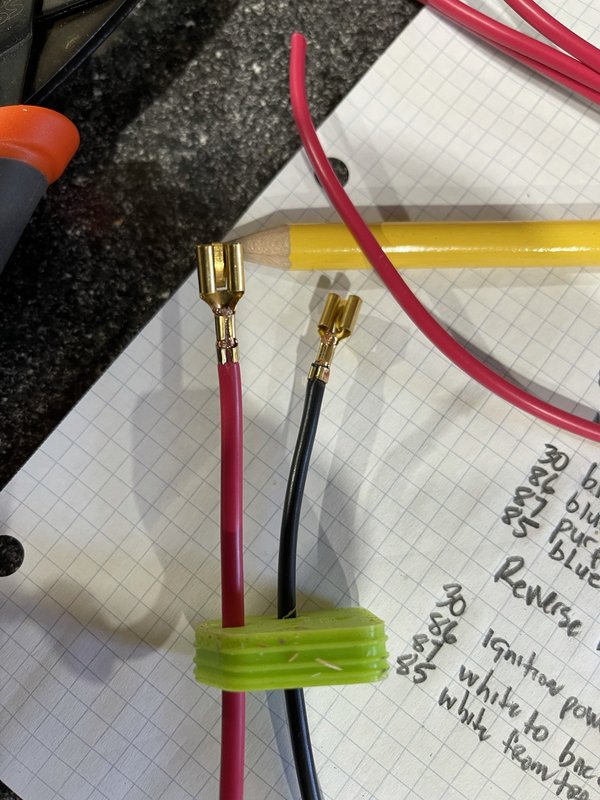
I still have a LOT to do, as I have not bought gauges yet, nor touched any of the inside the cab wiring. I have loom material etc and clamps for the final cleanup. The largest loom I had was 1/2” and based on the main front run, I am going to need at least 3/4”. I also have not found the ideal crimpers for the relay 6.3mm pins and other connectors. The pair I had (Klein) has wrong die and does not “roll over” the crimp on connectors.

Just bought these from Amazon… looks like they have the little heart top crimp die… so hopefully they will be the trick. Thank goodness for 1-2 day delivery.

Image
Jeff in Mooresville
63 Flareside and 65 Styleside projects underway
JeffinMooresville
Posts: 242
Joined: January 23, 2018, 8:12 pm
Location: Mooresville, NC
United States of America

Re: BlackTruck Build 65

Post by JeffinMooresville »

Starting to wire up the relay panel above… I made a little map of all the wires and what pins they connect to in the panel. The new crimps came in ( see last post) and they are perfect. I am using 12 and 16 gauge wires and they create a nice crimp.

Image

The panel has these rubber bushings to make it watertight… so you have to pay attention and make sure you get it in the right hole before the crimp…. Like getting perfect flare on brake line and realizing you forgot to put the fitting on.

Image

Going to use these distribution blocks for 12v battery source and common ground.

Image

The 3/4” split loom also came in and looks like this will be perfect size for the main wire bundles… I can’t imagine needing anything larger.

Image.

I am focusing on engine compartment wiring while I have good access…. And then I can put engine back in and finalize the wiring. Would like to get everything that attaches to firewall finished.
Jeff in Mooresville
63 Flareside and 65 Styleside projects underway
Post Reply