Page 3 of 5

Posted: April 16, 2009, 6:57 pm
by tschmitt
Heres some shots of the rear end. Some before and after pics too.

Image

Image

Image

Image

Image

Image

Image

Image

Thats all I got for now. Just gotta keep choppin wood.

Posted: October 24, 2009, 3:13 pm
by tschmitt
Been a long time since I updated this thread on this site so here it goes. Made alot of progress since my last post.

Got all the 50+ rivets out of the frame and all the cross members, cab mounts, etc taken out of the frame. I left one cross member intact to help keep the frame more rigid. I will remove it once I get the other cross members bolted back in. Used in a air hammer and chiseled the heads off then hammered the rivets the rest of the way through. Had to use a grinder on most of them after the heads were popped off. Alotta work getting them off but it will be worth it knowing every aspect of this frame was sandblasted of all its rust and restored.

Image

Image

Image

Image

Posted: October 24, 2009, 3:15 pm
by tschmitt
Got some small parts sandblasted.

Image

Image

Image

Image

Posted: October 24, 2009, 3:17 pm
by tschmitt
My Epoxy primer and Single Stage Urethane paint for the frame.

Image

Image

Posted: October 24, 2009, 3:19 pm
by tschmitt
Got some parts from Summit. DJM Drop Beams with Drop Shackles for the rear. Front sway bar as well. They didnt have the rear sway bar in stock yet so im just gonna wait to buy that.

Image

Image

Image

Posted: October 24, 2009, 3:20 pm
by tschmitt
I got my Devilbiss Finishline 3 primer gun with 1.8 & 2.2 tips (gun on the left) and my Devilbiss GFG-670 "Plus" paint gun with 1.2, 1.3, & 1.4 tips (gun on the right). Looking forward to trying these 2 guns out as I have read great reviews about both of these guns.

Image

Posted: October 24, 2009, 3:21 pm
by tschmitt
Got my fresh air respirator for painting and sandblasting. Its a HobbyAir I setup.

Image

Posted: October 24, 2009, 3:22 pm
by tschmitt
Got a few more parts sandblasted.

Image

Image

Posted: October 24, 2009, 3:23 pm
by tschmitt
I have been doing alot of research on what engine im going to put in my truck and after alot of thinking and planning I have changed my mind on the engine combo. I decided to go big block, the biggest v8 ever made in the factory, the 500 ci Cadillac. I bought this engine rebuilt for $800 and I will be tearing it down, going through it, making some adjustments, and buying some aftermarket parts for it too. The hard part is done and saved me alot of money too. The engine was rebuilt in 94' and never ran, the owner passed away before he could pick it up. Just in stock form these engines made a ton of torque and im hoping after some modifications I can make quite a bit more. 400hp/500lbs of torque can be had pretty easily and all within 3k rpm for the TQ numbers and around 4k rpm for the HP numbers. Cant wait till I get a rolling chassis and can start building this monster.


Image

Image

Image

Image

Posted: October 24, 2009, 3:24 pm
by tschmitt
I rented a 100 cfm gas powered air compressor/sandblaster from the local supply/rental store and knocked out everything in no time. The back driveway looks like a beach now but everything has been sandlasted so its on to the next step, primer and paint.

Image
Image
Image
Image

Posted: October 24, 2009, 3:25 pm
by tschmitt
Image
Image
Image
Image

Posted: October 24, 2009, 3:27 pm
by tschmitt
Didnt have time to take the I beams apart but I blasted what im using so I just got to take it apart and paint.
Image
Image
Image

Posted: October 24, 2009, 3:28 pm
by tschmitt
Image
Image
Image
Image

Posted: October 24, 2009, 3:29 pm
by tschmitt
Image
Image
Image
Image

Posted: October 24, 2009, 3:30 pm
by tschmitt
The frame in primer with SPI Epoxy Primer, 2 coats. Layed down great no runs and great coverage. I used my Devilbiss Finishline gun with 1.8 tip for the epoxy.

Image
Image
Image
Image

Posted: October 24, 2009, 3:30 pm
by tschmitt
And here it is in flat black. Kirker SS Hot Rod black (flat black), used the Devilbiss Plus gun with a 1.4 tip for the paint. No runs and I put on 4 dry/medium coats to help achieve the flat black look. Turned out pretty good, cant wait to see it under real light to really see how it turned out. I know in some of the pics it looks like it didnt cover all the way but its just the way the light is reflecting from the camera.

Image
Image
Image
Image

Posted: October 24, 2009, 3:32 pm
by tschmitt
A little timeline of the frame.

Image

Image

Image

Image

Posted: October 24, 2009, 3:33 pm
by tschmitt
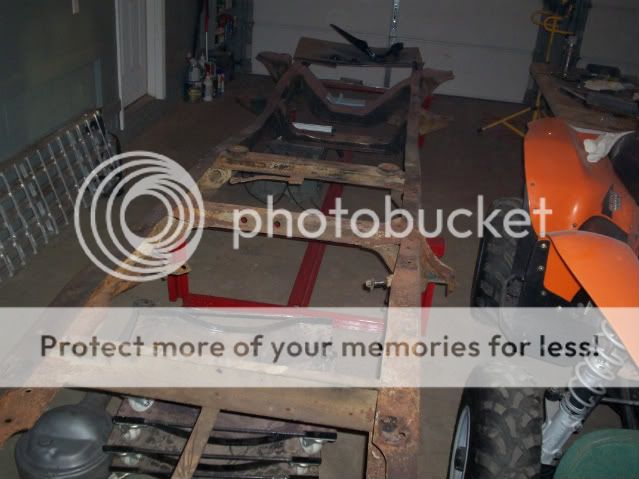
And this is where im at today. Hope to have the rest of the frame parts painted within the next week. Should be alot of fun putting this frame back together.

Posted: October 24, 2009, 4:16 pm
by Alan Mclennan
:shock: Boy !, didn`t you ever pull that baby to bits!, it`s looking great, I`m just a tad ahead of you in the put the chassis back together stakes but I think you are doing a more thorough job!, keep the pic`s coming :D

Posted: October 24, 2009, 4:25 pm
by tschmitt
Alan Mclennan wrote::shock: Boy !, didn`t you ever pull that baby to bits!, it`s looking great, I`m just a tad ahead of you in the put the chassis back together stakes but I think you are doing a more thorough job!, keep the pic`s coming :D


Haha thanks Alan. I cant wait to start putting it back together but im not too excited about buying that many bolts lol wont be cheap but it will be worth it. I want to get the frame put back together as far as all the former rivoted pieces by the end of October/1st wk of Novemeber so im right on schedule so far. Should be fun.