
Ltd Uni project , 62 short..on a 87 crown vic (Ltd)
-
SixtySix Ford

- Posts: 58
- Joined: September 7, 2010, 11:37 pm
- Location: Denver Co.

I don't think it would be hard to raise the floor in these trucks and the floor of the bed....I think the hardest part would be the radiator support, grill and bumper. I do plan on trying this idea on my 66 so we'll see how it pans out!
"Nitrous is like hot girl with STD's. You know you wanna hit it, but your afraid of the consequences."
66 Ford F-100 - Project SickUp
66 Ford F-100 - Project SickUp

I have been HAMMERING on the inside bed paint today ! Kid stopped by to see if I was getting to many paint fumes, and help me with a small inner rear wheel well fender project..
Well, I just went out and put the first coat on the front of the floor, I should be doing the second coat around 9:30, then I can do the first coat on the back floor, and maybe the second coat before midnight..that will be it for inside the box..except the suspension cover lid...
I decided not to go crazy with any putty work on the inner wheel wells, they are a little lumpy..not like when I bought it though..
Its time to start getting things done instead of never starting the PERFECT build, I am building a driver....It has sat to long !!!
might have some pics later tonight....
Well, I just went out and put the first coat on the front of the floor, I should be doing the second coat around 9:30, then I can do the first coat on the back floor, and maybe the second coat before midnight..that will be it for inside the box..except the suspension cover lid...
I decided not to go crazy with any putty work on the inner wheel wells, they are a little lumpy..not like when I bought it though..
Its time to start getting things done instead of never starting the PERFECT build, I am building a driver....It has sat to long !!!
might have some pics later tonight....
Last edited by foodstick on December 28, 2010, 1:31 pm, edited 1 time in total.

-
ezernut9mm

- Posts: 9141
- Joined: July 21, 2006, 9:37 pm
- Location: KCMO

i need to come up and learn things and stuff. lol. great work guys.
always
"i believe i've achieved satisfaction".-bubbles
"should i be gettin" baked for this boys?"-bubbles
i could no longer keep "r.i.p.ing" all of our fallen brothers and sisters, so i say here, slick loads of love and much respect to all you beautiful people.
"i believe i've achieved satisfaction".-bubbles
"should i be gettin" baked for this boys?"-bubbles
i could no longer keep "r.i.p.ing" all of our fallen brothers and sisters, so i say here, slick loads of love and much respect to all you beautiful people.
-
BackyardRest


-
rickairmedic
- Posts: 1394
- Joined: July 19, 2006, 9:27 pm
- Location: Louisville,Ky
 .
.Well after off and on work for quite awhile sanding, cleaning,puttying,caulking I started painting the door jambs on the ole LTD uni today.. One coat on so far ( POR 15 of course ) 
Gonna try to make it tough in those jambs, not show car worthy , hahah
Anyhow, need paint brushs, and a few supplies before the second coat is ready ! off to Home depot...
Gonna try to make it tough in those jambs, not show car worthy , hahah
Anyhow, need paint brushs, and a few supplies before the second coat is ready ! off to Home depot...
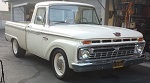


These were old parts, off a long bed..didn't line up right for a short bed..
Skip was correct above...cut your old corner skin off so you can drill the spot welds from the outside..remove no more metal than needed when drilling spot welds..
Your donor parts ( if they are off a truck) not new...can be cut ahead of the seam, and drilled from the front or (inside) ..I would slowly take the old stuff off..kind of see how it fits. then figure out the best easiest way to prep the new parts..lots of test fitting..and you will want the gate on for at least some of the realignment and welding..to keep it correct.
Yeah, I look back at my old pics and forget how rough it was.
Oh yeah, somewhere in hints and tricks is a quarter panel job Kid and I did, it is almost the exact one you will need to do..some good pics for you.
I have a corrupt disc with more pics..but it isn't cooperating I am afraid.
Skip was correct above...cut your old corner skin off so you can drill the spot welds from the outside..remove no more metal than needed when drilling spot welds..
Your donor parts ( if they are off a truck) not new...can be cut ahead of the seam, and drilled from the front or (inside) ..I would slowly take the old stuff off..kind of see how it fits. then figure out the best easiest way to prep the new parts..lots of test fitting..and you will want the gate on for at least some of the realignment and welding..to keep it correct.
Yeah, I look back at my old pics and forget how rough it was.
Oh yeah, somewhere in hints and tricks is a quarter panel job Kid and I did, it is almost the exact one you will need to do..some good pics for you.
I have a corrupt disc with more pics..but it isn't cooperating I am afraid.
Anyhow as to old beater.. i HAVE SOME UPDATED PICS !
They even make me smile I am not sure if I have mentioned this in the thread above, but I am going white over grey on the finished truck. So that way I can use lots of por for the durability of the box,engine area, and door jambs.. This truck is not gonna be a garage queen ..not enough garage !!

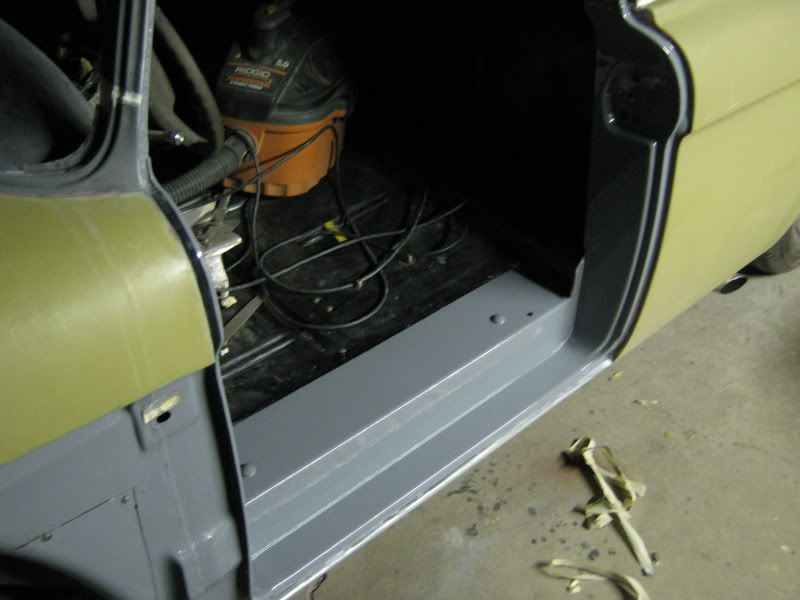
They even make me smile
I am not sure if I have mentioned this in the thread above, but I am going white over grey on the finished truck. So that way I can use lots of por for the durability of the box,engine area, and door jambs.. This truck is not gonna be a garage queen ..not enough garage !!Thanks Foodstick! That's good info. Too bad about the corrupt discfoodstick wrote:These were old parts, off a long bed..didn't line up right for a short bed..
Skip was correct above...cut your old corner skin off so you can drill the spot welds from the outside..remove no more metal than needed when drilling spot welds..
Your donor parts ( if they are off a truck) not new...can be cut ahead of the seam, and drilled from the front or (inside) ..I would slowly take the old stuff off..kind of see how it fits. then figure out the best easiest way to prep the new parts..lots of test fitting..and you will want the gate on for at least some of the realignment and welding..to keep it correct.
Yeah, I look back at my old pics and forget how rough it was.
Oh yeah, somewhere in hints and tricks is a quarter panel job Kid and I did, it is almost the exact one you will need to do..some good pics for you.
I have a corrupt disc with more pics..but it isn't cooperating I am afraid.

-
fire truck
- Posts: 2141
- Joined: January 17, 2010, 9:06 pm
- Location: Down in Mississippi and up to no good