Page 3 of 7
Posted: April 14, 2010, 8:17 pm
by 64low-n-slow
Funny thing about bodywork and welding....they're like potato chips, you can't stop!
Looking good, Robert. Keep it up!
Maybe some Sat night we can get the FL Slicksters together in Old Town. I used to have an old Gran Sport that I took there occasionally. Usually a good cruise.
Posted: April 18, 2010, 4:01 pm
by rwhistles
That sounds like a good idea low-n-slow but first I gotta get the rear end changed out first that 5.13 is just to low.
Yesterday I got the paint on the right side and moved on to the left side.

Started to grind the filler off the left side and found that the damage extended from the tail light down the side of the bed about a foot.Filler was at least half an inch or more thick.Pulled the metal out a little better and welded the holes.Whoever made the repair welded in the seam between the bed and the tail light up to the half way mark and stopped. I decided to go ahead an weld anf fill the seam all the way around the tail light.Got the first filler on and it started to rain so I had to stop. Snapped a couple of pic's to post.

When I'm through with this side will have to go back and weld and fill the right side seam.
Posted: April 20, 2010, 5:37 pm
by rwhistles
Got the filler on the left side tiday and some paint. Not quite as perfect as some I have seen here but will have to do untill I start getting it ready for paint job. Might have to let a proffesional handle the couple of waves I couldn't get out. Actually I just got tired of messing with it. Nothing I tried seemed to work.

First cut on the side of the bed for the toolbox.A little to small but what the hey better to small than to big.

I had to mount it a little higher on the bed than a stylside because of the lip at the bottom. It points straight down from the end of the bed contour about an inch and a half. Will have to trim a half inch off number two bed crossmember to get it to fit. Brace has already been removed.
Posted: April 22, 2010, 10:39 am
by rwhistles
got a little more work done on the toolbox yesterday. put the box in place but it hit the frame and wouldn't go all the way up to the body.

cut a 1/4 inch off back of box

cut the excess off the box back and welded it back in place.

put it in place and drilled all holes and bolted it up. Will have to put blind nuts on those three top holes

Need to go to hardware store and get some screen door laceing to go around the back side of the box.There was a rubber gasket there and screen laceing should fit the groove where it was. hope to get it finished today.
Posted: April 22, 2010, 4:25 pm
by rwhistles
went to the hardware store and picked up some screen laceing. Used 3M weather stripping cement to glue it down. After that dried I ran a small bead of black silicone behind the rubber laceing.Let that dry and proceeded to instal box.

Have been useing stainless panhead screws as much as possible.

Next project is to get the top rails on the bed straightened out. and leveled up some. then I need to find a tailgate for it.
Posted: April 22, 2010, 7:42 pm
by Anthony
looking good Whistles.. I like the box. I would like to eventually get one for mine. they are hard to come by around me. Truck is really looking sharp..
Posted: April 22, 2010, 7:50 pm
by Max
Good work with the toolbox! What are you going to use it for?
Posted: April 24, 2010, 12:42 pm
by rwhistles
thanks for the comments. I'ts mostley for looks but will probably keep jumper cables,jack,and lug wrench in it.might as well use it
Posted: August 6, 2010, 10:21 am
by rwhistles
Finally got a little time for the slick.Put all new inserts in the dash knobs.Dabbed a little 3M on the back side with a tooth pic.

Recieved the tailgate from Iceman this week and hope to get started on it soon.
Posted: August 7, 2010, 8:50 am
by Thunderboy
Nice work, Whistles. I like that you just "jump in" and do bodywork and welding as needed, and it turns out well! I like your toolbox swap, too.

Posted: August 7, 2010, 5:55 pm
by rwhistles
Thanks thunder I appreicate the kind words.I'm learning as I go on most of what I've done.
Posted: August 16, 2010, 3:05 pm
by rwhistles
I got my tailgate from Ice a couple weeks ago.It had a crease in the middle got that hammered out and now have a streched place where the crease was. I plan on trying my hand at shrinking it with a torch.May have to pop for a shrinking disc.Picked up a set of chains off ebay for $8.47 plus $10.00 shipping from denver. Just went and picked up the hinges at the post office this morning.

This is the first test fit.had to grind out some of the floor that was welded in to get it to shut correctly.May just put some primer on and leave it there until I get to a torch to shrink that middle panel. then blast it and get some paint on it.Even with the way it is it looks better than that expanded metal tailgate that was on it before.
Posted: August 16, 2010, 5:37 pm
by ICEMAN6166
wow
you have done a lot
nice to see the tailgate on the extreme other side of the USA
keep it up, its looking good.
Posted: August 17, 2010, 12:53 am
by 64shortbed
Glad to see you're back at it. I've enjoyed watching your progress. Where did you find the knob inserts?
Posted: August 17, 2010, 5:37 am
by olliesshop
Dennis Carpenter has them (on page 55 in their catalog), at $3 a pop ...
http://www.parts123.com/parts123/yb.dll ... Z50000024G
Hope it helps.
Posted: August 17, 2010, 11:57 am
by fire truck
Lookin awesome. I have the right bumper for that truck if you want one. I bought it figuring someone would need one one day....
Posted: August 18, 2010, 12:58 pm
by rwhistles
Hey Ice,
Wouldn't you like to know where that tailgate has been since it was manufactured? The truck was made in the lower 48, but where did it go before Alaska? We know how the tailgate got from Alaska to Florida.
The knob inserts came from DC. Buy enough to do all the knobs in your truck, so all the knobs will match. The new insert color is different that the original.
Posted: September 19, 2010, 9:26 am
by rwhistles
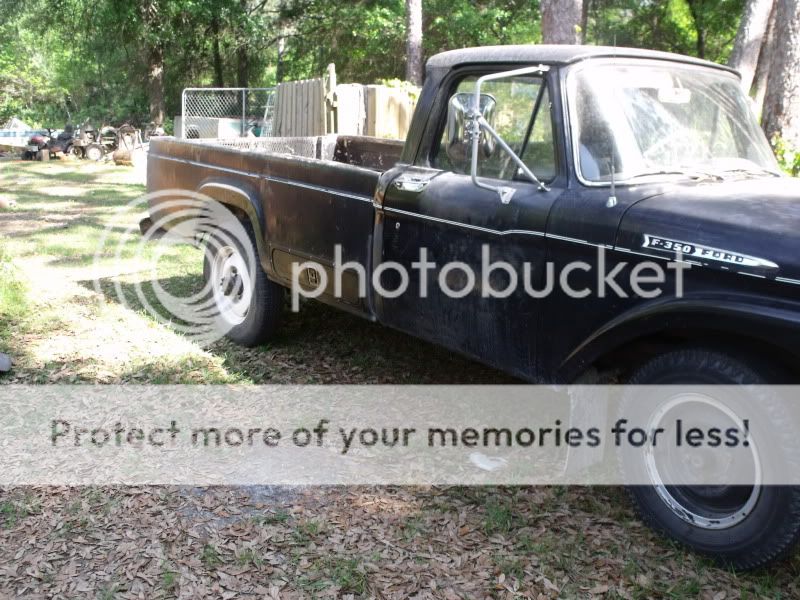
Rainy season is not quite over yet so decided not to pull the roof off the camper.Have been doing a little preservation work on the 61. Pulled the seat to clean and paint the cab floor.

Mostly just surface rust so I wire brushed it then scrubed it with purple stuff

When it dried I took a 4 inch flap disc to the worst parts then got carried away and ran over the whole floor also decided to wait until I can get a backing pad for my DA and will sand the whole floor with 36 grit down to bare metal. The paint on the floor is kind of soft and sticky so I want to take it all off. Then I decided to work on other areas like the steps.

Passenger side finished sorry forgot to get a before pic. The scuff plate and cab pillars have been wire brushed,sanded,primed,and painted flat black. The step plate got the same treatment ecept 3 coats of Loctite rust extender and several coats of duplicolor spray bedliner.

Sand blasted the battery cover.

after several coats of spray on bedliner. I am going to do the whole floor with the bedliner.It's supposed to be durable so maybe it will last untill I get a floor mat.
Posted: September 19, 2010, 2:10 pm
by 64low-n-slow
Lookin good Robert. The extra work will pay off!
Posted: September 20, 2010, 9:21 am
by rwhistles
Worked on the truck for awhile yesterdsy. Went and bought a can of spray adheasive and sprayed it on the DA pad.Sanded it down to bare metal and I'm glad i did. There sure was a lot of surface rust under the paint that you couldn't see.

I had already done that one place on the drivers side several weeks ago to see how it would look.Thats when I decided to do the whole floor. Sanded it down then used JB weld to fill some pin holes and rust craters. Put several coats of rust neutralizer on then sprayed it with bedliner.

This is after one coat of duplicolor bedliner. I ran out just as I got done. Will get another can and put one more coat on the floor.