'66 F100 Custom Cab Short/Styleside Factory Correct Resto

A place just for our project & build threads.

Moderators: Casey 65, Kid

Post Reply
User avatar
theastronaut
Posts: 452
Joined: August 7, 2013, 10:43 am
Location: Upstate SC

Re: '66 F100 Custom Cab Short/Styleside Factory Correct Rest

Post by theastronaut »

The bottom right bed corner didn't fit well at the seam against the bedside so we made cuts and re-aligned the two panels.

Image


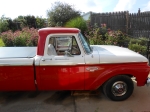
After cutting welding, and smoothing the welds.

Image

Image


The very bottom of the corner didn't fit either so we cut/reshaped it.

Image

Image


The rolled curve in the body line didn't match, same treatment.

Image

Image

Image

Image


Finding the dents in the left wheel tub with sandpaper and straightening them with a hammer/dolly.

Image
User avatar
skidoorulz
Posts: 359
Joined: April 11, 2013, 9:02 pm
Location: Billings MT
United States of America

Re: '66 F100 Custom Cab Short/Styleside Factory Correct Rest

Post by skidoorulz »

I have started looking forward to coming home and looking at that days progress report. Imagine my disappointment when today, there is nothing. That is like waking up on Christmas Day to discover nothing under the tree :cry:
User avatar
theastronaut
Posts: 452
Joined: August 7, 2013, 10:43 am
Location: Upstate SC

Re: '66 F100 Custom Cab Short/Styleside Factory Correct Rest

Post by theastronaut »

skidoorulz wrote:I have started looking forward to coming home and looking at that days progress report. Imagine my disappointment when today, there is nothing. That is like waking up on Christmas Day to discover nothing under the tree :cry:
Good things come to those who wait... you'll get double updates this time! :lol: I had church last night that I had to get ready for right after work, then ate out with friends afterwards. Didn't have time to post!
User avatar
theastronaut
Posts: 452
Joined: August 7, 2013, 10:43 am
Location: Upstate SC

Re: '66 F100 Custom Cab Short/Styleside Factory Correct Rest

Post by theastronaut »

We have the bed prepped for epoxy so we started on the doors. The top of the passenger door was pretty beat so we finally decided to cut the whole skin off to get to the damage better.


Image


Checking the damage with a straight edge.

Image

Image


Skin off, more rust than expected. This would have come through in a few more years if not addressed now. We blasted the frame and welded up the pin holes.

Image

Image

Image


The new emblem studs were slightly off from the original holes, and slightly larger. I stuck the emblems on and marked where the holes needed enlarging to make them fit properly.

Image

Image

Image


Checking the fit of the clips.

Image


Inside of door blasted and painted with Chassis Saver.

Image

Image


Door skin before straightening.

Image


Finding the high/low spots by block sanding.

Image


Door skin straightened above the body line.

Image


Marking the location of the sunk in areas on the bottom skin.

Image


Rolling on an english wheel to bring the skin up.

Image


Sound deadener inside the door frame.

Image


Ready to start on the driver's door next week.

Image
User avatar
skidoorulz
Posts: 359
Joined: April 11, 2013, 9:02 pm
Location: Billings MT
United States of America

Re: '66 F100 Custom Cab Short/Styleside Factory Correct Rest

Post by skidoorulz »

theastronaut wrote:
skidoorulz wrote:I have started looking forward to coming home and looking at that days progress report. Imagine my disappointment when today, there is nothing. That is like waking up on Christmas Day to discover nothing under the tree :cry:
Good things come to those who wait... you'll get double updates this time! :lol: I had church last night that I had to get ready for right after work, then ate out with friends afterwards. Didn't have time to post!
I forgot it was Wednesday. Church is important, I will forgive.

Amazing work by the way
User avatar
totten
Posts: 284
Joined: January 1, 2012, 8:05 pm
Location: Erlanger,ky
United States of America

Re: '66 F100 Custom Cab Short/Styleside Factory Correct Rest

Post by totten »

Love your fab work and metalworking art. Beautiful !
1966 f-100 ranger,red and white,240,cruiseomatic,3.00 gear,a/c.
MadMaxetc
Posts: 2600
Joined: July 10, 2006, 12:00 pm
Location: Wichita, KS
Contact:
United States of America

Re: '66 F100 Custom Cab Short/Styleside Factory Correct Rest

Post by MadMaxetc »

Damn that's a lot of work... Thanks for posting. Now I know what I need to do! ;)
Dan
Project: '63 F-100 LWB / 460 / C6 / 2x4
My Build Thread
thenephilm
Posts: 543
Joined: June 25, 2009, 9:06 pm
Location: Cincinnati
United States of America

Re: '66 F100 Custom Cab Short/Styleside Factory Correct Rest

Post by thenephilm »

I would love to be able to work with metal like this. The work looks great and I am real jealous!
Hi I'm Justin.
User avatar
theastronaut
Posts: 452
Joined: August 7, 2013, 10:43 am
Location: Upstate SC

Re: '66 F100 Custom Cab Short/Styleside Factory Correct Rest

Post by theastronaut »

skidoorulz wrote:
I forgot it was Wednesday. Church is important, I will forgive.

Amazing work by the way
Thanks!


totten wrote:Love your fab work and metalworking art. Beautiful !
Appreciate that!


MadMaxetc wrote:Damn that's a lot of work... Thanks for posting. Now I know what I need to do! ;)
Glad it's a help!


thenephilm wrote:I would love to be able to work with metal like this. The work looks great and I am real jealous!
Thanks, been looking through your build- neat project!
User avatar
theastronaut
Posts: 452
Joined: August 7, 2013, 10:43 am
Location: Upstate SC

Re: '66 F100 Custom Cab Short/Styleside Factory Correct Rest

Post by theastronaut »

Here's what we did yesterday and today. We moved the cab around to the stall we usually work out of since the doors were nearly ready for fitting.


Driver side door finished, coated with Chassis Saver and two layers of sound deadening. They don't sound like tin cans anymore!

Image


Doors installed to check fit and rework the edges where things didn't line up.

Image


Front edge against cowl box didn't fit the shape.

Image


Heat shrunk to pull the edge down, then shaped with a hammer/dolly to match the shape of the cowl panel.

Image

Image


Back edge fit was decent already.

Image


Bottom edge needed some straightening.

Image


This was one of the two areas that fit terribly.

Image


Difference between the door skin shape (red profile gauge) and the cowl edge.

Image


Relief cuts.

Image


Reshaped the edge, checking the shape.

Image

Image

Image


Cuts welded and smoothed.

Image


Fits flush, it looks a little off since the gaps aren't even yet.

Image

Image


This was the second area that fit really bad. The cab stuck out from the window frame by 3/16". Both sides were like this, tapering in towards the top.

Image

Image

Image

Image


After relief cutting the door jamb, aligning, welding, and smoothing.

Image

Image
thenephilm
Posts: 543
Joined: June 25, 2009, 9:06 pm
Location: Cincinnati
United States of America

Re: '66 F100 Custom Cab Short/Styleside Factory Correct Rest

Post by thenephilm »

Dang, it only gets better. I love your attention to detail.
Hi I'm Justin.
digler005
Posts: 38
Joined: January 13, 2013, 6:31 pm
Location: Lewes, DE
United States of America

Re: '66 F100 Custom Cab Short/Styleside Factory Correct Rest

Post by digler005 »

Unbelievable skills, this will probably be the straightest slick anywhere.
User avatar
skidoorulz
Posts: 359
Joined: April 11, 2013, 9:02 pm
Location: Billings MT
United States of America

Re: '66 F100 Custom Cab Short/Styleside Factory Correct Rest

Post by skidoorulz »

What kind of sound deadening mats are you using?
User avatar
theastronaut
Posts: 452
Joined: August 7, 2013, 10:43 am
Location: Upstate SC

Re: '66 F100 Custom Cab Short/Styleside Factory Correct Rest

Post by theastronaut »

thenephilm wrote:Dang, it only gets better. I love your attention to detail.
Thanks!

digler005 wrote:Unbelievable skills, this will probably be the straightest slick anywhere.
We hope so, after spending this much time on it!

skidoorulz wrote:What kind of sound deadening mats are you using?
Uhh, it's not actually sound deadener... it's Peel and Seal from Lowe's. :lol: Google it! Same butyl backing as Dynamat, just not as thick. So we double wrap it. Works great and saves the customer a ton of money. We did the doors with less than four rolls, around $50 bucks worth.
User avatar
theastronaut
Posts: 452
Joined: August 7, 2013, 10:43 am
Location: Upstate SC

Re: '66 F100 Custom Cab Short/Styleside Factory Correct Rest

Post by theastronaut »

We cleaned off the back of the fenders to see what the original primer color was... light gray. There was a very thin coat of Sahara Beige that would wipe off with wax and grease remover, we'll replicate this when we paint the fenders.

Image

Image


Mocked up the fenders to check their fit. The passenger side has a bulge at the bottom. We'll try to find another one since there are 5 long creases hiding under the paint; it's full of bondo.

Image

Image


The driver's fender was much better, it won't need much work to fit the door perfectly.

Image


Didn't post this earlier, but we shot weld-thru coating on the door skin flanges.

Image

Image


Rust in the right rear cab corner.

Image

Image


Blasted, pinholes welded up, inner cavity painted with Chassis Saver. Used a long dauber to reach farther up into the cavity to get more paint in there.

Image

Image

Image


Marking the door edge for cutting. I use 1/8" steel welding rods on the edges of the doors to reset the gaps.

Image

Image


Door edge cut back, inner/outer skins tacked together.

Image


Nylon feeler gauge for checking the size of the gap.

Image


Welding rod bend to fit the door edge, tacked in place.

Image


Fully welded.

Image


Welds smoothed. The gap is too small, but there is a full 1/8" of material to grind back without the edge splitting.

Image
User avatar
theastronaut
Posts: 452
Joined: August 7, 2013, 10:43 am
Location: Upstate SC

Re: '66 F100 Custom Cab Short/Styleside Factory Correct Rest

Post by theastronaut »

Shot the bed with PPG DPLF epoxy thursday night.

Image


Masked and applied epoxy seam sealer Friday morning. Don't use blue tape for seam sealer, it's tough to get it back off without it tearing to shreds!

Image

Image

Image

Image


Turned the bed up so we could hammer/dolly the dents out of the bed floor.

Image


Skim coated a few spots.

Image
MadMaxetc
Posts: 2600
Joined: July 10, 2006, 12:00 pm
Location: Wichita, KS
Contact:
United States of America

Re: '66 F100 Custom Cab Short/Styleside Factory Correct Rest

Post by MadMaxetc »

Looking killer!

What tape would you suggest for the sealer?
Dan
Project: '63 F-100 LWB / 460 / C6 / 2x4
My Build Thread
rickairmedic
Posts: 1394
Joined: July 19, 2006, 9:27 pm
Location: Louisville,Ky

Re: '66 F100 Custom Cab Short/Styleside Factory Correct Rest

Post by rickairmedic »

Max the green is usually fine as it is more for automotive type work the blue is best left for the honeydo's inside the house :D. I learned this the hard way when I 2 toned my old aluminum starcraft boat and almost had to completely start over :D.


Rick
if it aint broke fix it till it is :D
MadMaxetc
Posts: 2600
Joined: July 10, 2006, 12:00 pm
Location: Wichita, KS
Contact:
United States of America

Re: '66 F100 Custom Cab Short/Styleside Factory Correct Rest

Post by MadMaxetc »

Green it is!

I also see you sealed the back edge of the bed. Do you have any other drainage paths? I plan on sealing it too and having a small hole (1/8") on every vally. I also plan to put a tonno cover and a rug in.
Dan
Project: '63 F-100 LWB / 460 / C6 / 2x4
My Build Thread
User avatar
theastronaut
Posts: 452
Joined: August 7, 2013, 10:43 am
Location: Upstate SC

Re: '66 F100 Custom Cab Short/Styleside Factory Correct Rest

Post by theastronaut »

MadMaxetc wrote:Looking killer!

What tape would you suggest for the sealer?
Green or yellow. I like the yellow 3M tape the best. Sticks better than green or blue, even when wetsanding around it. Peels off clean too.

rickairmedic wrote:Max the green is usually fine as it is more for automotive type work the blue is best left for the honeydo's inside the house :D. I learned this the hard way when I 2 toned my old aluminum starcraft boat and almost had to completely start over :D.


Rick
Yep, green works well. The places where the sealer even slightly overlapped the blue tape made the tape rip, then we had to cut the edge with a razor blade.


MadMaxetc wrote:Green it is!

I also see you sealed the back edge of the bed. Do you have any other drainage paths? I plan on sealing it too and having a small hole (1/8") on every vally. I also plan to put a tonno cover and a rug in.
There were two small factory drains that we'll open back up. I'm not too worried about it since the owner will get a stern lecture about never having the truck out in the rain, or even washing it. These kind of restorations usually never get that dirty; just dust them and wipe over them with some quick detail spray.
Post Reply