
The rubber/steel bushings? I think we have already ordered a set.Shadow wrote:Those Floor Pans Great. Are You Going To Use A Set Of Tom's Cab-Mounts Or Fab Your Own?
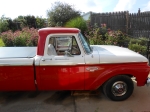
'66 F100 Custom Cab Short/Styleside Factory Correct Resto
-
theastronaut

- Posts: 452
- Joined: August 7, 2013, 10:43 am
- Location: Upstate SC
Re: '66 F100 Custom Cab Short/Styleside Factory Correct Rest

Re: '66 F100 Custom Cab Short/Styleside Factory Correct Rest
I Don't Know What I Was Thinking. Your Truck Is A Twin I Beam Truck Not The Straight Axle. Completely Different Mounts......theastronaut wrote:The rubber/steel bushings? I think we have already ordered a set.Shadow wrote:Those Floor Pans Great. Are You Going To Use A Set Of Tom's Cab-Mounts Or Fab Your Own?
-
theastronaut
- Posts: 452
- Joined: August 7, 2013, 10:43 am
- Location: Upstate SC
Re: '66 F100 Custom Cab Short/Styleside Factory Correct Rest
Haven't posted lately so here's the updates. We're finished with metalwork on the cab and doors and have them in epoxy.
Passenger floor fitted and welded in.

We drilled a couple 1/8" holes in each end of the hinges while the doors were bolted up and aligned. Next time we install the doors we can use 1/8" welding rods to easily align the holes, and the doors will be 95% adjusted on the first try.

The windshield and back glass pinchwelds were extremely rough and wavy.


After straightening and smoothing. The glass will be easier to install and the rubber will lay down evenly across the pinchweld.


Door skins were seam sealed from the inside out, and the drains were reopened with a dremel after the sealer dried.

Doors prepped for epoxy using PPG DX579 and DX520.

-
theastronaut
- Posts: 452
- Joined: August 7, 2013, 10:43 am
- Location: Upstate SC
Re: '66 F100 Custom Cab Short/Styleside Factory Correct Rest
We mounted the cab on a rotisserie so we could grind the welds on the bottom side.

After smoothing the welds.

Shot with PPG DPLF epoxy.


Won't take much bodywork to make the floor pan grafts disappear.

Doors shot with epoxy.


After smoothing the welds.

Shot with PPG DPLF epoxy.


Won't take much bodywork to make the floor pan grafts disappear.

Doors shot with epoxy.


Re: '66 F100 Custom Cab Short/Styleside Factory Correct Rest
If you block sand the bottom of the cab....you win. 
As always, looks great!
As always, looks great!
-
theastronaut
- Posts: 452
- Joined: August 7, 2013, 10:43 am
- Location: Upstate SC
Re: '66 F100 Custom Cab Short/Styleside Factory Correct Rest
Thanks!digler005 wrote:awesome
We'll just clean up around the welds, but not the whole bottom. The weld seams will be skim coated and shot with high build primer, but the rest of the bottom is good enough to scuff over with 500 grit and shoot paint. I think red oxide will be the final finish underneath, with Sahara Beige overspray around the edges. The red oxide won't be reflective so there's no need to get the ripples out, just smooth the areas that were welded.MadMaxetc wrote:If you block sand the bottom of the cab....you win.
As always, looks great!
Re: '66 F100 Custom Cab Short/Styleside Factory Correct Rest
You are doing an awesome job on this thing!
Re: '66 F100 Custom Cab Short/Styleside Factory Correct Rest
Great work!
1966 f-100 ranger,red and white,240,cruiseomatic,3.00 gear,a/c.
-
theastronaut
- Posts: 452
- Joined: August 7, 2013, 10:43 am
- Location: Upstate SC
Re: '66 F100 Custom Cab Short/Styleside Factory Correct Rest
MadMaxetc wrote:You are doing an awesome job on this thing!
totten wrote:Great work!
Thanks guys!!
-
theastronaut
- Posts: 452
- Joined: August 7, 2013, 10:43 am
- Location: Upstate SC
Re: '66 F100 Custom Cab Short/Styleside Factory Correct Rest
We bodyworked the doors, firewall, and kick panels and got them shot with PPG K36 high build. Also seam sealed the door jambs, inside the cab, the firewall, and the drip rails.

Masked any stamped numbers to preserve the details.

Kick panels primed and seam sealed.


Seam sealed with Fusor 122 self leveling seam sealer. Flows out almost glass smooth.


Roof seam.


Inside of doors didn't need much, only had a few ripples across the bottoms.

Shot with K36.


Masked any stamped numbers to preserve the details.

Kick panels primed and seam sealed.


Seam sealed with Fusor 122 self leveling seam sealer. Flows out almost glass smooth.


Roof seam.


Inside of doors didn't need much, only had a few ripples across the bottoms.

Shot with K36.


Re: '66 F100 Custom Cab Short/Styleside Factory Correct Rest
I'll repeat the other members....What a fantastic job !! 

Re: '66 F100 Custom Cab Short/Styleside Factory Correct Rest
Wow, that Fusor 122 self leveling seam sealer is pretty amazing stuff!. Learned a bunch from your project. Still watching, keep up the good work. If I could incorporate just 10% of your quality level into my stuff I'd be ahead!
-
greenindian
- Posts: 130
- Joined: June 30, 2007, 1:44 pm
- Location: Gettysburg, PA
Re: '66 F100 Custom Cab Short/Styleside Factory Correct Rest
Yes, this is simply one of the greatest builds, ever. Period. End of story.
-
theastronaut
- Posts: 452
- Joined: August 7, 2013, 10:43 am
- Location: Upstate SC
Re: '66 F100 Custom Cab Short/Styleside Factory Correct Rest
scbolt wrote:I'll repeat the other members....What a fantastic job !!
bird55 wrote:Wow, that Fusor 122 self leveling seam sealer is pretty amazing stuff!. Learned a bunch from your project. Still watching, keep up the good work. If I could incorporate just 10% of your quality level into my stuff I'd be ahead!
Thanks dudes!!greenindian wrote:Yes, this is simply one of the greatest builds, ever. Period. End of story.
-
theastronaut
- Posts: 452
- Joined: August 7, 2013, 10:43 am
- Location: Upstate SC
Re: '66 F100 Custom Cab Short/Styleside Factory Correct Rest
We blasted the vent frames and shot them with epoxy, then high build.

Door jambs masked, ready to shoot with high build.


Sprayed with K36.

Starting to work the pan graft areas underneath. This is where a rotisserie is really handy!


Roof skimmed and blocked, ready for Slick Sand.

If you've been wondering about how much filler stays on the panel, this is what was blocked off just the center section of the roof, not the sides. This was also with a fan blowing, so this isn't all that was blocked off. Doesn't take much to make a mess of the shop when dry blocking!

Re: '66 F100 Custom Cab Short/Styleside Factory Correct Rest
I am impressed every time I read an update. Thanks for taking the time to post all of this and the incredible amount of info and tips you are providing. 
Re: '66 F100 Custom Cab Short/Styleside Factory Correct Rest
Very nice build! Was wondering, what determines the application of the K36 or Slick Sand? K36 a urethane primer?
Thanks,
Russ
Thanks,
Russ
-
theastronaut
- Posts: 452
- Joined: August 7, 2013, 10:43 am
- Location: Upstate SC
Re: '66 F100 Custom Cab Short/Styleside Factory Correct Rest
Thanks Hazdri!Hazdri wrote:I am impressed every time I read an update. Thanks for taking the time to post all of this and the incredible amount of info and tips you are providing.
Russ, we use Slick Sand on outside panels that need to be absolutely straight. It builds very thick so we can long-block the panels flat with 80 grit.loosrp wrote:Very nice build! Was wondering, what determines the application of the K36 or Slick Sand? K36 a urethane primer?
Thanks,
Russ
We use K36 on non-exterior areas like the door jambs, firewall, and interior panels that aren't flat- they all have stamping stretch marks and complex shapes that would be difficult to block sand. For these areas we do the bodywork on the places that need it, shoot, K36, then wetsanded with 500 grit, usually with a soft sanding pad. That gets it smooth enough to paint and saves the stamping details that Slick Sand and blocking would remove. Minor ripples and waves won't show on areas like the jambs or kick panels like they would on the roof skin or a bedside, for example, so there's no need to shoot a "dry blocking' build primer on everything.
Also, when using DPLF we can shoot K36 (or whatever else) over the epoxy within one week without having to sand or scuff the epoxy (DPLF stays "open" for 7 days) so it's a single step from epoxy to having a surface that's ready to wetsand and paint- that really saves time on the inner panels that don't need to be blocked. Slick Sand is also paintable, but it lays out much rougher and makes for more work to get it smooth enough to paint. We like to do as much as we can within 7 days of spraying DPLF so everything that goes over it bonds chemically instead of just mechanically (sanding scratches would be mechanical adhesion). Since the epoxy stays open, whatever is applied on top etches or interlocks with the epoxy so you don't have to worry about adhesion problems.
-
theastronaut
- Posts: 452
- Joined: August 7, 2013, 10:43 am
- Location: Upstate SC
Re: '66 F100 Custom Cab Short/Styleside Factory Correct Rest
Shot the roof with Slick Sand last night, and the floor bottom with K36.


