
I posted previously about the problems I had installing a new headliner in my '66 truck.
I received many comments and some good advice from other members here so I thought I'd post what I've learned.
After breaking the middle piece (goes between the rear window and main headliner piece), I was able to order a replacement from Dennis Carpenter. I did not have to buy an entirely new kit. They were very helpful and sold me only the piece I needed.
The replacement arrived Friday - only a couple of days after I ordered it!
Great service!!!
Tips on installing the main piece:
measure several times from several locations in the cab to locate the center screw hole properly. Once you have it located, mark it with a pencil and use a small piece of wire or an awl to poke a small hole.
Have your helper hold it in place while you shine a flashlight between the headliner and the cab. you should be able to see light coming from the hole and if your headliner is perforated (highly recommended - reasons to follow), you'll be able to see thru the perforations to the hole in the metal cross-member you are trying to screw into.
Go ahead and install that large piece. This includes the center screw and the screws along the edges (the edges may have a chrome strip that accepts the screws on some models).
Next, install the 2 cab corner pieces. These will need to be curved and shaped to match the truck cab corners.
This is why the perforated headliners are easier: the perforations allow you to wet the back of the material to a greater extent. It is necessary to wet the cardboard so it can be bent and curved. The perforations provide additional "edges" for the water to penetrate the board. I tried the cab corners with some non-perforated material and they simply didn't get wet enough to bend properly. My perforated material worked perfectly.
If you have the chrome strip that runs along the top of the cab door area, go ahead and install those but don't snug the screws down all the way - leave a gap between the trim and the metal cab. The screws will help secure the pieces you've already installed. Leaving a gap will allow you some space to slide the last piece of headliner around (behind the strip) as you position it correctly.
Install the small metal clips on the back edge of the main headliner piece.
Bend them down slightly to less than a 90-degree angle. This will help you when it comes time to snap the edge of the headliner over the clips.
Next comes the hardest part - the middle piece with the dome light hole.
First. tape the electrical wire for the dome light to the upper part of the cab so it will be out of the way yet still accessible once the headliner is in place.
Next, you'll need to modify the headliner piece a little.
install packing tape over the back of the dome light hole. This will reinforce it and you can cut it out once the piece is installed. The headliner will tend to crack in the corners of the domelight hole during install if it isn't reinforced.
Next, trim about 1/8" off the bottom of the piece so it can slide further into the window weatherstripping.
wet the back of it thoroughly - multiple times.
To install it, have your helper hold it into place while you slide the bottom edge under the weatherstripping lip. Move it side-to-side until it is centered.
Next, you'll gently push and bend the board toward the metal clips that are on the main headliner piece. Start at one end and push until the board goes past the clip and snaps back against it; holding it in place.
Do one clip per side alternating ends as you go until you have just the middle clip left to do. Bend and push that area until it goes past the clip and snaps back into place.
Now, cut out the tape along the outline of the dome light hole.
Reach in the hole and find the wire you taped to the cab surface and pull it out thru the hole and connect it to the dome light.
At this time, you should take the metal clips from your old headliner (the clips that allow you to screw the dome light to the board) and transfer them to the new headliner dome light opening.
The dome light also has a ground wire that should be fished down behind the headliner and behind the rubber weather stripping lip. There should be a screw hole behind the rubber lip and that's where the ground wire is attached.
Screw your dome light housing and lense to the metal clips on the edge of the opening and that's it.
Now, push and bend the corners of this last headliner piece to engage the top and edge of the cab corner pieces and you're DONE!
Go around and screw down the chrome strip above the doors if you have it.
There may be other ways to do this but this way worked for me.
Take your time, use the perforated material if you can, wet the back of the cardoard (liberally), and have another set of hands helping you.
'66 headliner tips
-
Blackwaterforge

- Posts: 893
- Joined: March 13, 2008, 9:22 am
- Location: Alabama
- Contact:

-
65 66 Ford

- Posts: 300
- Joined: August 4, 2007, 3:31 pm
- Location: Southeast PA.

-
dotcentral
- Posts: 1341
- Joined: August 18, 2006, 5:13 pm
- Location: Charlotte, NC
headliner tips
great! wanna come do mine when I get to that part?just right across the creek from ya.that is if you call the gulf a creek.LOL
Re: headliner tips
absolutely!rwhistles wrote:great! wanna come do mine when I get to that part?just right across the creek from ya.that is if you call the gulf a creek.LOL
send me that plane ticket and buy the beer and I'll take care of it for ya!
When I installed mine, it was middle of August and I had read somewhere to lay it out in the sun on a patch of green, heathly, damp grass.
So I did that. After an hour or two, that headliner was limp almost. I've not sweat that much in years as I did putting it in, and I had a helper as the instructions noted.
Anyhow, the heat and grass trick really worked for me....
So I did that. After an hour or two, that headliner was limp almost. I've not sweat that much in years as I did putting it in, and I had a helper as the instructions noted.
Anyhow, the heat and grass trick really worked for me....
1965 F-100 240 Autolite 1101, Disk brake dual master upgraded, swapped over to C4 and powersteering. Bought by my Dad new in March 65'

Planned/considered upgrades:
Perhaps power brakes, 300 I6 motor and JUST maybe, AC!
Planned/considered upgrades:
Perhaps power brakes, 300 I6 motor and JUST maybe, AC!
yep -it was VERY hot in my shop and humid that day.
The vinyl seat was soaked and I was dehydrated by the time I installed the headliner.
wetting the back of the cardboard is the key.
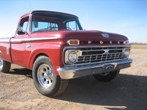
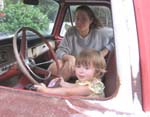
Here are a couple of pics:
http://s171.photobucket.com/albums/u282 ... mview=grid[/img]
The vinyl seat was soaked and I was dehydrated by the time I installed the headliner.
wetting the back of the cardboard is the key.
Here are a couple of pics:
http://s171.photobucket.com/albums/u282 ... mview=grid[/img]