Mock up (part 1)
(this is going to be a long post....hope you all like to read, I need to lay a base line because of the different facets I'll be talking about going forward in future posts ..lol)
In the chassis swap this is the point where you have really reached a valley or the very bottom of the hill your climbing and while it's all up hill from here there are lots of plateaus to stop, look around, then continue on up the hill your climbing and it's really a great idea to do that from time to time, stepping back and looking around periodically keeps you on the correct path because there are so many paths to take as you climb the hill in front of you.
------
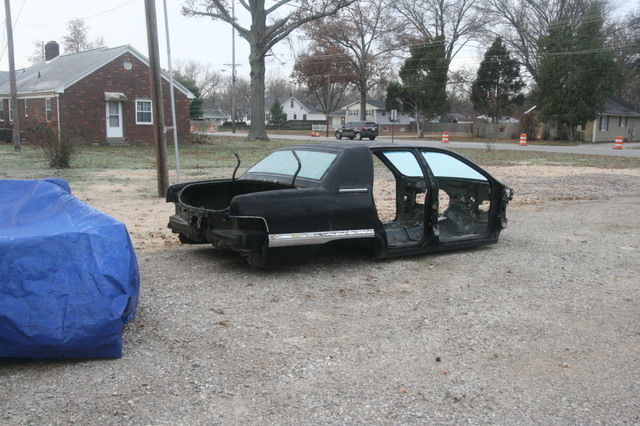
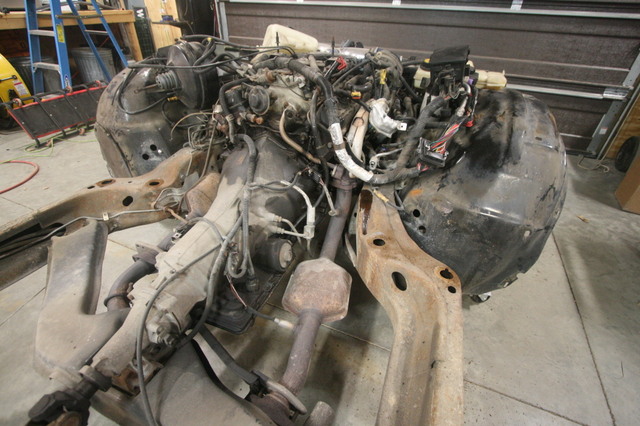
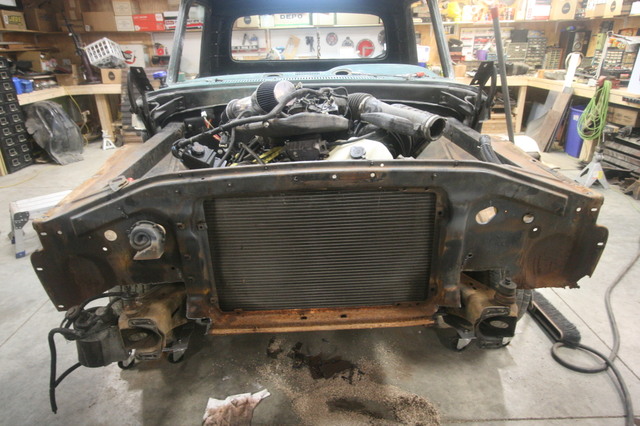
Sunday morning I picked the cab up with the cherry picker and sat it on the RM frame, I couldn't set it all the way down until I cut the back of the cab corners to fit over the frame, but I could get it close enough to measure and make my cuts, then sat it down on the frame. The cab is light enough stripped to move around on the frame, it takes some effort but will slide around.


Right off the bat I can see differences between the '62 cab and the '65 cab and how it sits on the new frame, the '62 having the cab steps and risers sits lower on the frame while the '65 sits higher because of the lack of interior steps...not a real big deal but it does limit your choices in setting a low stance with moving the body/cab up and down. Once it's flat on the frame that of course is the lowest point you can get and in fact will at the minimum have to be raised the height of the rubber body mount.
So if you're looking for a real low stance and your using a '64-'66 your going to be limited trying to get that aspect from mounting the body without doing a lot of cutting of the floor which we won't be doing, we'll have to see what it looks like once it is all mocked up and sitting on the ground to decide which direction we will want to go. On that topic just briefly there are several ways to lower the vehicle from cutting the coil springs, replacing the springs with lowering springs or replacing the spindles with drop spindles, it's not a decision you want to make lightly or quickly in fact it's not a decision you need to make until the truck is drivable and totally put back together so all the weight that is going to be there is on the suspension.
--------
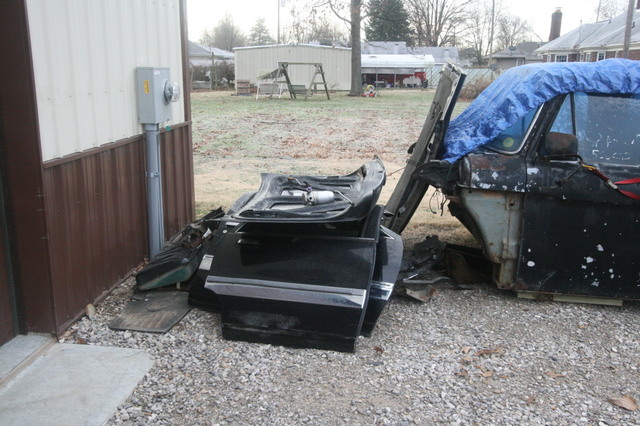
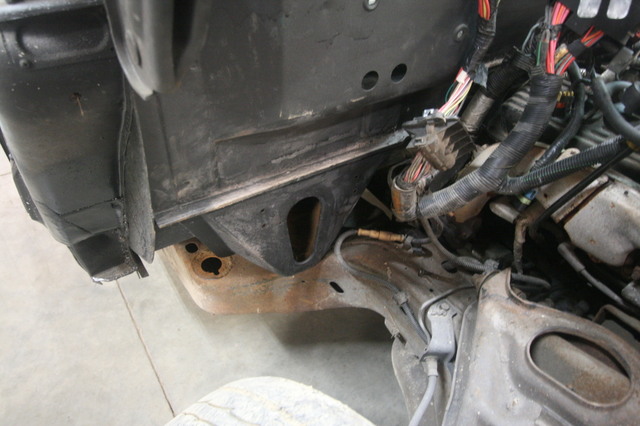
With the cab roughly in position the first item for me was to (rough) cut the inner fenders so they would fit around the RM frame and upper control arms, since the inner fenders are in really good shape I cut more material then was needed but will add metal to the inner fenders down the road, what I was trying to do was make them fit by removing some of the metal angle of the inner fender, then I'll go back and weld metal to the inner fender at a different angle so it conforms more to the contour I need. This saves a lot of trial and error fitting the inner fenders when I really don't know at this point where they will end up until the cab is in its final position.

The whole point of this phase of the mock up is to find the proper location of the cab and the radiator support so I can make mounts, I want to have the bed also on the frame for this phase of the mock up so I can move the body parts around on the frame to get my wheel openings, bed-cab spacing and see where it all is going to fit, then I can cut the ends of the frame if I have to. On the '62 I cut the front of the frame rails off right behind the radiator support, and it worked out fine but this time I want to do it differently and have the frame rail protrude through the radiator support so it'll be easier mounting the front bumper....but again I'll have to see how it all falls during this phase of the mock up to see if it is a option or not.


Like I said before the '65s radiator support has some rot mostly at the bottom outward from the mounting bracket, luckily it fell in the same area that had to be cut to fit around the RM frame, but I cut most of the bad area out and like the inner fenders I'll go back and add metal to the openings that are too large.

------
Some observations, surprises, and plans based on first impressions of using this chassis.
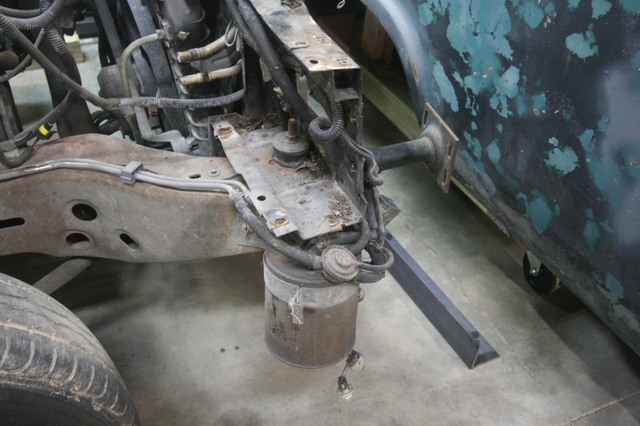
Like I said in other posts you really don't know what you're going to be dealing with until it's all blown apart and you can look at everything formulating a plan, one of the first things I noticed is that the fuel tank from the RM wasn't mounted to the frame like I originally thought but instead was mounted to the underside of the body/trunk floor, this is a two edged sword because it gives me a few options. One of them is to just mount the fuel tank to the bottom of the bed floor which makes the most sense and closely mimics how GM originally mounted the tank. The other obvious option is to just build a frame and tie it to the RM frame rails which would be a harder option since it would need some sort of top for the tank to rest against...not a big deal either way and I guess it comes down to if you want to drive it without the bed on the truck....right now the bed floor is the way I plan to go but that is subject to change.

Either way it wouldn't make any difference if you had to replace the fuel pump the tank will have to be removed to do so and the way it's mounted won't really make any difference, but the fuel filler going out the back opens up several options, you could do a fuel fill behind the license place, or in the bed floor, or out either side of the bed if you wanted which might happen.
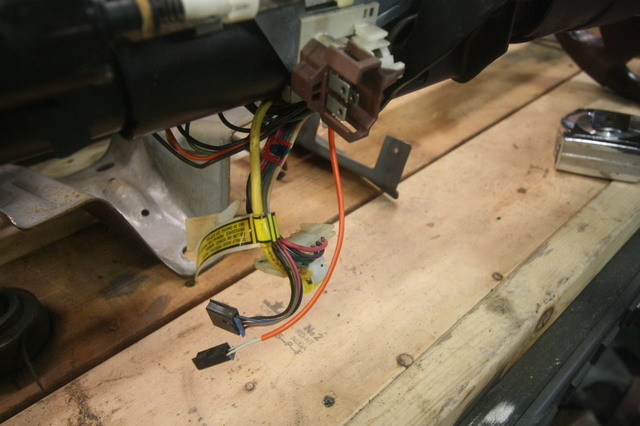
The steering column is another item that has lots of options, it could be reused easily, it's mostly all metal and should be easy to fab up mounts to fit it to the slick dash, we probably won't be using it since my wife wants a similar setup to the '62 using the slicks controls but there is no reason that it couldn't be painted ,a new steering wheel fitted, and the column reused which would make reusing the RM electrical harness a no brainer.

The brake master cylinder and pedal is very similar to the CV, brake pedal was bolted into the RM used the booster mounting studs and one location under the dash (5 bolts total) and came out easily, basically the same for the gas pedal 3 screws held the entire pedal assembly to the toe board.

The E-brake assembly is smaller and flatter than the CV unit was, so it may be reusable in the '65 I just need to look at the air vent doors to see if there is enough room (probably not but we'll look), the e-brake cable should be pretty easy to adapt to another style of activation but like the '62 it's way down on my list of things to figure out.

Under the hood.....
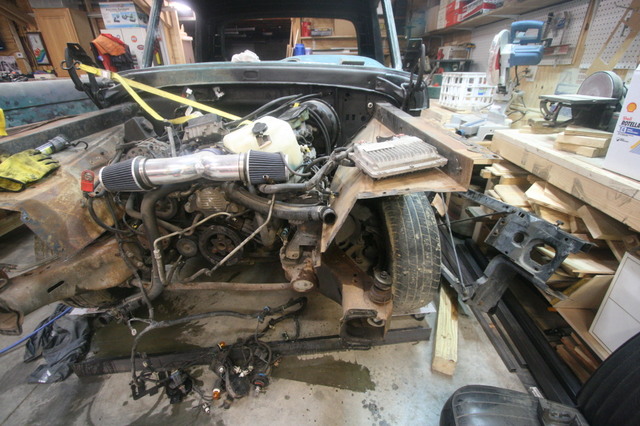
I'm really happy with how the '62 turned out under the hood, the RM has the potential to be just as neat or better, because of how the '65's inner fenders are shaped they are more like the RM original steel inner fenders so mounting items should be just as easy and right now it looks like everything will go back into basically the same location or very close with only a very limited amount of modification to the inner fenders or the items themselves. (this is great news that will save a lot of fabrication)
It also looks like I can mount the RM radiator/fan assembly basically the same way I did the '62 with using the lower half of the RM support that holds the radiator and cutting it up-welding it to the engine side of the slicks radiator support, I'll just have to come up with a way to mount the top of the radiator like I did on the '62....shouldn't be any problem at all. It also looks like there is plenty of room to move the slicks radiator support forward or backwards a few inches without the clearance between the radiator fans and the front of the engine being a issue.
Continued in next post....